
How to Disable Your Laptop’s Keyboard
We expect our portable devices to last a long time, and especially our work machines. While most modern devices like smartphones and tablets rely on a touch screen for all input and output purposes, our laptops rely on a more physical, mechanical way of interaction.
While this may be ideal for a work setting where we need physical feedback to quickly type away at our keyboards, it also comes with one big caveat – mechanical devices like the keyboard are more prone to develop faults.
If your keyboard does get faulty, one easy and simplest solution is to use a third-party keyboard by simply plugging it in. However, while some faults can simply render a few keys unusable, some faults can be much worse where a key could cause interruptions to your workflow, like a faulty key that presses itself randomly.
The only way to fix it is to either have the technical expertise to open up your laptop to manually fix the key or have it fixed by an expert, both ways are costly or require time and knowledge.
One simple alternative that we suggest is to simply disable your laptop’s keyboard and use an external third-party keyboard. Here is how you can do it,
Disable Laptop Keyboard
Find the Laptop Hardware ID
- Press the Start button and search for Device Manager and click on it.
- Scroll down to the Keyboard section and click on the arrow to reveal the drop-down list of keyboard drivers.
- Right-click on the default keyboard for your laptop (usually named Standard PS/2 Keyboard) and click on Properties.
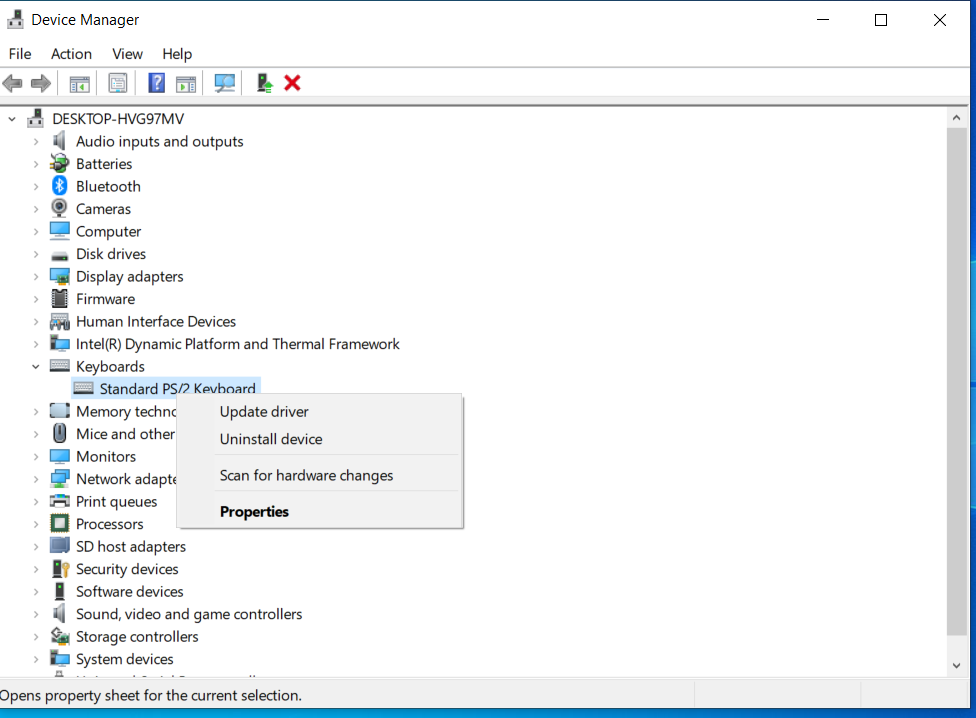
- Go to the Details tab as shown in the screenshot below.
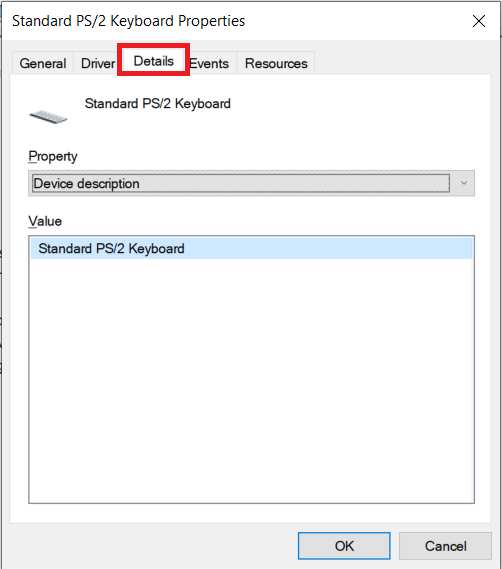
- In the Property box below, select Hardware ID.
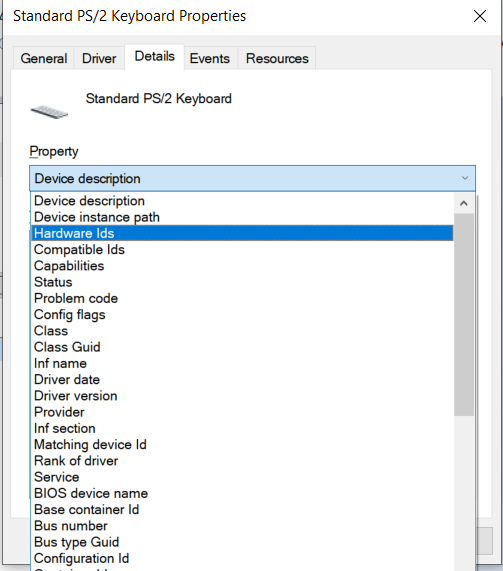
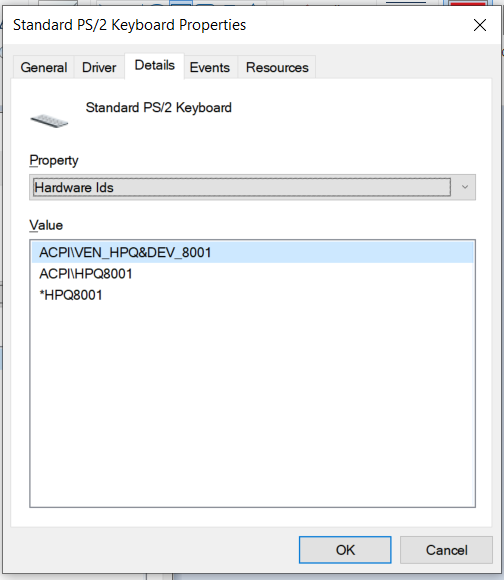
- You will see a list of values below. Copy the top-most value, which is the Hardware ID that refers to your device.
Prevent Windows from Installing Driver for this Keyboard
- Press the Start button and search for gpedit.msc and click on it to open the Group Policy Editor.
- In the left pane, go to the following path,
Computer Configuration > Administrative Templates > System > Device Installation > Device Installation Restrictions
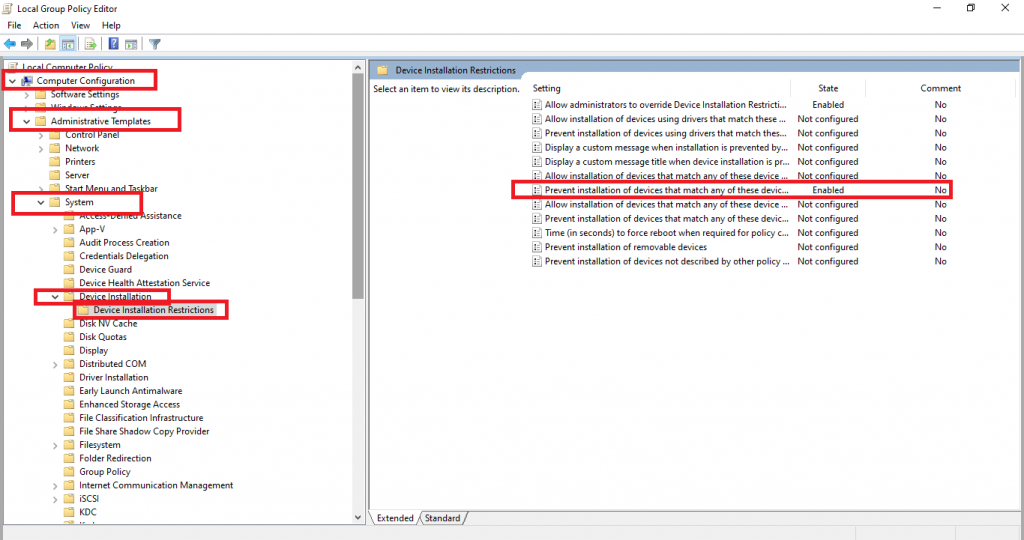
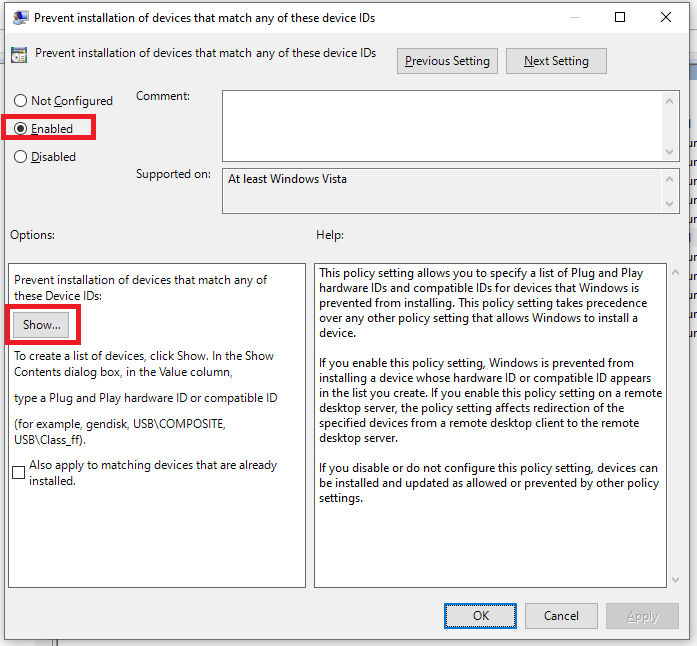
- In the right pane, you will see a list of settings. Find the setting titled “Prevent installation of devices that match any of these device IDs” and double-click on it to edit it.
- Select Enabled and in the Options box below, you will see a button called Show. Click on this.
- Here, enter the Hardware ID you found out earlier and click on OK.
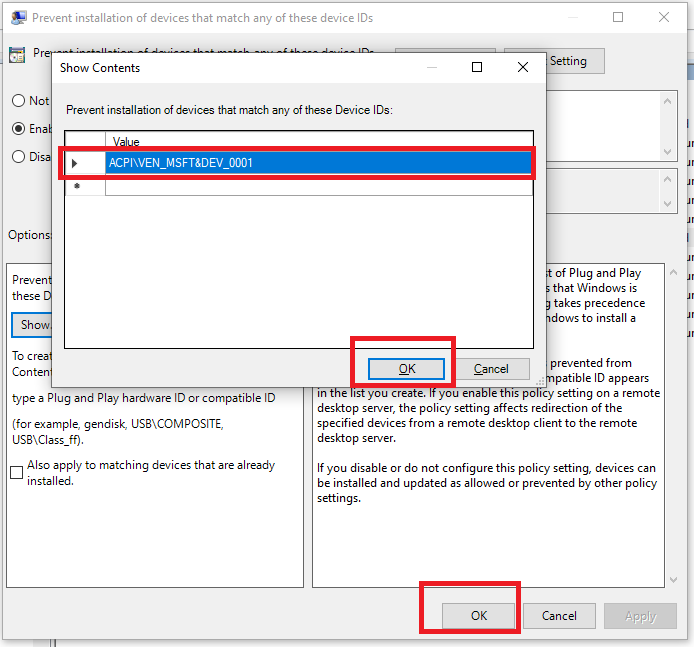
- Click on OK.
Uninstall Keyboard Driver
- Go back to the Device Manager (open Device Manager and then go to the Keyboard driver as in the previous steps)
- Press the Start button and search for Device Manager and click on it.
- Scroll down to the Keyboard section and click on the arrow to reveal the drop-down list of keyboard drivers.
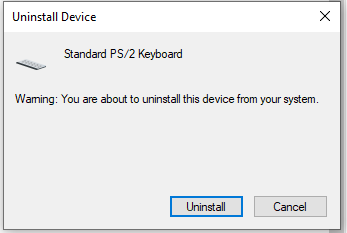
- Right-click on the default keyboard for your laptop (usually named Standard PS/2 Keyboard) and click on Uninstall device.

- Click on Uninstall.
That’s it. Now it will ask you to restart your PC and Windows will make sure to not install the driver for this keyboard as long as this setting is enabled.
If you ever want to revert this, you can open the Group Policy Editor again and remove this ID and/or simply Disable this setting.
