
Here is how you can take Ownership of a File or Folder in Windows
Windows is designed to be a shared, multi-user operating system from the very core, and has deep integration and settings allowing it to be smoothly used by different users. It has set rules and configurations that give different users different levels of controls over applications, settings, files and folders.
For example, administrators can have different levels of access as compared to standard users. However, even in users, files, and folders can be hidden from one another and different access and permission levels can be set for file and folder sharing purposes.
Windows has different ways of allowing you to take ownership of a file or a folder (or grant it to any other user). The only condition is that you have to be the administrator of the system to be able to control and reset permissions as needed. You can check if your user has administrator rights using our guide over here.
Here is how you can take or grant file or folder ownership in Windows,
Taking Ownership using Windows Explorer
One way to take ownership of a file or folder is by manually navigating to it inside the Windows File Explorer. Here is how you can do it,
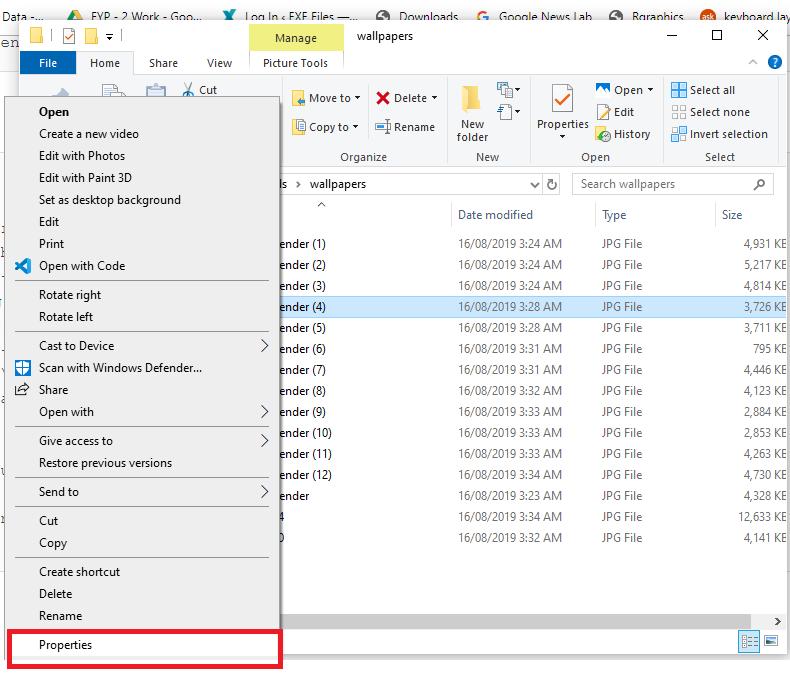
- Open Windows Explorer (Start + E).
- Browse to the parent folder i.e. the folder that contains the subfolder or files that you want to take ownership of.
- Right-click on the folder or file you want to take ownership of and click on Properties.
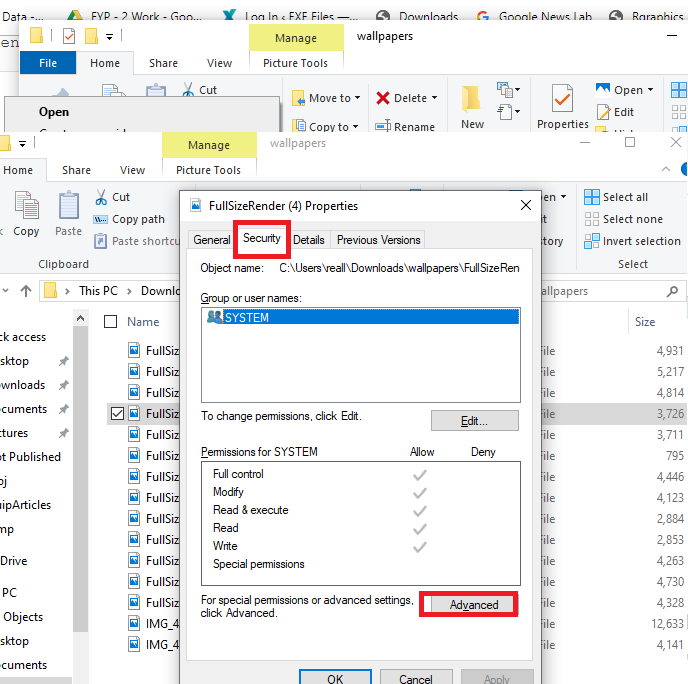
- Go to the Security tab and click on Advanced.
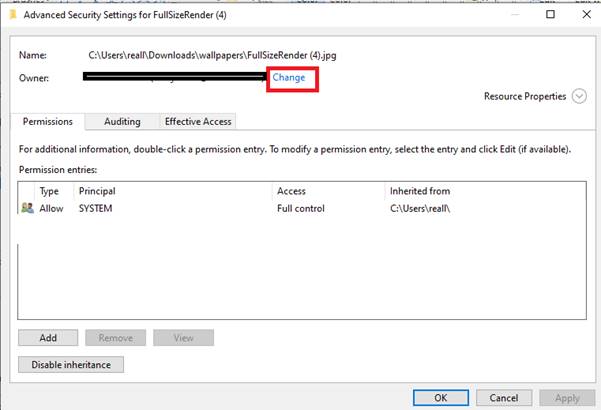
- Click on the Change button beside the Owner, as shown in the screenshot below.
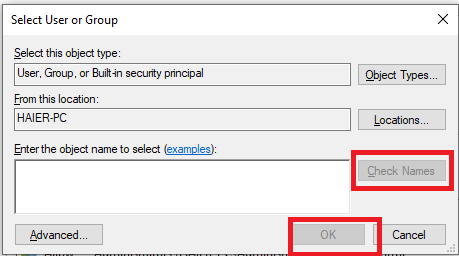
- Search for the new owner (yourself or any other user on the PC) and click on Okay.
That’s it. The ownership of the file or the folder you chose should have been transferred to the user you chose.
Taking Ownership using Command-Line
You can also take ownership of a file or folder using a CLI interface like Command Prompt or the Windows PowerShell. Here is how you can do that,
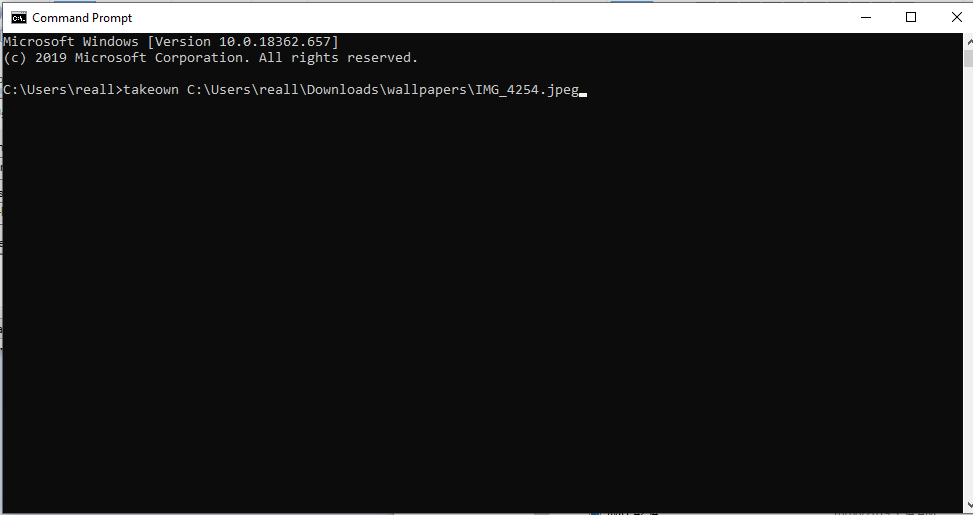
- Open your preferred CLI interface as an administrator. Here, we will be using the Command Prompt.
- Type the following commands,
- Taking ownership of a file,takeown <filename>
- Granting ownership of a file to another user,subinacl /file <FilePath> /setowner = <User>
- Taking ownership of a file,takeown <filename>
Using the CLI, you can also give ownership of all the files in a directory to a user by using the following command,
subinacl /subdirectories \\rallen-svr1\docs\* /setowner=AMER\rallen
