Here is how you can use the Telnet Client in Windows
Windows is one of the most advanced general-purpose operating systems designed for PCs. While Windows never really took off in smartphones or tablets, it did make its way to become the most used PC operating system, be it in workplaces or homes.
Thanks to the multitude of built-in features, utilities, and the abundance of freely available softwares, Windows is also the perfect OS for working, be it for developers or regular office work.
Microsoft’s Command Line Interface options, although not as good as Linux’s, still provide some very handy utilities and commands that you can easily use. Recently, it also added support for a Linux bash shell along with its own newly introduced Windows Terminal.
Some of the most useful features offered by the Microsoft CLI are the ability to use the Telnet utility to communicate with a server directly using the Command-Line utility. Along with the ability to ping or trace route an ip address, Telnet is a really useful utility.
What is Telnet and how does it work?
Telnet is a command-line utility that allows you to remotely log in and communicate with a server using just text through a terminal. It is now used through a virtual terminal (a terminal emulator).
Telnet is an internet protocol, just like HTTP. However, unlike in HTTP where the protocol is used to transfer files between servers, Telnet allows you to log-in, directly giving you control and access to some files just like a normal user. It is also available on Linux and Mac. It is not a secure way of communicating but is widely used to test connectivity between servers, especially on a given port.
How to Enable Telnet in Windows
Unlike some other common command utilities, Telnet has to be enabled in Windows before you can start using it. Here is how you can do that,
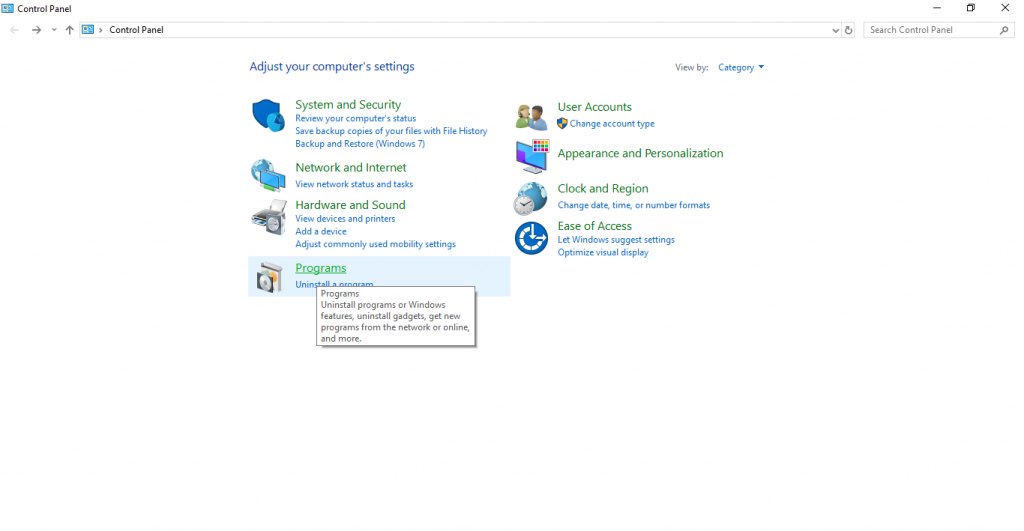
- From the Start menu, search for Control Panel and open it.
- Click on Programs.
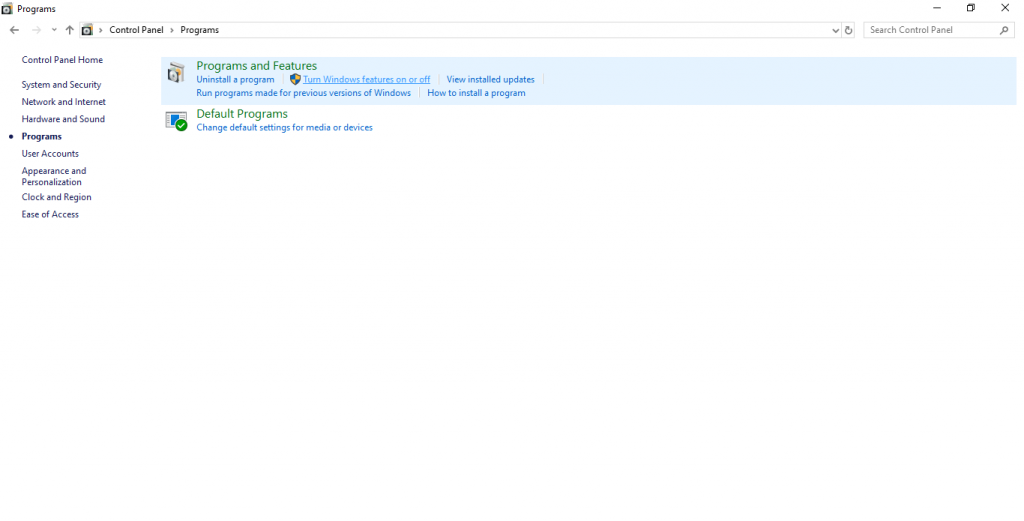
- Click on Turn Windows features on or off, as shown in the screenshot below.
- Scroll down and select the checkbox for Telnet Client.
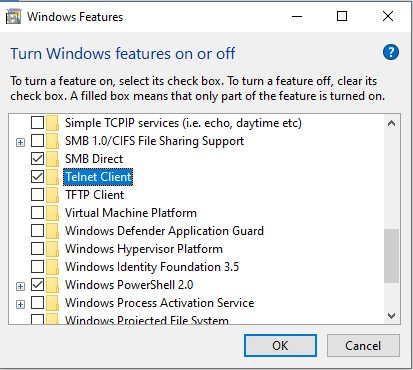
- Click on OK.
That’s it. Windows will now search for the required files to install the requested feature. Wait until the installation process is completed and then you’re good to start using this utility from your favorite Command-Line utility.
Here, we will be using the Command Prompt to demonstrate telnet usage but you can also use Windows PowerShell for this purpose.
How to use Telnet in Windows
- Open the Command Prompt by searching for CMD in the start menu.
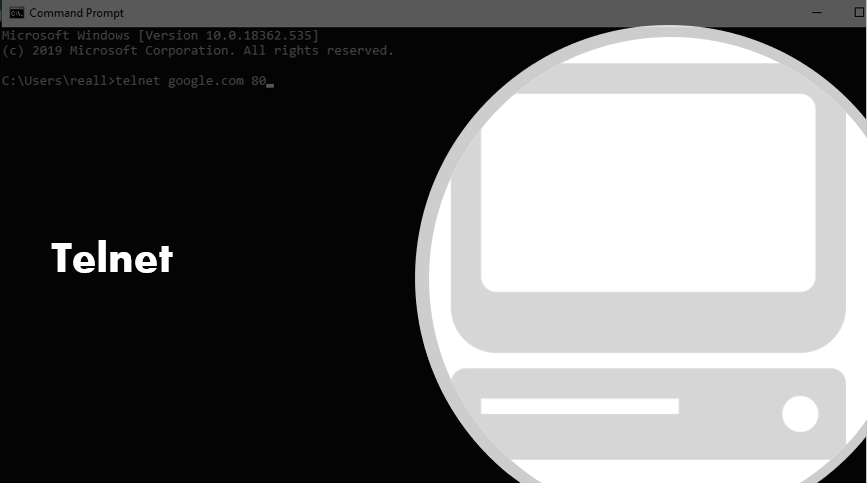
- You can simply type telnet to access the Telnet Client. Or, you can directly connect to a server by typing the following command,telnet <hostname/ip> <port>In the above command, replace the hostname/ip with the hostname/ip of the server you want to connect and the port with the port you want to connect to. For example, see the attached screenshot below.


You can also try to directly connect with the hostname/ip without giving the port, as shown in the screenshot below. But in this case, telnet will try to connect on the default port and it is possible it will fail.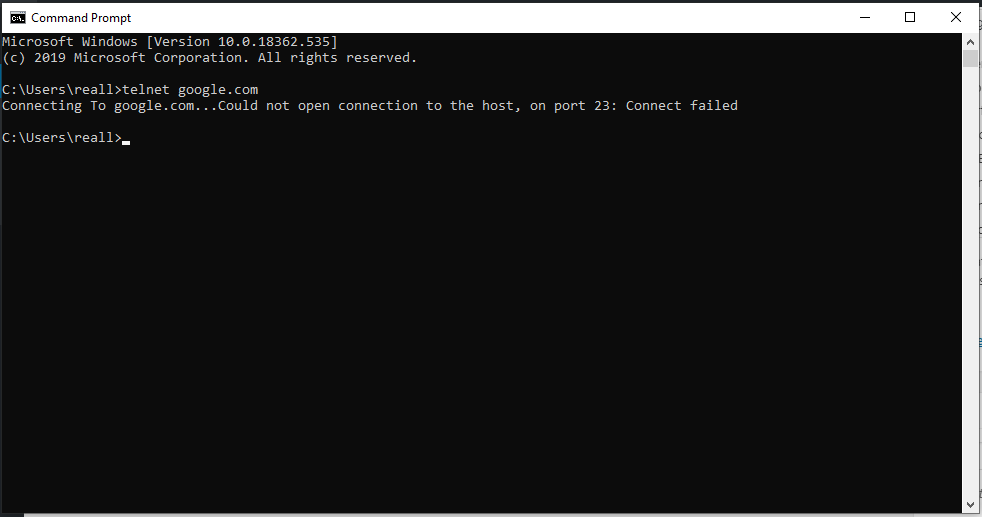
If the command succeeds, it will show you a blank screen with a blinking cursor, which means you’ve successfully connected to the server at the given port.
Windows also lets you specify a whole list of parameters to change the default configuration of the telnet command. Below, we have listed all the parameters and what they do.
telnet [-a][-e escape char][-f log file][-l user][-t term][host [port]]
- -a Attempt automatic logon. Same as -l option except uses
the currently logged on user’s name. - -e Escape character to enter telnet client prompt.
- -f File name for client-side logging
- -l Specifies the user name to log in with on the remote system.
Requires that the remote system support the TELNET ENVIRON option. - -t Specifies terminal type.
Supported term types are vt100, vt52, ansi and vtnt only.
host Specifies the hostname or IP address of the remote computer
to connect to.
port Specifies a port number or service name.
You can play around and connect to hundreds of telnet-enabled servers on the internet, thanks to this list.
