Here is how you can Ping an IP Address using Windows
Windows is one of the most advanced general-purpose operating systems designed for PCs. While Windows never really took off in smartphones or tablets, it did make its way to become the most used PC operating system, be it in workplaces or homes.
Thanks to the multitude of built-in features, utilities, and the abundance of freely available softwares, Windows is also the perfect OS for working, be it for developers or regular office work.
Microsoft’s Command Line Interface options, although not as good as Linux’s, still provide some very handy utilities and commands that you can easily use. Recently, it also added support for a Linux bash shell along with its own newly introduced Windows Terminal.
One of the most useful features offered by the Microsoft CLI is the ability to ping a particular IP address.
What does it mean to Ping an IP Address?
The Ping is a useful internet program that allows you to verify if a particular IP address exists and can accept requests. It is used to check if the computer you are trying to reach is active and operating and is frequently used for troubleshooting to test connectivity and determine the response time.
It sends an ICMP (Internet Control Message Protocol) request over the network and then waits for the reply, noting the time it takes to receive the response.
How to ping an IP Address in Windows?
Here is how you can ping an IP address in Windows,
- Open your preferred CLI i.e. Windows PowerShell or Command Prompt by searching for it in the start box.
- Simply type ping followed by the IP address or the domain name of the host server that you want to ping. For example, if you want to ping Google, you will type the command below,
ping google.com
Or, to directly ping the IP address associated with Google instead of finding the domain IP using the DNS, you can simply type the IP address,
ping 172.217.19.174
We have added screenshots below after executing both the commands in the Command prompt.
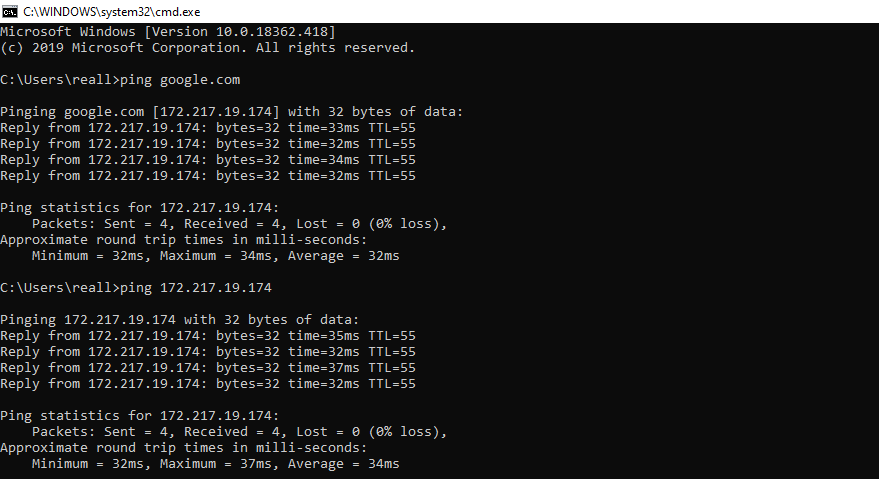
That’s it. The default ping command will ping the server, sending 4 packets and receiving 4 packets, noting down the approximate round trip time in milliseconds as well as the percentage of packets that were lost. You can also change the default behavior of the ping command using multiple parameters that you can pass.
We have listed down a few options below, thanks to Paessler,
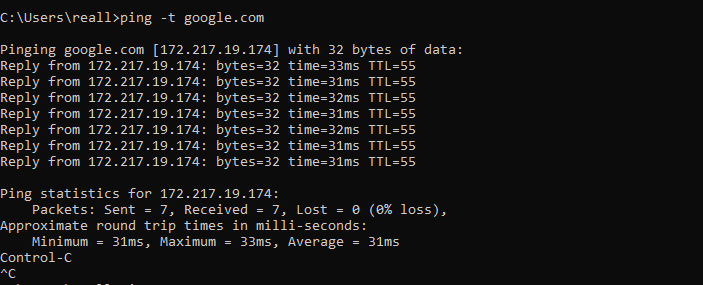
| -t | Pings the specified host until stopped. (Use Control-C to stop) |
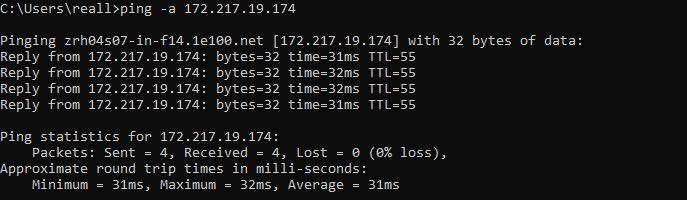
| -a | Resolves addresses to hostnames |
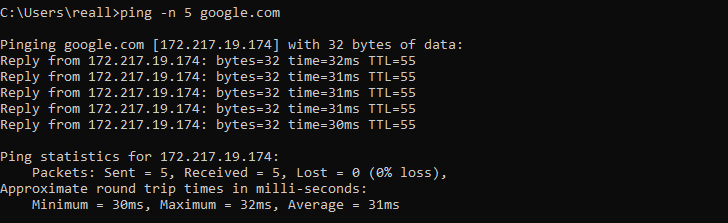
| -n | Specify the number of echo requests to send |
| -l | Send the size of the buffer |
| -f | Set Don’t Fragment flag in packet (IPv4-only) |
| -i | Set Time To Live |
| -v | Set Type of Service (Setting has been deprecated) |
| -r | Record route for count hops (IPv4-only) |
| -s | Timestamp for count hops (IPv4-only) |
| -j | Loose source route along host-list (IPv4-only) |
| -k | Strict source route along host-list (IPv4-only) |
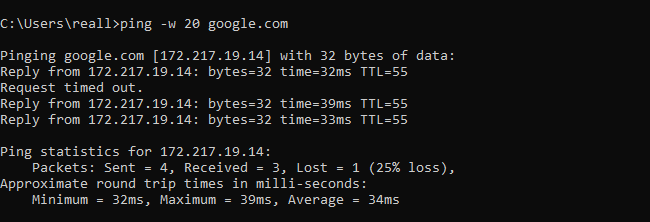
| -w | Provide timeout in milliseconds to wait for each reply |
| -R | Use routing header to test reverse route also (IPv6-only, deprecated per RFC 5095) |
| -S | Provide source address to use |
| -c | Routing compartment identifier |
| -p | Ping a Hyper-V Network Virtualization provider address |
| -4 | Force ping to use IPv4 |
| -6 | Force ping to use IPv6 |
We have used some of these commands and attached screenshots below,