Here is how you can Perform a Trace Route (Tracert) in Windows
Windows is one of the most advanced general-purpose operating systems designed for PCs. While Windows never really took off in smartphones or tablets, it did make its way to become the most used PC operating system, be it in workplaces or homes.
Thanks to the multitude of built-in features, utilities, and the abundance of freely available softwares, Windows is also the perfect OS for working, be it for developers or regular office work.
Microsoft’s Command Line Interface options, although not as good as Linux’s, still provide some very handy utilities and commands that you can easily use. Recently, it also added support for a Linux bash shell along with its own newly introduced Windows Terminal.
Some of the most useful features offered by the Microsoft CLI are the ability to ping a particular IP address or perform Trace Route (Tracert).
What is a Trace Route?
A Trace Route is a program that tries to connect to a given IP address and traces the complete route a packet takes to get from one computer to another across a network, including all the hops it takes along the way. It is a very handy utility, particularly useful in diagnosing connectivity issues.
The Trace Route command (known as tracert in Windows) is available for all modern versions of Windows Operating Systems. Here is how you can run the Trace Route in Windows,
How to Trace Route in Windows
- Open your preferred CLI i.e. Windows PowerShell or Command Prompt by searching for it in the start box.
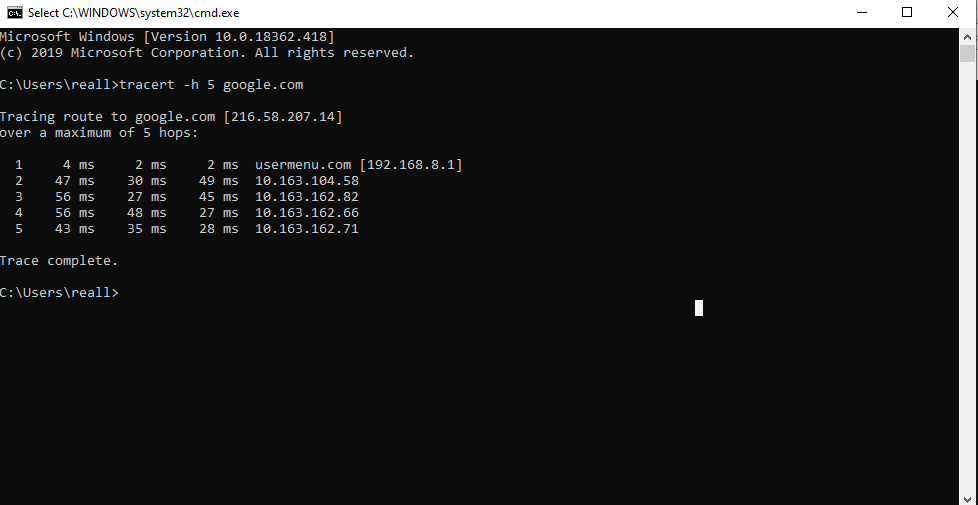
- Simply type tracert followed by the IP address or the domain name of the host server that you want to ping. For example, if you want to ping Google, you will type the command below,
tracert google.com
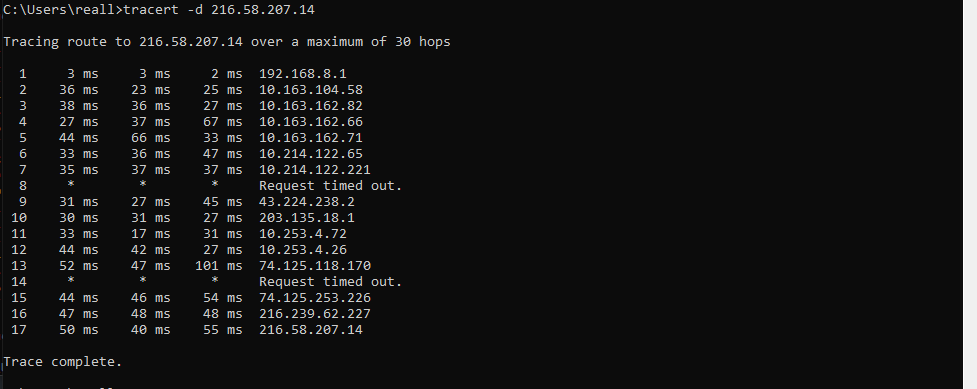
Or, to directly tracert the IP address associated with Google instead of finding the domain IP using the DNS, you can simply type the IP address,
tracert 216.58.207.14
We have added screenshots below after executing both the commands in the Command prompt.
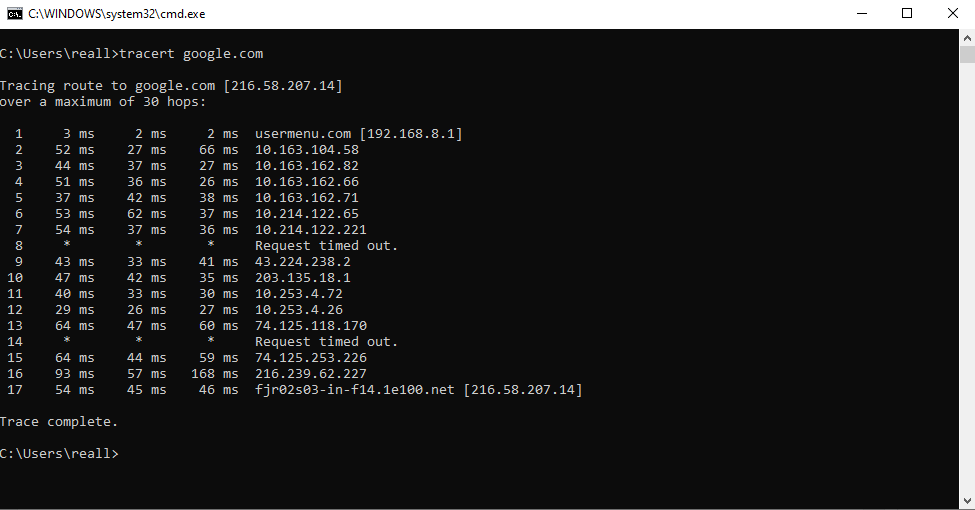
That’s it. By default, this command will trace the route over a maximum of 30 hops and show how long it took to get a response from each hop on the way, along with the IP address and end with the final IP address of the destination IP address you were trying to reach.
You can also tweak the tracert command using several parameters that you can configure before running the command. Below, we have listed some of the available parameters and what they do,
Usage: tracert [-d] [-h maximum_hops] [-j host-list] [-w timeout]
[-R] [-S srcaddr] [-4] [-6] target_nameOptions:
-d Do not resolve addresses to hostnames.
-h maximum_hops Maximum number of hops to search for target.
-j host-list Loose source route along host-list (IPv4-only).
-w timeout Wait timeout milliseconds for each reply.
-R Trace round-trip path (IPv6-only).
-S srcaddr Source address to use (IPv6-only).
-4 Force using IPv4.
-6 Force using IPv6
Below, we have attached a couple of screenshots after using these commands,