Xbox Game Bar: Screen Recording Made Easy
Saving your best in-game moments, recording a short tutorial or presentation, or maintaining an offline copy of an online class: the screen recording feature comes in handy for all these scenarios. Numerous third-party applications allow screen recording for your desktop computer. But if you happen to be a Windows 10 or Windows 11 user, the pre-installed Xbox Game Bar can easily be your go-to option for screen recording.
Unlike its name suggests, the Xbox Game Bar is not limited to in-game recording only and can be used to record various things, as mentioned earlier. Never heard of the Xbox Game Bar before? No worries: just read through this guide to easily grasp how to screen record on your Windows System using the Xbox Game Bar.
Key Features
Before we get into the details of how the tool works, here are a few key things it offers.
Screen recording with adjustable quality
You can easily choose the video quality of the recording you intend to make, utilizing disk space accordingly. No need to allocate a large amount of disk space to a video recording that does not require high video quality.
Toggle Microphone
The requirements of a recorded video vary from user to user. For instance, a user may be an enthusiastic gamer wanting to record their brilliant plays but keeping their excited chatter out of the recording to give it a more professional feel. No problem: users can simply toggle recording whatever the microphone reads on or off, getting their desired type of recording.
Easy to Access and Edit Recordings
All videos recorded using the Xbox Game Bar are saved to a specified path, which will be discussed later in this article, in Mp4 format. This makes the videos accessible at any time and can be opened in a video editing tool to modify at will.
How to Record Using the Xbox Game Bar
Once you have understood the main features offered by the Xbox Game Bar, let’s look into its usage.
Enabling the Xbox Game Bar
 You first need to check whether the Xbox Game Bar is enabled on your system or not. Here are a few screenshots that should help you figure out how to enable the Game Bar.
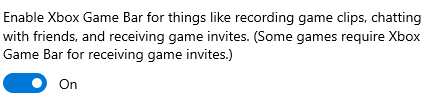
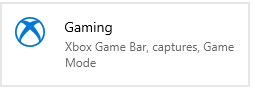
Open “Settings” on your system. This can be done by typing Settings on the search menu at the bottom left of your Windows taskbar; typing the first few letters should also suffice. Next, open the “Gaming” settings, as shown above. Opening the tab should present you with a bunch of options. The first thing you need to do here is toggle the Xbox Game Bar “on,” as shown above.
Captures Tab
This tab presents you with most of the key features offered by the Xbox Game Bar. We will go through them one by one.
Storage Path
Windows assigns a default storage path to recordings made using the Xbox Game bar, as shown below.

Clicking the “Open folder” button will direct you to your recordings’ dedicated folder. You can easily change this by simply moving the “Captures” folder shown in the path above to a location of your choice. Windows will automatically redirect the storage path for recordings made using the game bar to this folder. Click the “How to save a different folder” link to get redirected to an Xbox Support webpage, where you can access various details about the Game Bar and its features in detail.
Background Recording
A key feature offered by the Xbox Game Bar is recording your gameplay automatically while you play for a set period of time. The details appear like this:
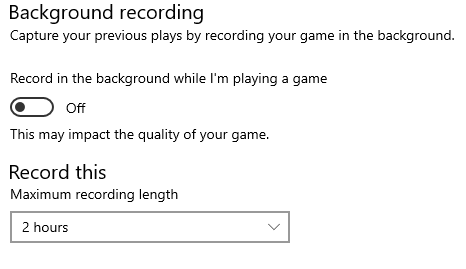 This feature can be toggled on or off, and we recommend keeping it off if you do not intend to use it, as keeping it on may impact the quality of your game, as mentioned in the picture above. The duration Xbox Game Bar automatically records in the background for you can be set to 30 minutes, 1 hour, 2 hours, or 4 hours. The background recording can be saved by hitting certain hotkeys, which will be explored later.
Recording Quality
This subtab in the captures tab lets you modify the quality of the audio (if enabled) and video recordings you make. For audio, you variate the audio quality, while the frame rate and video quality can be altered for the video recording itself.
Hotkeys
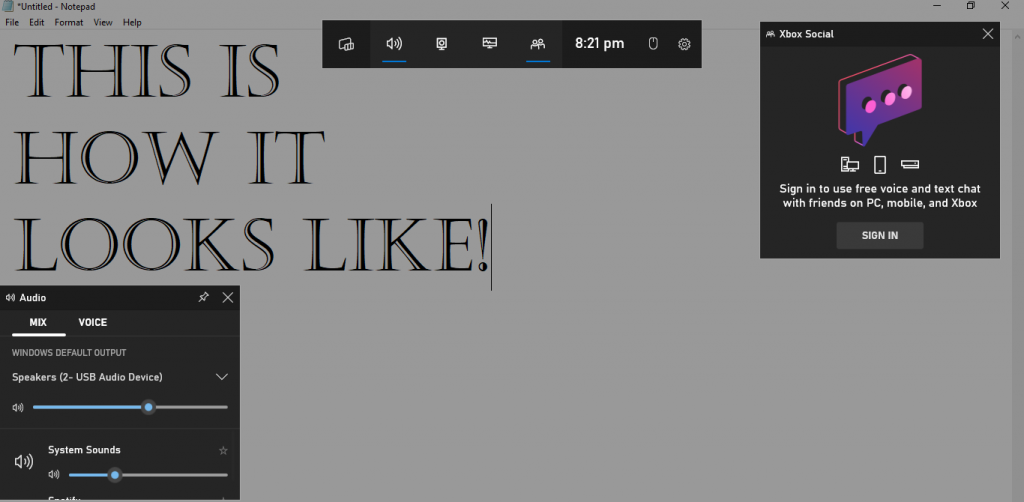
Hotkeys or keyboard shortcuts are certain pre-set keys that trigger a certain action by the Xbox Game bar. You can change them at will as well. The actual Game Bar itself pops if you hit the defined hotkey. Here’s what a few of them look like.

Xbox Game Bar: Microsoft’s Easy-to-Use Recording Tool
Why use third-party applications when Windows offers you a quality recording tool by default? Set your Xbox Game Bar up now and enjoy its benefits!
