
Here is how you can protect your privacy on Windows 10
Over the years, Windows has become almost a pervasive presence in our lives. Being such a general-purpose operating system, it is now almost ubiquitous and can be found everywhere from our homes to our offices and even other places we frequent, from the doctors’ to the places we shop at. Computers are everywhere, and therefore, Windows is everywhere.
However, while Windows came with a significantly large price tag, costing 100s of dollars per license for a PC in the old days, Microsoft has made a pretty significant change in their business model. With Windows 10, Microsoft allowed free upgrades for most of the old Windows versions, instead deciding to build advanced data-collection features inside Windows. Using this data allows Microsoft to present deeply personalized advertisements for each Windows user.
Microsoft uses the data collected by Windows to create a profile of a person’s interests that is used by a variety of companies to target ads by creating an advertising ID. Apart from collecting information about your web usage, it also keeps a track of how you use your apps on Windows.
Not only this, but there are several other tools in Windows that invade your privacy to collect data about you, from location tracking to Cortana usage and more. Fortunately, most of these features can be turned off if you just know where to go and which switches to turn off.
Here, in this guide, we will cover how you can protect your privacy in Windows 10 by turning off most of the data-collection features inside Windows.
Protect your privacy in Windows 10
Turn off Advertising ID-based Ad Tracking
One of the newest and most advanced ways Microsoft collects information inside Windows is the new Advertising ID, which creates a complete profile of a person’s interest to present targeted ads. Microsoft asks you if you want to enable or disable this at the start of your PC setup, when you are installing Windows or logging into your PC for the first time.
If you didn’t disable it at the setup point, you can still do it by going to the Windows Settings. Here is how you can do it,
- Open the Settings app (Press START + I).
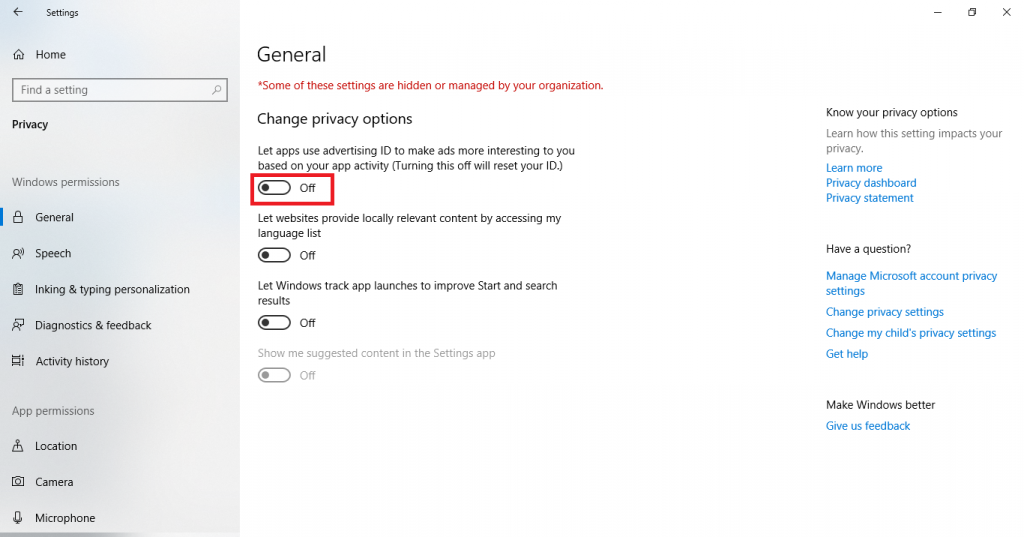
- Click on Privacy and then click on General.
- In the right-pane, you will see a checkbox for ‘Let apps use advertising ID to make ads more interesting to you based on your app activity’. Turn it to Off, as shown in the screenshot below.
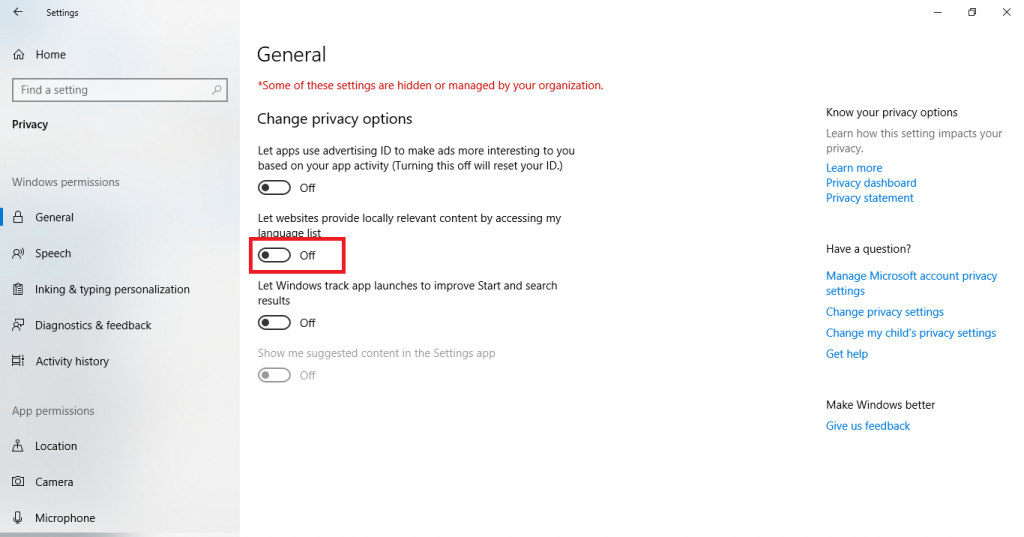
- While in the Privacy settings, you can also turn off other options that allow websites to provide locally relevant content by accessing the language list inside Windows. To turn it off, switch the option given below to off.
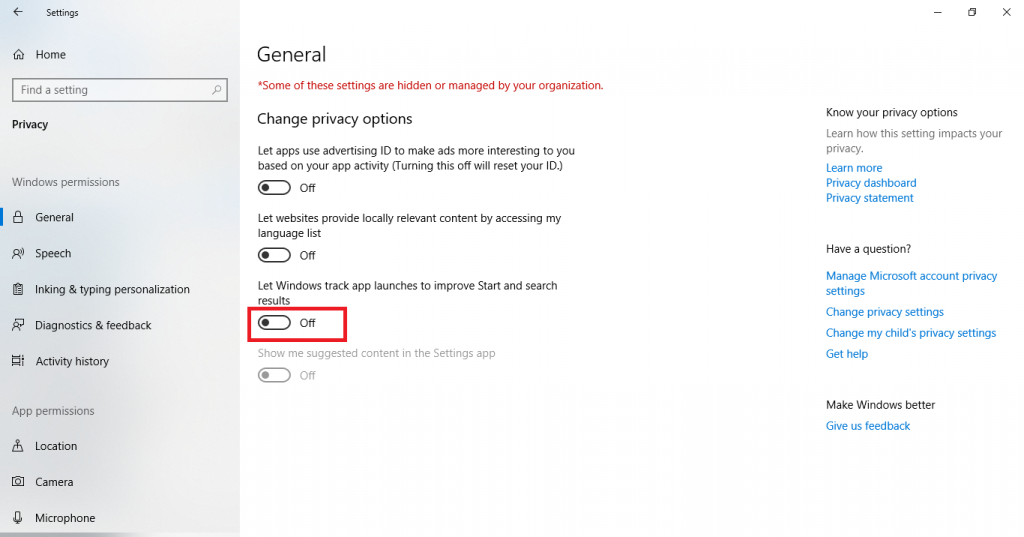
- Lastly, Windows tracks app launches to improve suggestions for Start and Search results. You can also turn that to Off to prevent Windows from tracking your app usage.
Turn off Location-based Tracking
Another way Windows keeps track of your usage is by tracking your location. You can also turn the location-based tracking features to off or choose which apps are allowed to access your location, so only some apps you trust can access your location-based data while others are not.
Here is how you can do it,
- Open the Settings app (Press START + I).
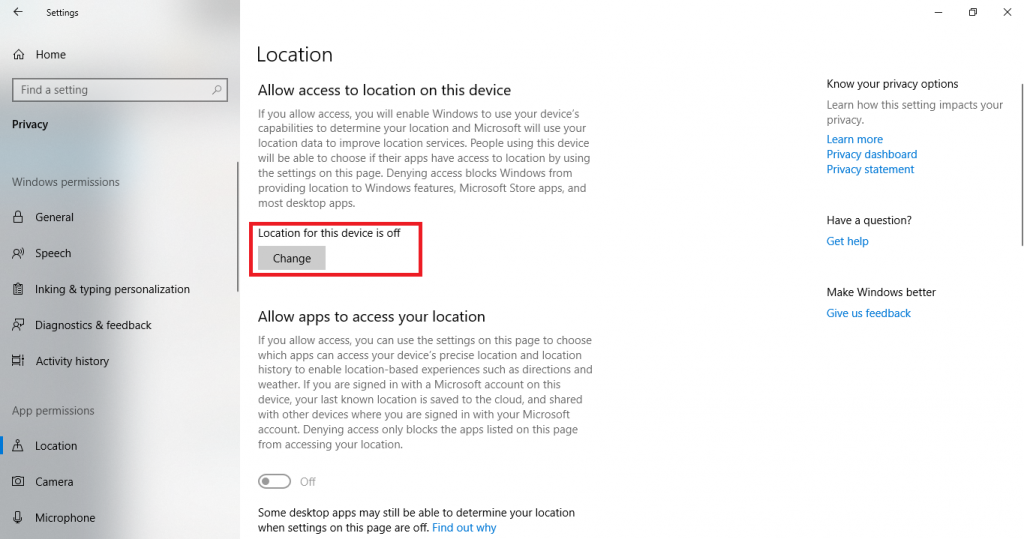
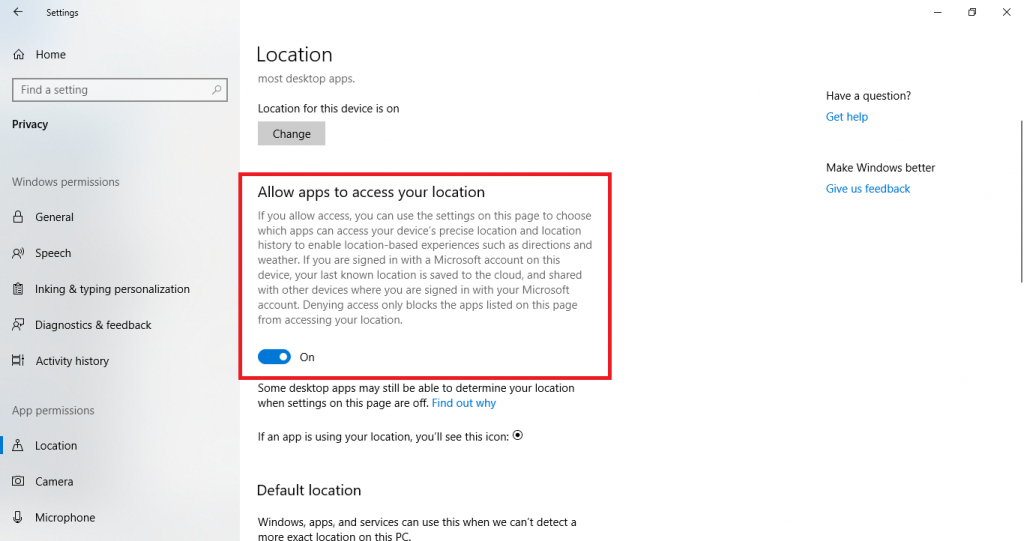
- Click on Privacy and then click on Location.
- On the right-pane, you will see an option to turn the Location for your device On or Off, as shown in the screenshot below.
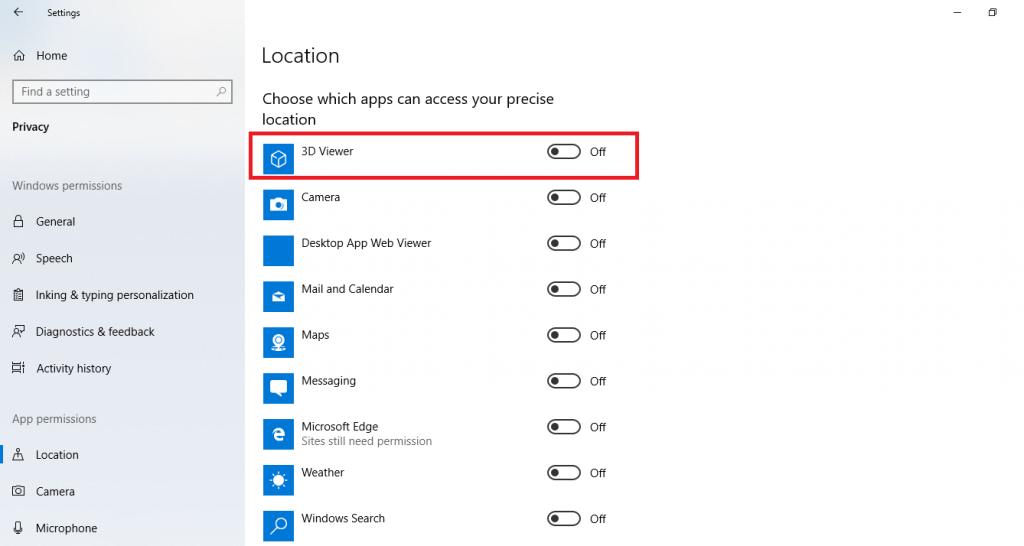
- If the device Location-tracking is on, you can choose which apps are allowed to track your Location by scrolling below. Switch the option shown below to On and scroll down to see a complete list of all the Windows apps. Here, you will see a switch beside each application that you can slide to On or Off to decide which apps can use your location.
Note: This Location-tracking option is only for Windows and Windows apps. Some desktop apps can still track your location, even if these settings are off. You can read more about desktop apps and their privacy policies over here.
Disable Cortana
One of Microsoft’s biggest pushes in making Windows devices more personalized is the introduction of Cortana, the AI digital assistant that allows you to perform a host of tasks using just your voice by having a conversation with the intelligent little assistant. Cortana is Microsoft’s answer to Apple’s Siri and Google’s Assistant.
However, while Cortana is very useful, it has one flaw. Like all other digital assistants, Cortana requires a lot of data to be actually useful and provide useful suggestions/recommendations. This means that it will collect a significant amount of data about you, from how you use your device to where you use your device, your search history, etc.
Fortunately, there are a host of configurable options for controlling Cortana and how it uses your data.
- Click on the Windows Search box or press START + S to open the search box.
- Cick on the little Settings icon on the left of the search bar.
- Click on Permissions & History.
- Click on the option for Change What Cortana Knows About Me in the cloud. Then click on Manage the Information Cortana Can Access from This Device. From here, you can select/deselect all the options like location, communications and browsing history. Uncheck all if you don’t want any of it to be accessible by Cortana.
- You can also tap on Clear My Device History to make Cortana forget all it’s learned about you from your past searches.
If that doesn’t work, you can turn it off altogether. Here is how you can do it using the Windows Registry Editor,
Note: Windows Registry Editor allows you to make changes in the Windows Registry. However, be sure to make a backup of all your registry using our guide to be able to safely revert back if anything breaks.
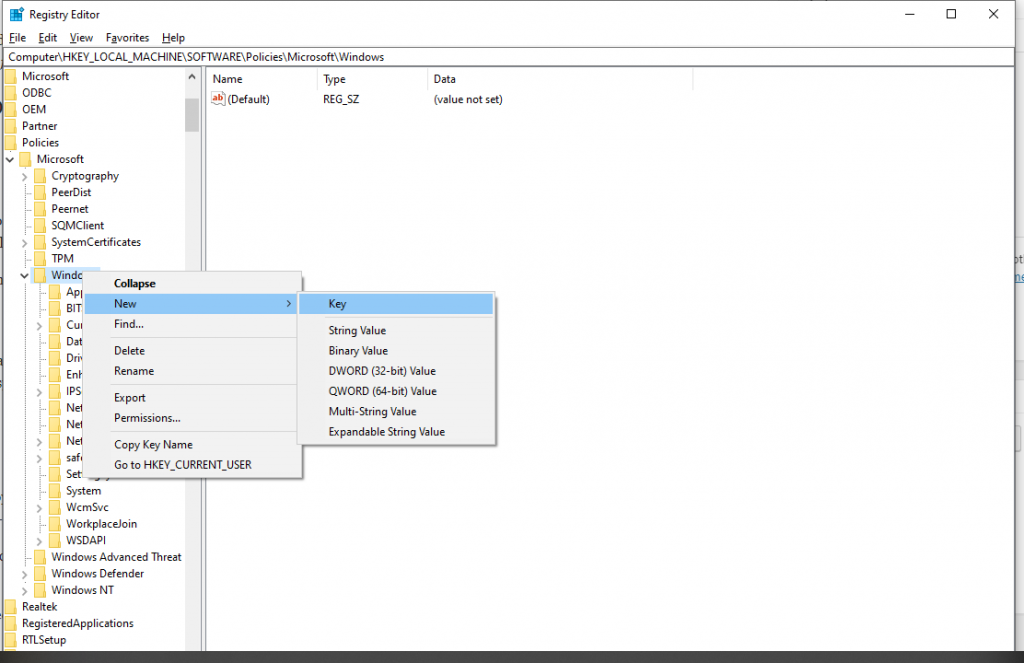
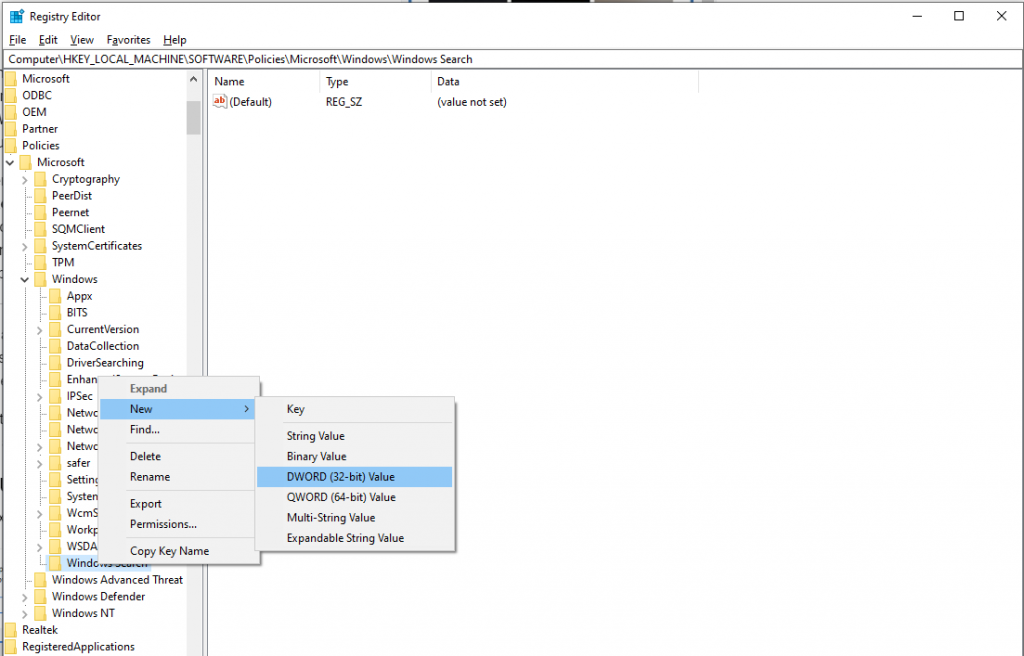
- Press Windows Key + S to open the search box and type regedit, and click on Registry Editor to open it.
- Go to the path, HKEY_LOCAL_MACHINE\Software\Policies\Microsoft\Windows\Windows Search. (if the key doesn’t exist, create a new one by right-clicking Windows, clicking on key and then select New > Key, then rename it to Windows Search)
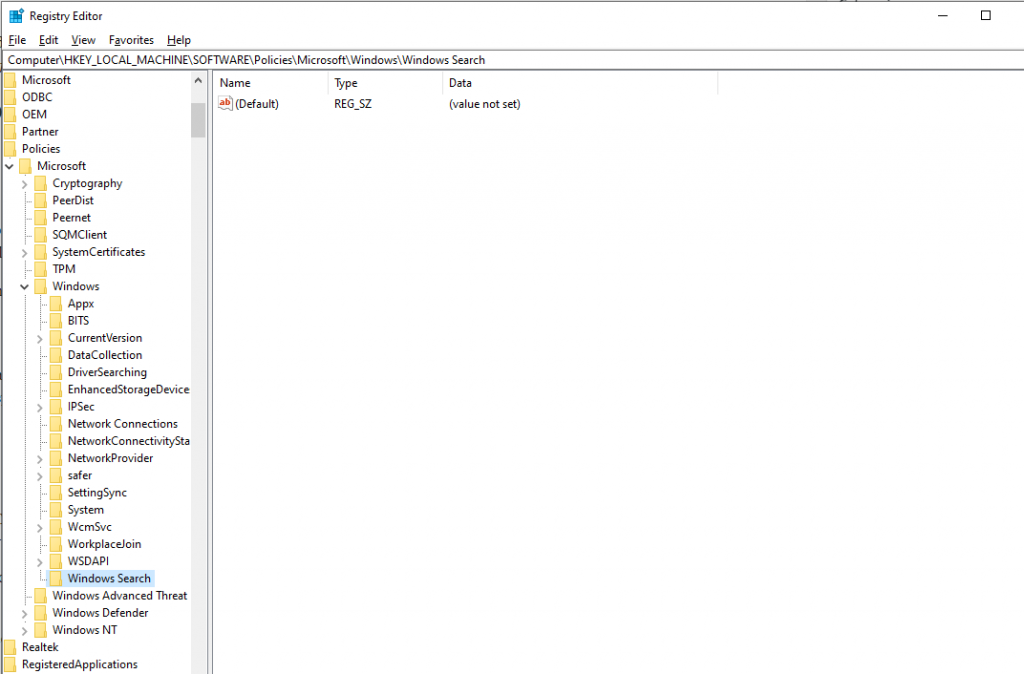
- Right-click on Windows Search and then click on DWORD (32-bit) Value to create a new Value and name it AllowCortana.
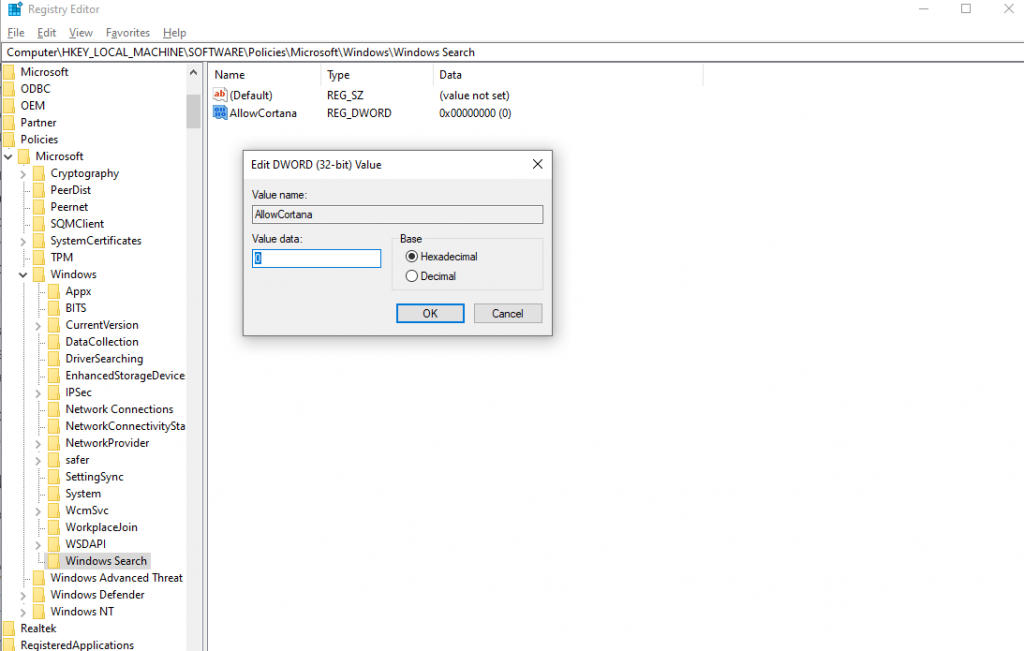
- Double-click the AllowCortana value. Type 0 in the Value data box.
Turn off Activity History
Windows 10 comes with a new feature called Timelines, which allows you to track what you’ve been doing inside Windows, be it using different apps for accessing documents, or browsing on Chrome. Albeit a useful feature, this does mean that Microsoft will need to collect quite a lot of information about how you use your PC and which applications you use and when did you use them.
This feature is possible through the use of an option for Activity history, which can be disabled from the privacy settings inside Windows. Here is how you can disable it,
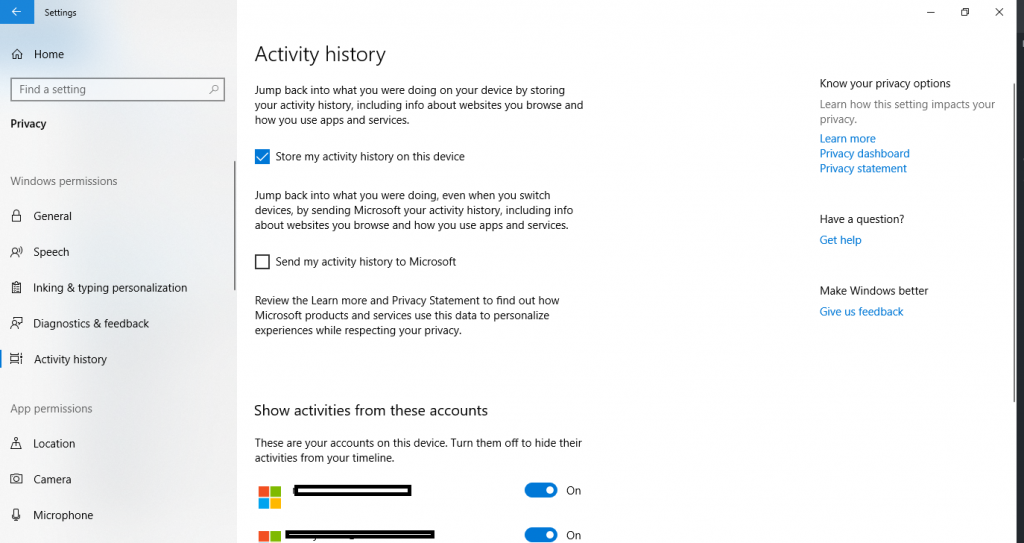
- Open the Settings app (Press START + I).
- Click on Privacy and then, on the left pane, click on Activity history.
- From here, you can choose if you want to allow Microsoft to store your activity history. There are several different options you can choose from. You can also choose if you want to use this feature but don’t want to send your information to Microsoft to be synced across different devices. Not only that, you can also choose which Microsoft accounts you want your activities to be tracked on and which accounts not to track.
Control your Diagnostic Data
Windows 10 collects a lot of diagnostic data about your hardware and usage by default, which Microsoft says is used to improve the overall Windows experience. Microsoft is not the only one who collects data in such a way, but with Microsoft’s push into a more advertising-centric approach, it is natural to assume this data can be used for that purpose.
Here is how you can control and/or delete the diagnostic data Microsoft collects,
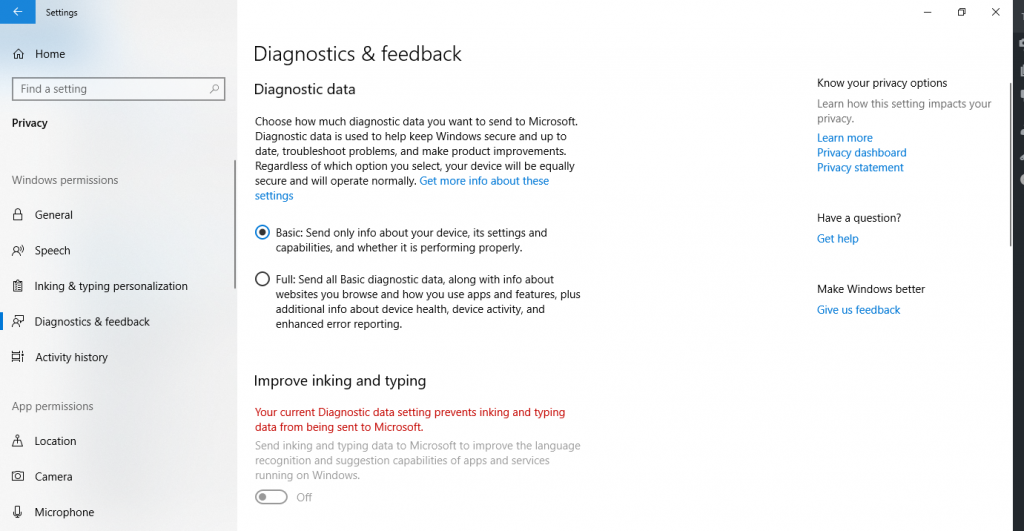
- Open the Settings app (Press START + I).
- Click on Privacy and then, on the left pane, click on Diagnostics & feedback.
- Select one of the two options available,
Windows also has a host of other options that allow you to choose which apps can access your device’s features like Camera, Microphone, Voice activation, Notifications, Account info and more. All of these settings can be found inside the Privacy section in the Settings app and give you a pretty granular level of control, where you can selectively disable some apps while allowing others to work.
