Here is how you can Disable Command Prompt Access in Windows
Windows is a general-purpose operating system with a ton of tools and utilities. It also has a pretty robust user management system, allowing multiple users to share one computer. However, one problem with this sharing is deciding what rights and access to grant a particular user.
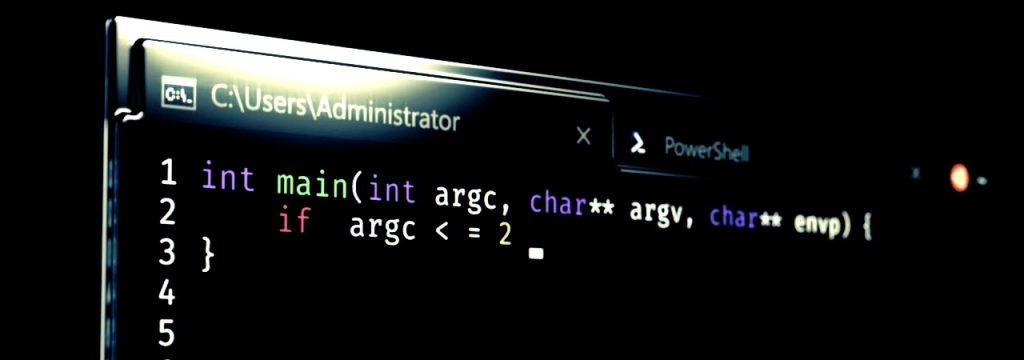
When creating a user account, Windows only allows you to grant administrator access or not. However, the easy thing to do is limit access to tools that allow a user to make significant configuration changes, like the Registry Editor or the Command Prompt, the Windows CLI (Command Line Interface).
If you want to limit access to the Windows Command Prompt, there are two ways you can do it,
Disable Command Prompt Access from Group Policy Editor
The gpedit or the Group Policy Editor is a Windows administration tool used to allow users to configure a number of important settings on their computers and networks, from password requirements, startup programs, and more.
Here is how you can use it to disable access to Command Prompt,
- Press the Start button and search for gpedit and click on the search result to open it.
- In the left pane, click on User Configuration, then click on Administrative Templates, and then double-click on System.
- You will see a list of Settings in the right pane. Double-click on the setting that reads Prevent access to the command prompt.
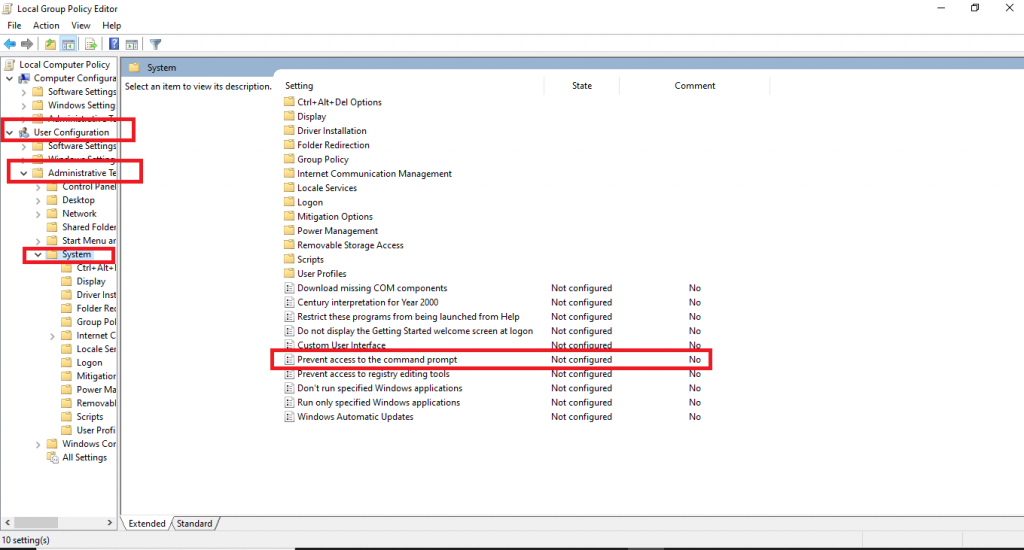
- Change it to Enabled, as shown in the screenshot below.

- Click on OK.
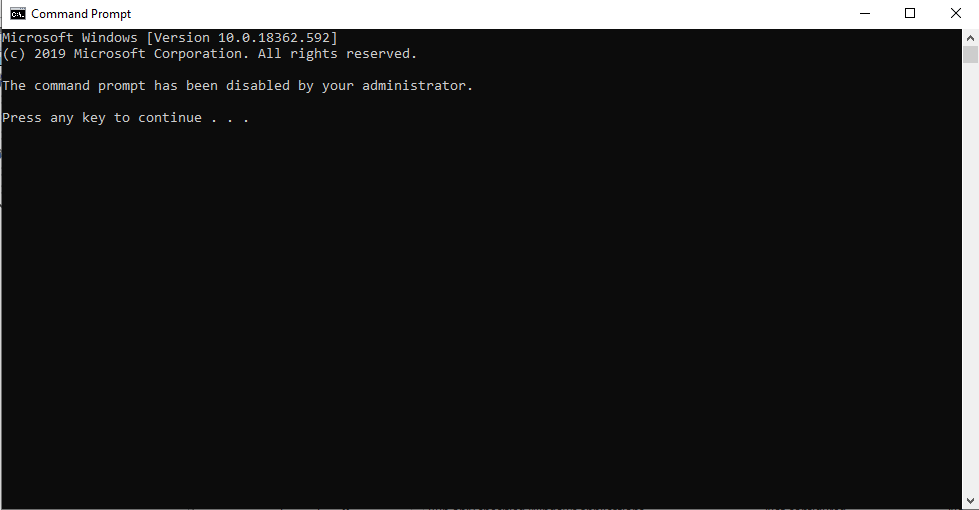
That’s it. Now, when the user tries to access Command Prompt, they will see the following error.
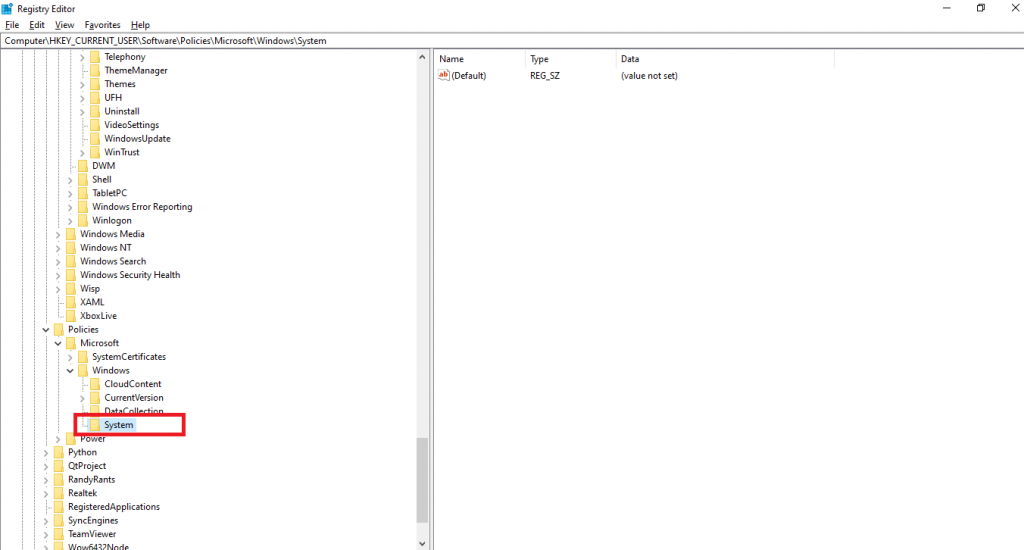
Disable Command Prompt Access using Windows Registry Editor
Another way to disable access to the Windows Command Prompt is by using the Windows Registry Editor, which is a powerful tool that can be used to make configuration changes for many Windows programs and applications.
It allows you to make changes in your system but the problem with this is that, if you don’t know what you are doing, you can easily end up messing with some critical system settings and cause other programs (or even the operating system) to go haywire.
The best thing to do before you make any changes is to make a backup, so if you make any undesired changes, you can quickly revert back without causing any permanent harm. You can use our guide over here to do it.
Here is how you can do it,
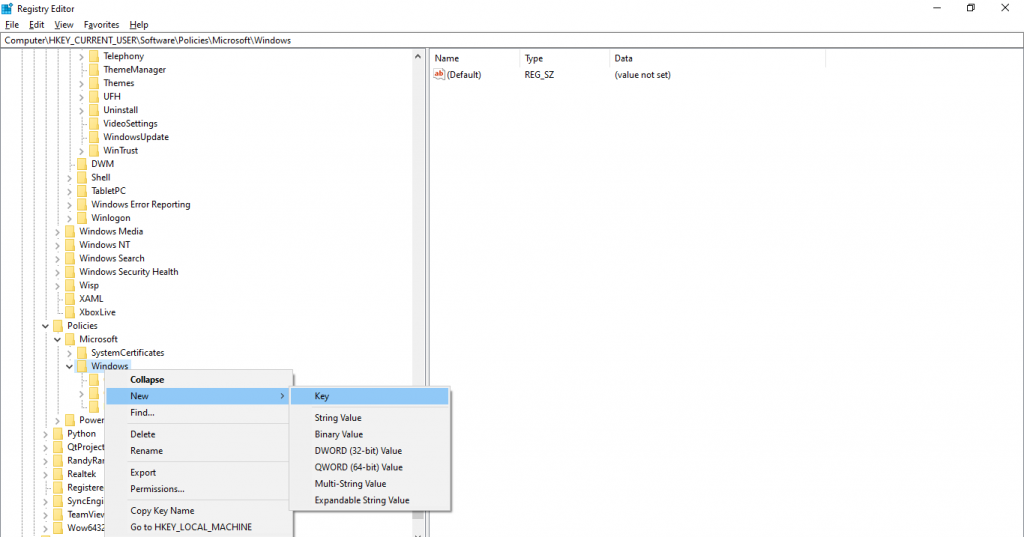
- Press the Start button and search for regedit and click on the search result to open it.
- In the left pane, you will see a list of keys, go to the following path by using the keys,
HKEY_CURRENT_USER\Software\Policies\Microsoft\Windows\ - Right-click on Windows and create a new key for System, as shown in the screenshot below. (Note: If this key already exists, then you don’t need to do this step).
- In the right pane, right-click anywhere and click on New, and then choose DWORD (32-bit) Value.
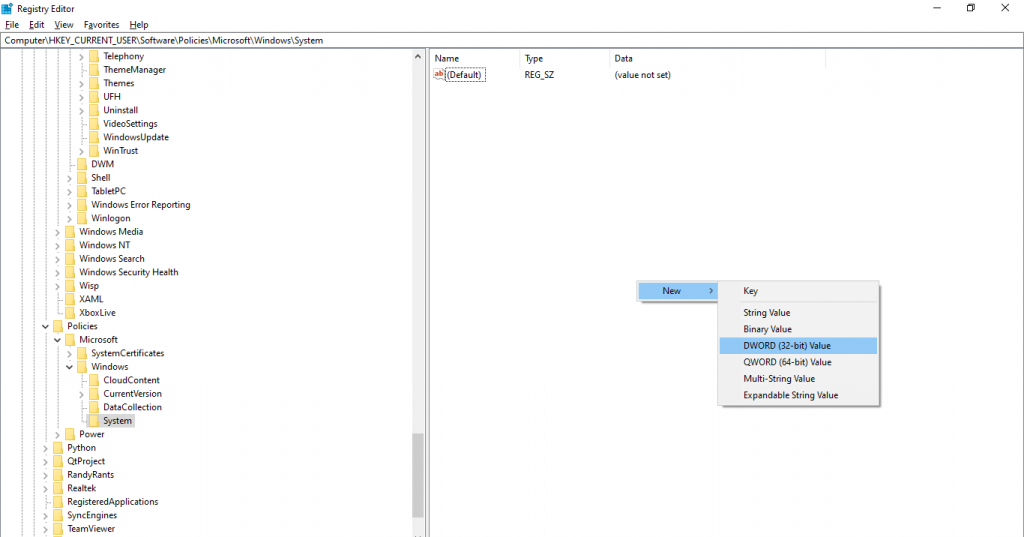
- Rename the newly created value DisableCMD and then double-click it to configure it.
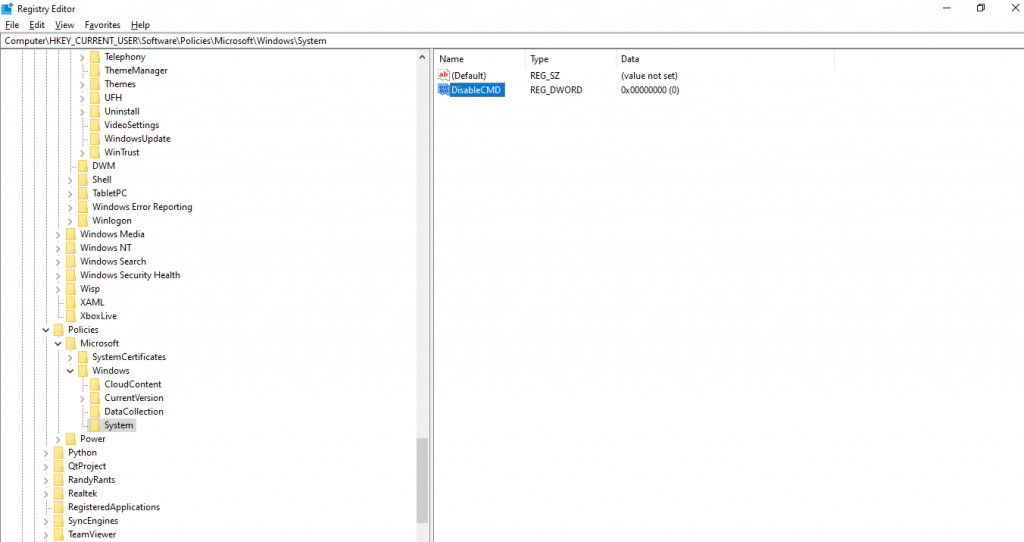
- Select Decimal and then set the value to 2.

That’s it. The changes will be implemented instantly and you will be unable to use the Command Prompt and will see the following error.
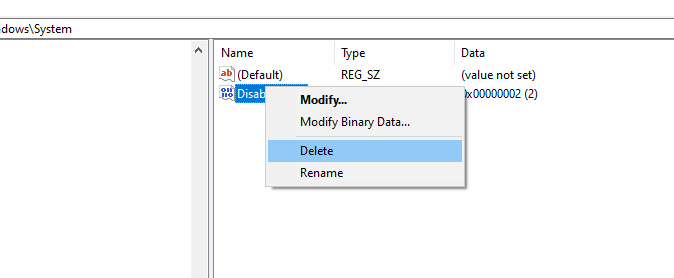
To revert back and Enable Command Prompt again, you can either delete the value you just created or simply change the value to 0.
 Here are what the values represent,
- 0 – Enable Command Prompt
- 1 – Disable Command Prompt AND prevent scripts from running
- 2 – Disable Command Prompt only
