
Here is how you can Enable or Disable Registry Editor Access in Windows
Windows is a complex operating system, made up of a collection of software, tools, and drivers, making it a general-purpose operating system that you can use to perform almost any task imaginable. It also provides a host of different APIs for implementing your programs as you see ideal. In Windows NT operating systems, Microsoft has introduced an API called a Windows Service. This API allows any application that to register itself as a Windows Service, allowing a computer program to operate in the background as long as it obeys the interface rules and protocols of the Service Control Manager. Theoretically, it is quite similar to how daemons in Unix.
Any Windows Application that is implemented with the services API and is capable of handling low-level tasks with very little or no user interaction can be called a Windows Service. We recently wrote a guide on how you can install or uninstall a Service in Windows using the Microsoft .NET Framework’s InstallUtil, which you can read over here. However, what if you want to change some configuration settings for a service and don’t want to have to reinstall the whole service to be able to do that?
The Windows Registry Editor is a powerful tool built into Windows and is a collection of databases that store configuration settings for everything from the operating system to other software programs to user preferences, etc. It is a hub for accessing configuration details for all programs on the computer and can be used to make some pretty serious changes to how your computer functions.
As a result, we always advise proceeding with caution when making any changes in the Registry Editor. Even when we do, we advise that you take a backup. You can use our guide over here on how you can safely edit the Registry without breaking things.
However, one safe solution is to simply disable Registry Editor access in Windows. It won’t permanently disable the tool, but only make it harder to access for the ordinary user, keeping it safe from prying eyes but still being there when you really need to use it. For example, on a shared computer, you may want to allow only certain users to be able to access the Registry Editor.
Here is how you can disable Registry Editor access using the
Disable Windows Registry Editor using Group Policy Editor
- Press the Start button to open search, and type gpedit.msc and open it.
- It will open the Group Policy Editor.
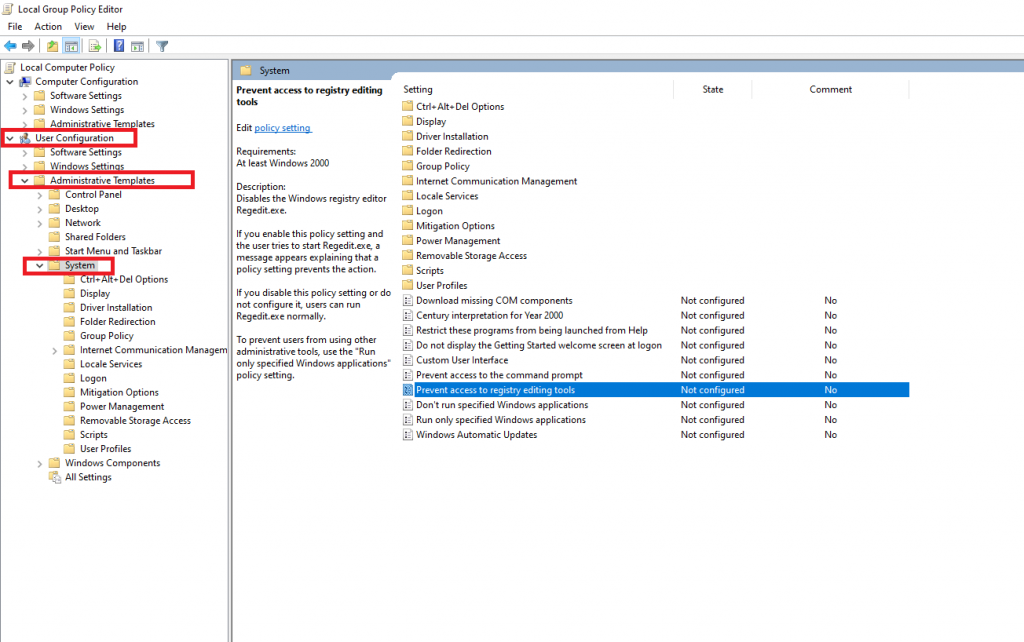
- In the left pane, under User Configuration, click on the arrow beside Administrative Templates, then double click on System.
- In the right pane, double-click on Prevent access to registry editing tools, as shown in the screenshot below.
- Click on Enabled and then click on OK.
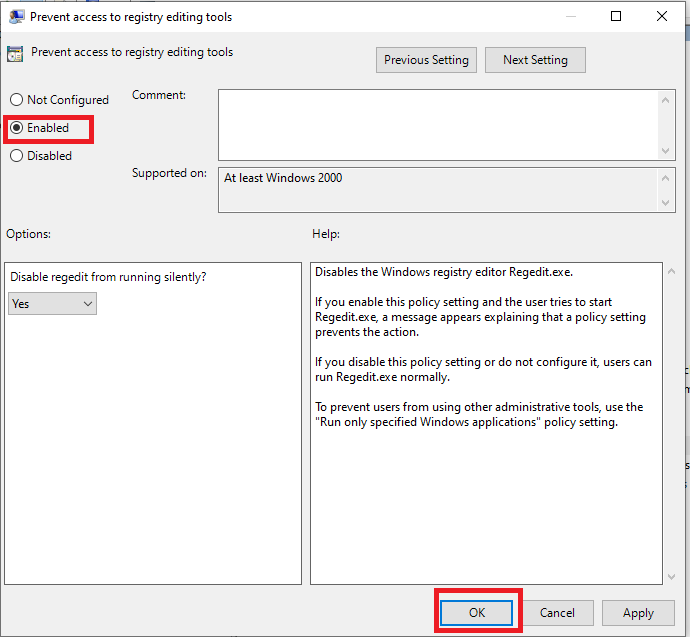
Now, when a user tries to access the Registry Editor, they will see an error that says that the policy settings are preventing this action. However, do keep in mind that this method blocks out all users from being able to access the Registry Editor, including you, until you set the settings back to Disabled.
Disable Windows Registry Editor Access using Registry Editor
This method requires you having Administrator access. You need to be logged into the account where you want to disable Registry Editor. Here is how you can do it,
- Press the Start button to open search, and type regedit and open it.
- Go to the following path,
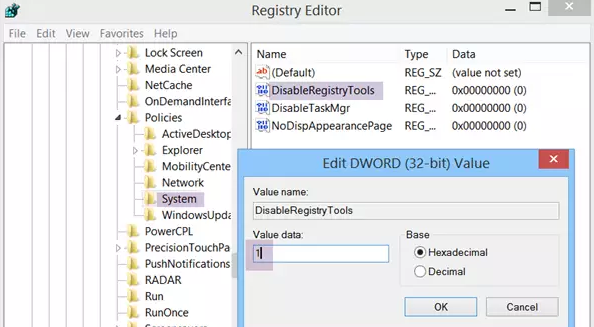
HKEY_CURRENT_USER\SOFTWARE\Microsoft\Windows\CurrentVersion\Policies\System
- In the right pane, you will see multiple keys. Double-click the key for DisableRegistryTools and change its value to 1 and click OK.
That’s it. This account won’t be able to run regit now.
