
Here is how you can automate maintenance tasks in Windows
Windows has gone through a ton of iterations, improving itself at every update. But it also has grown substantially bigger to accommodate new technologies, growing more complex with every update. Each added feature comes with an added complexity and learning curve.
With time, however, Windows has also gotten better at doing most of the things you’d expect a computer user to do, itself. So most of the tasks that are associated with the maintenance of a PC are handled by Windows on its own, freeing up a PC user’s time from the mundane tasks.
You can easily set up Windows to automatically run maintenance tasks at a preferred time, so that you don’t have to worry about it. These tasks can include anything from disk defragmentation, the process of removing fragmentation from your disk by organizing data in a contiguous form; disk optimization, to make it run optimally; downloading and installing updates, etc.
Here is how you can set up Windows 10 to automatically run maintenance tasks,
Set Up Automatic Maintenance
For most PCs, the Automatic Maintenance feature is on by default. However, if you want to tweak its settings according to your preferences, here is how you can do it,
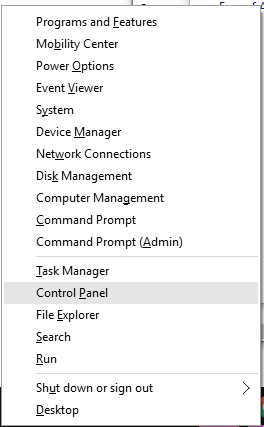
- Open Control Panel by pressing START + X and clicking on Control Panel.
- Click on System and Security, and then Security and Maintenance.

- Click on the little down arrow beside Maintenance to expand the settings.

- Click on Change maintenance settings to access the settings or click on Start maintenance if you want to run maintenance tasks right now.

- In the Maintenance settings, you can choose your preferred time for running maintenance tasks,

You can also allow Windows to wake up your computer at the scheduled time for maintenance. However, this will only work if your computer is in Sleep mode at the time.
Turn Off Automatic Maintenance
If you want to turn off the Automatic Maintenance settings, the method is a bit different and involves making a change in the Windows Registry through the Windows Registry Editor.
Note: Editing the Windows Registry is a risky process and can cause some programs to not function properly. You can also use our guide over here to back-up your Windows Registry before proceeding with this guide.
- Press START + R and type regedit in the dialog box that appears.
- Click on Yes when it asks you if you want to allow the app to make changes to your PC.
- Go to the following path,
HKEY_LOCAL_MACHINE\SOFTWARE\Microsoft\Windows NT\CurrentVersion\Schedule\Maintenance
You will have to expand each folder one by one by clicking on the little down arrow besides each one. - Right-click on the Maintenance folder and select New and then DWORD (32-bit) Value, as shown in the snapshot below.

- Name the key ‘MaintenanceDisabled’, then double-click the key and set the value in the Value data field to 1.

Now, all you need to do is Restart your computer and Windows will stop running automatically running maintenance tasks on your PC. However, do keep in mind that, unless you run these tasks yourself, your PC might slow down over time or have some performance effect.
To reverse this process and allow Windows to continue running automated-maintenance tasks, you can simply go to the same folder as you went above, and then delete the ‘MaintenanceDisabled’ key you created.
Use the Windows Task Scheduler
Windows has another useful little tool up its sleeve, called the Task Scheduler. It allows much more control over how and which tasks are run and when they are run. Here is how you can use it,
- Open Control Panel by pressing START + X and clicking on Control Panel.
- Click on System and Security.
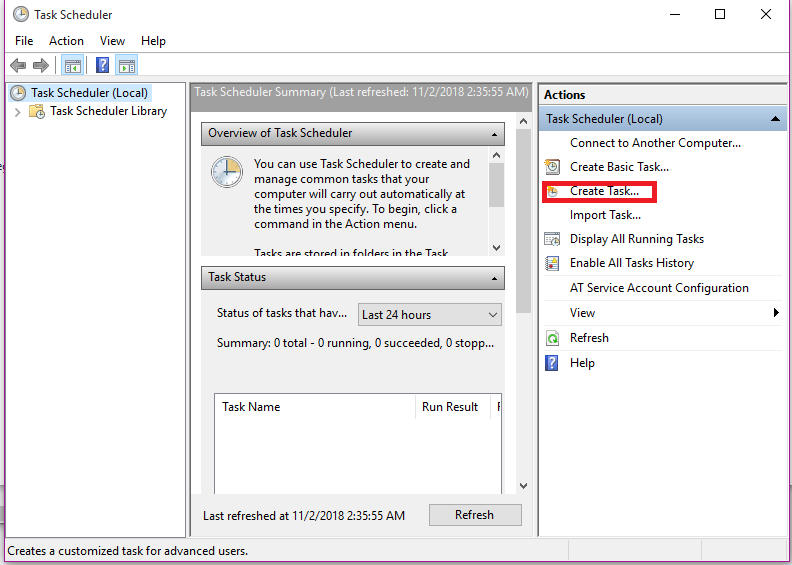
- Under the Administrative Tools heading, click on Schedule tasks.

- Under the Actions column on the right-hand side of the screen, select Create Task to create a new task &you can also Import Task if you have already created one on another computer.)
- In the General tab, enter a Name and a short Description and choose other preference for the task.

- In the Triggers tab, click on New.

- Now, it’ll allow you to choose when to run the task. You can choose to run it just once, daily, weekly, or even on a monthly basis. You can also choose to expire the task after a certain time or stop it if runs for more than a specified time limit. Once you’re done, click OK.
- Now, go to the Actions tab and click on New.

- Select the action you want it to perform, like starting a Program or displaying a certain message. You can also choose to run a custom script.
- You can also set Conditions by going to the next tab. Once you’re done, press OK to create the task and save it.

That’s it. Your task is now active and functioning.
