
Sensitivity Labels are an important feature that users can avail on Microsoft 365 as they deal with confidential data. So, for example, if you want to ensure that no one in your firm share’s credentials or similar sensitive data with someone outside the firm, you can apply sensitivity labels to monitor these activities and take actions accordingly.
Sensitivity labels in Microsoft 365 are used to classify and protect data based on its sensitivity or confidentiality. They can be applied to documents, emails, and other types of content to ensure that the appropriate level of protection is applied. These labels can include information about how the data should be handled, who can access it, and whether it should be encrypted.
How to publish sensitivity labels?
Firstly, you need to ensure that you meet the prerequisites.
- To publish sensitivity labels you need to be a Global Administrator in your company’s Microsoft 365 account.

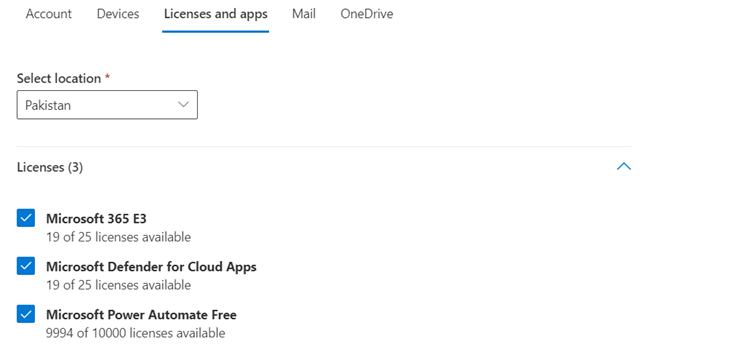
- Next make sure you have all necessary licenses assigned. You will need a Microsoft 365 E3 license assigned to the global admin. And a Microsoft Defender for Cloud Apps license:
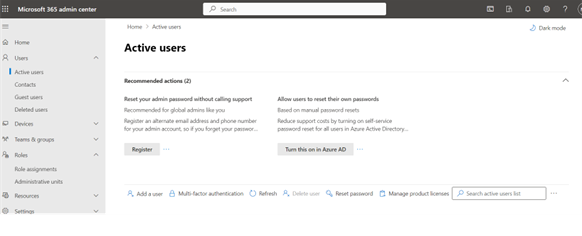
- These are assigned in the Microsoft Admin Center’s ‘User’ section:
Now that all prerequisites are met, we will move onto publish the label.
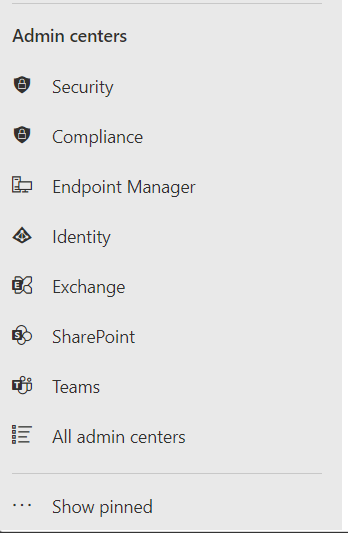
From the sidebar of the admin center, click on show all at the bottom of the sidebar and scroll down to ‘Compliance’
Click on it and you will be redirected to Microsoft Purview:
Now under the Solutions, scroll down to “Information Protection”:

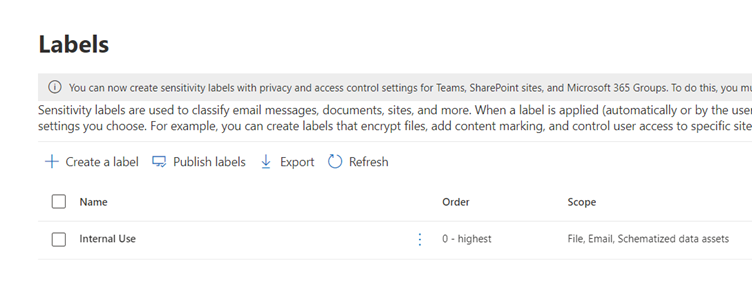
From here click on Labels which will take you to the Labels page, where you can create Labels according to your preference.
Initially there will be no Labels, nor any default labels posted here. You will have to click on “Create a label” to create one.
You will now be redirected to naming the Labels and providing an overview of what you aim to achieve:

Next you will define the scope of this label:
These will be set according to your requirements. Allowing you to apply labels across different applications.
Next you will be asked for the protection settings for labeled items, again on your preference you can apply these settings.
Lastly you will be asked to define across what user groups you want to spread your label to. And then you will be given an overview of your applied settings, and it will ask you to Create New Label.
Now under your labels section you will see your created label:
Next step will be to Publish this label, this will be achieved by clicking on Publish labels:
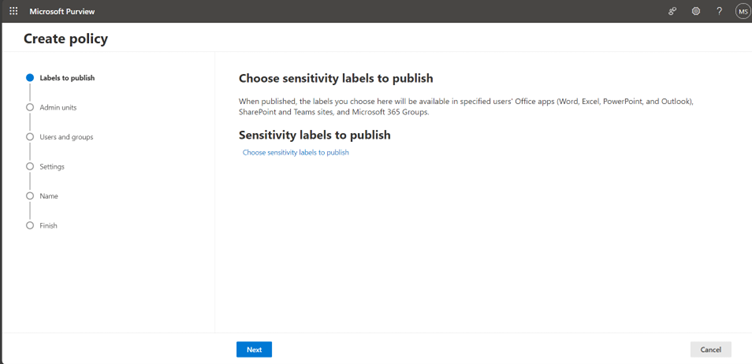
You will choose your label and fill in similar information to publish it. Publishing your label is important if you want to use the label and apply it to meet your needs. It takes up to 24 hours to publish a label, hence you will have to wait accordingly.
Once published users can now use these labels within their company/organization’s Microsoft office environment. But these have to be applied in a specified manner, and a few steps have to be taken to ensure perfect functionality and effectiveness of these labels. We have covered that in another article which is around applying these sensitivity labels and generating alerts allowing the global administrator the ability to monitor.
Find the article here: Using Sensitivity Labels on Microsoft 365 Defender – EXE Files
