How to Perform a Clean Boot in Windows
Windows 10 comes loaded with hundreds of processes and services integrated within the operating system designed to make all the processes and functions within it run smoothly. But sometimes when you install a 3rd party program or service, it may interfere with other pre-installed Windows services, which could cause unexpected program crashes, error messages popping up, slowing down your computer or a failure in a piece of hardware of your computer.
Note: Before you get started, you may want to set up a System Restore Point or back up your computer just in case anything goes wrong during the process. Also, you should not try to perform these steps if your PC is connected to a managed network, such as the one at your company. In fact, it’s likely the tools you’d use to perform these steps are disabled by your administrator since you might be using a restricted account.
To solve this, you could boot up your computer in Safe Mode, to boot into Safe Mode on Windows 8 or 10, press and hold the Shift key while clicking the “Restart” option and then navigate to Troubleshoot > Advanced Options > Windows Startup Settings > Restart > Safe Mode. On Windows 7, press the F8 key while your computer is starting and you’ll see a boot options menu that allows you to select “Safe Mode”.
Safe mode is a more barebones approach that disables all third-party drivers or services which are not needed by windows to start, but it may disable some things you may be trying to test hence it would be useless in this case. To solve this issue, you can perform a Clean Boot on Windows 10 by temporarily disabling non-critical services and startup programs. You can then enable them again one at a time to see if any of them are causing you trouble.
- To start, hit Win+R to open the Run window. Type “msconfig” in the box and then hit Enter.

- Once MSConfig opens, switch over to the Services tab to display a list of all services for your computer. At the bottom of the window, select the “Hide All Microsoft Services” option and then click the “Disable All” button. This disables all non-Microsoft services. Click “OK” when you’re done.
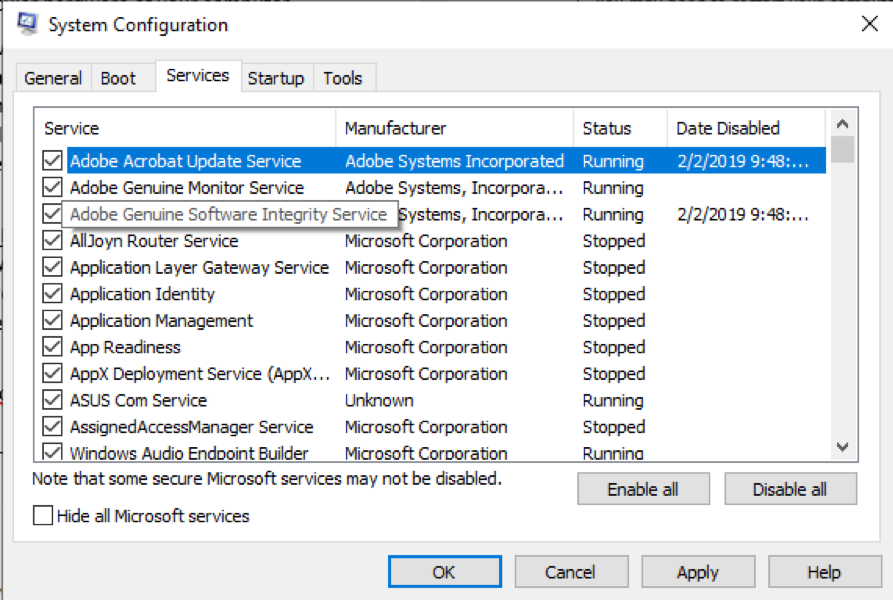
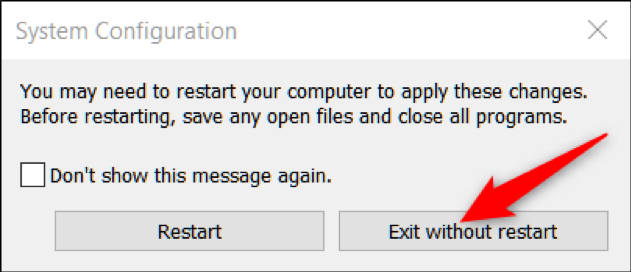
In the warning window that pops up, click the “Exit Without Restart” button. We need to restart the computer but there is one more thing that needs to be done before that
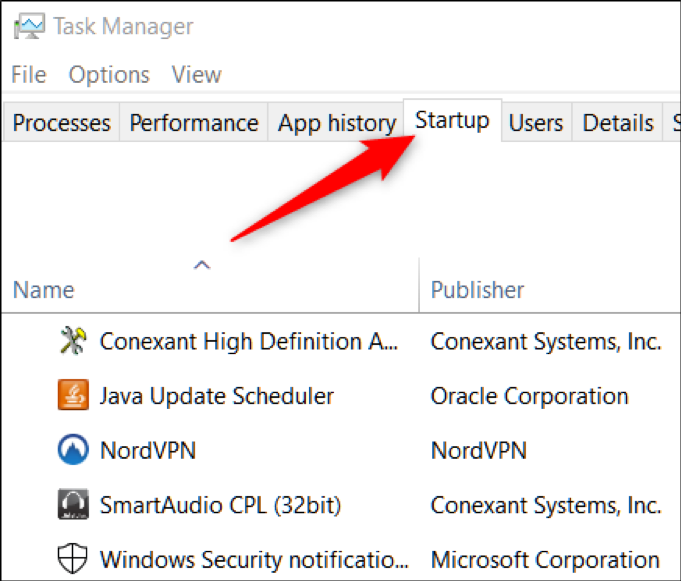
- Next, you’re going to disable third-party startup programs that could potentially be causing problems on your computer. Hit Ctrl+Shift+Escape or right click on the taskbar and select Task Manager to open Task Manager, then switch over to the “Startup” tab.
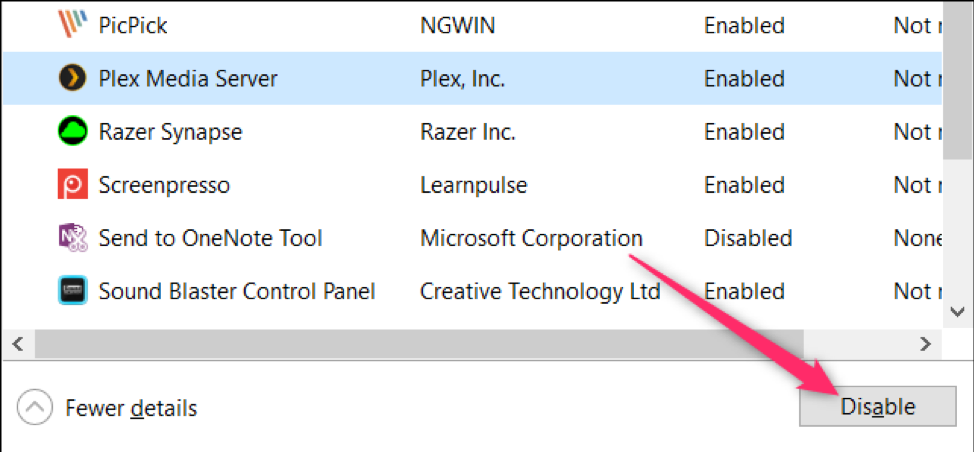
- You’ll have to disable startup apps one at a time; there’s no way to disable them all at once. Select an enabled app and then click the “Disable” button or just Right click after choosing an app and press “Disable”. Do that for all the enabled apps on the tab.
- When you’re done disabling apps, restart your computer, and it should load without any of those services or startup programs running.
- You can now start troubleshooting the issues you were experiencing before. If you receive any errors stating certain programs couldn’t start, this is normal as you’ve just disabled all non-essential services.
If the clean boot fixes the problem you were experiencing, you can start turning services and startup apps back on and restarting your PC. We recommend doing this one service or app at a time, even though the process will take some time. This allows you to narrow the problem down by process of elimination. - Another thing you can try is the Disk Cleanup tool which removes temporary files and clears caches from most programs which can get things up and running again. The Disk Cleanup tool has been around forever, and it still works great. So, to get it up and running simply open a run dialog and type in the direct executable for disk cleanup. Click on Start, type in run and press Enter. Type in Cleanmgr.exe.

Select the drive you want to clean up, and then select OK. Under Files to delete, select the file types to get rid of. To get a description of the file type, select it. Select OK.
When you’ve finished troubleshooting, go back to the “Services” tab in msconfig, click the “Enable All” button, and then individually disable any services that caused problems. In Task Manager, turn on all the startup apps that did not cause any problems.
