
Here is how you can turn your Windows 10 PC into a Wi-Fi Hotspot
Ever been in a situation when you want to share your Windows computer’s internet connection with your mobile or any other device? Even in today’s world, not every place has a Wi-Fi connection. Some still rely on Ethernet connections. So what if you don’t have access to a Wi-Fi router and have one Ethernet cable but more than one device to use the internet connection on?
Fortunately, any modern Wi-Fi device today can turn into a WiFi hotspot i.e. act as a WiFi router. It may not be a permanent solution to your internet problem as it will require your device to be active as long as you want to use the internet connection, but it is a good temporary hack to know. While it is fairly easy to turn your smartphone (Android or iPhone) into a hotspot, it is not as simple on a computer running Microsoft’s Windows 10 operating system.
To turn your computer into a WiFi hotspot will require a bit of tinkering and running some code on the command prompt. Here is how you can do it,
Using Windows 10’s Built-in Feature
- Open Settings by pressing CTRL+I.
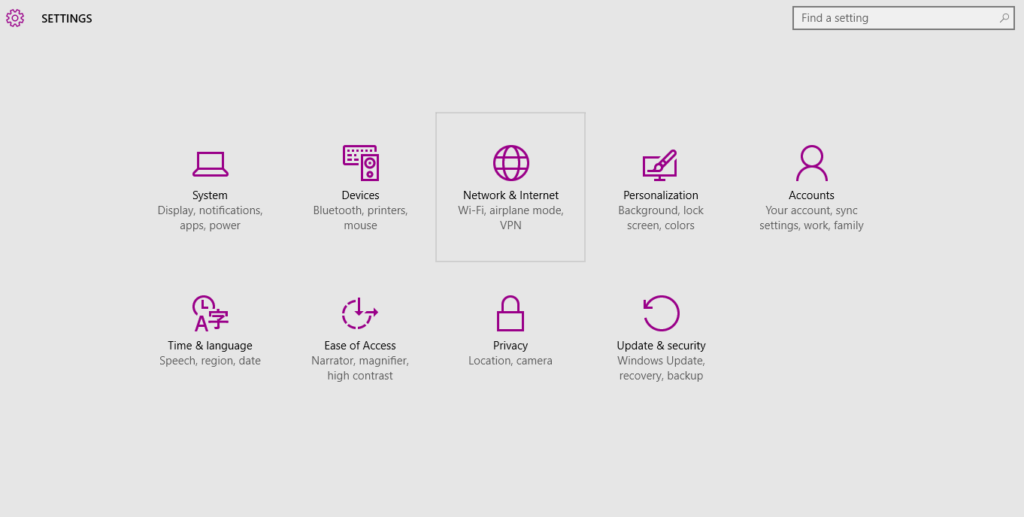
- Open Network & Internet.
- In the left pane, check if you can see Mobile hotspot. If no, then skip to step 6 If yes, then click on it.
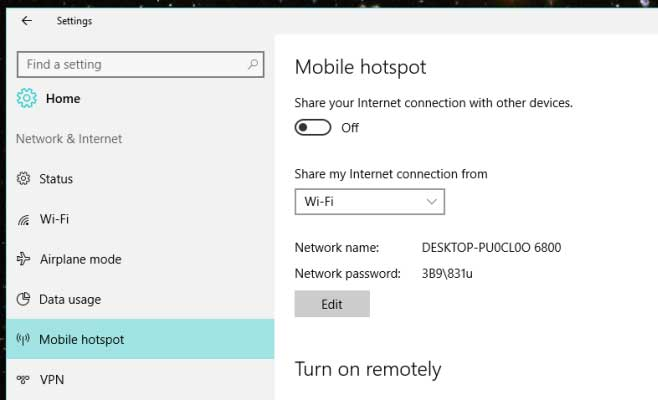
- Switch the toggle button to On.
- Click on Edit to set your Network name and Password.
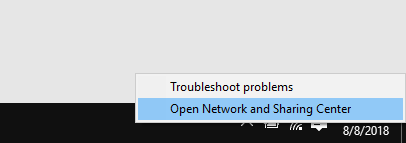
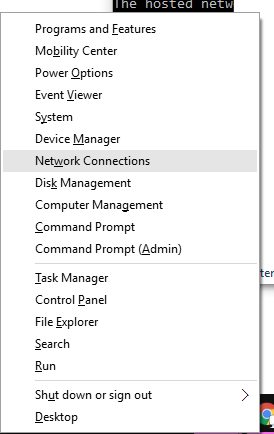
- If you don’t see the Mobile hotspot option, open the Network and Sharing Center by right-clicking on the WiFi connection button.
- Click on Change Adapter Settings.

- Right-click on the Wi-Fi icon and select Enable.

- Now, go back to Step 1.
If this doesn’t work for you, you can also use the command prompt to manually turn on the WiFi hotspot feature.
How to turn on Mobile Hospot using Command Prompt
First, you will need to check if your network driver supports sharing WiFi over a hotspot.
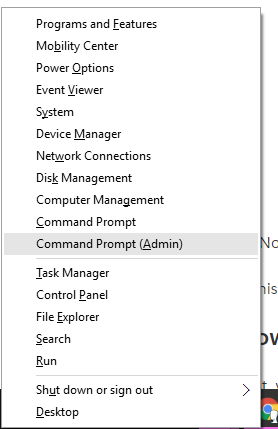
- Press START+X and then click on Command Prompt (Admin).
- Type the command given below and press ENTER,
NETSH WLAN show drivers - Does your PC say yes for Hosted network supported? (highlighted in yellow below)
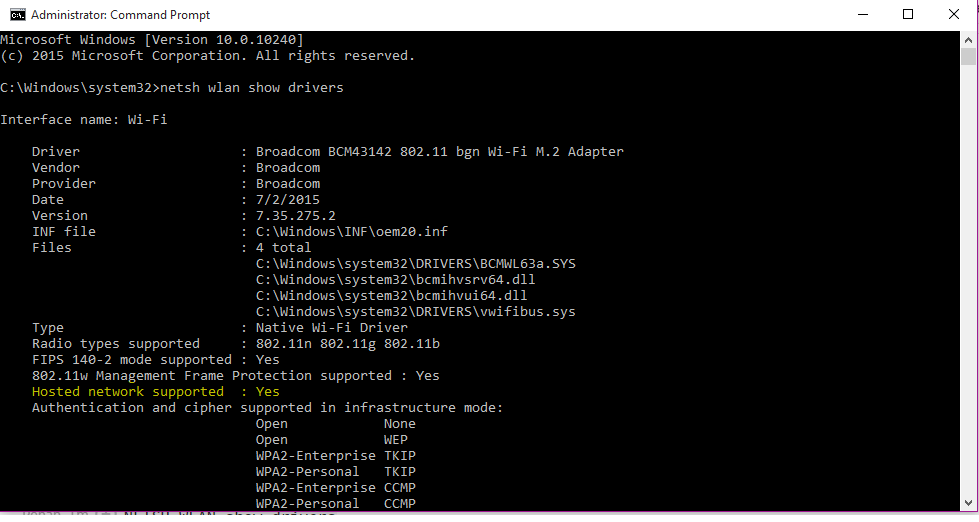
- If it does, then your PC supports sharing Wi-Fi over a hotspot. Follow the next few steps to achieve it.
- In the command prompt, paste the following line of code, replacing ‘Your_SSID’ with a Network name and ‘Your_Passphrase’ with a password (at least 8 characters in length).
NETSH WLAN set hostednetwork mode=allow ssid=Your_SSID key=Your_Passphrase - Next, type in the following command and press ENTER,
NETSH WLAN start hostednetwork

- CTRL+X and select Network Connections.
- You should now see a Microsoft Hosted Virtual Network connection there.
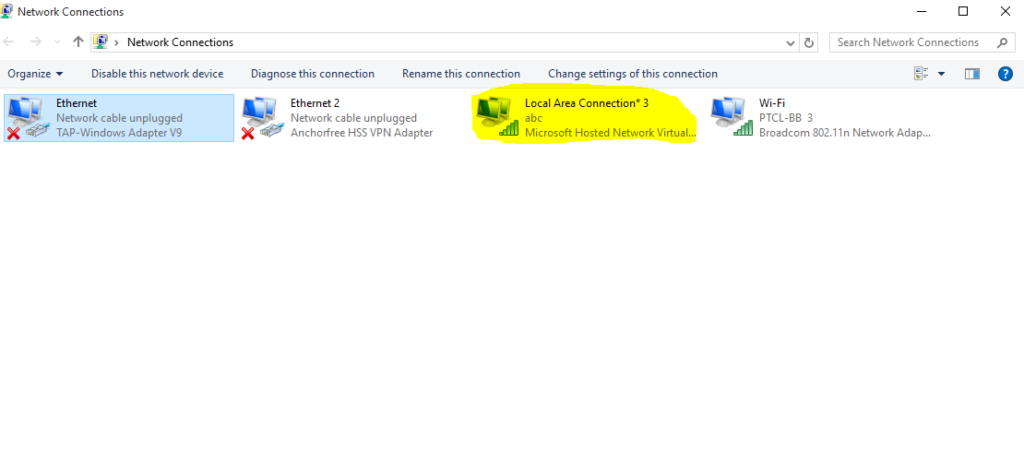
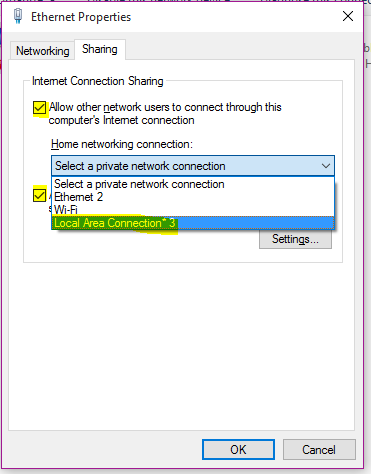
- Right-click on Ethernet and select Properties.
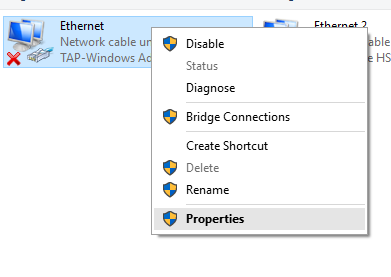
- Check both the boxes and select the Local Area Connection in the drop- (highlighted in yellow below)down box and then select Ok.
That’s it, you should now be able to connect to the WiFi network via any device. To turn the hotspot OFF, you can use the following command.
NETSH WLAN stop hostednetwork
To enable/disable the hosted network option, you can use the following two commands,
NETSH WLAN set hostednetwork mode=allow
NETSH WLAN set hostednetwork mode= disallow
