How to Connect Your PC to a Printer in a Shared Grouped
Windows has improved its handling of networked printers significantly over time. However, if you wish to distribute a printer across the network, you might need to do some additional labor to get everything set up.
There are two steps to establishing a printer on your network. The initial stage is to link the printer to the wireless network, which can be done in one of three different ways:
- Attach the printer device straight to the network: This is the simplest method for connecting a network printer. You don’t even have to switch on a second PC to print, and you don’t need to deal with the inconvenience of establishing sharing
- Attach the printer with one of the computers and use Homegroup to distribute it across the rest of the system: If attaching a printer to the network immediately isn’t possible, you can communicate it with Windows Homegroup by attaching it to a computer on the network
- Attach the printer to one of your computers and link it without having to use Homegroup: This approach, like the Homegroup method, necessitates that the computer to which the printer is attached be fully operational in order for you to utilize it. It’s also the best option if none of the other options are functioning
You may link your printer with multiple PCs on your system with Windows 10. To link a printer to the computer to which it is connected, with additional PCs to which it is not attached, you must initially establish the printer’s networking arrangements, then link the printer to the main PC and switch it on. Also, ensure the principal PC is powered on, linked to the printer, and networked.
With the principal PC, link the printer
You may connect your printer in two different ways: through Settings or through the Control Panel:
- Via Settings, you can share your printer:
-
-
-
-
-
-
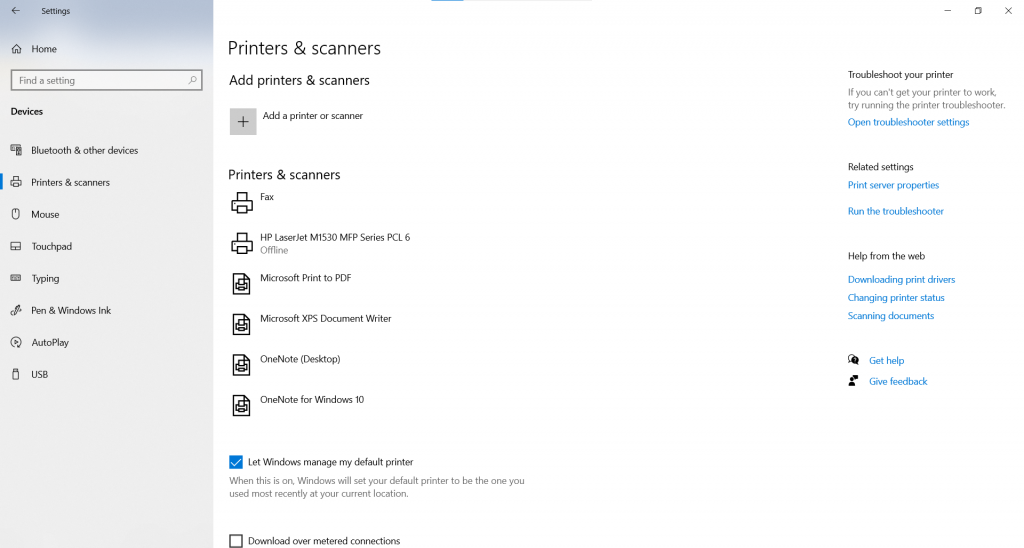
- After pressing the Start icon, go to Settings
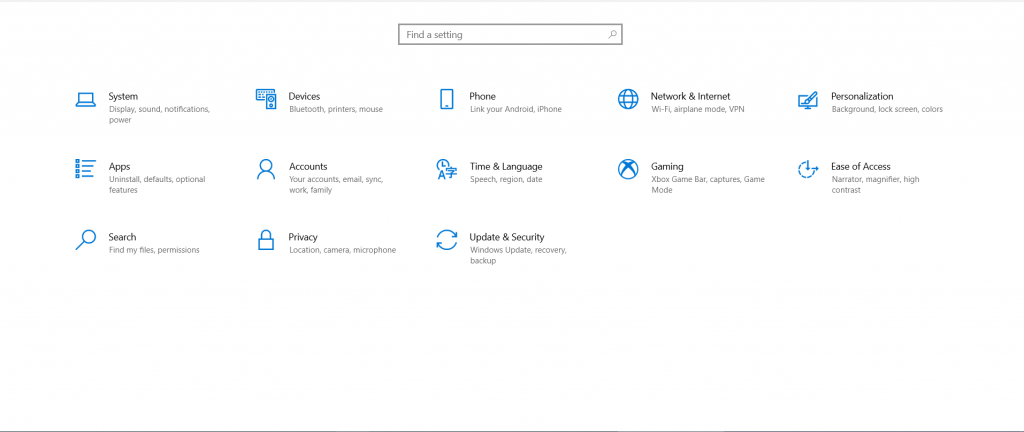
- Select the Devices option
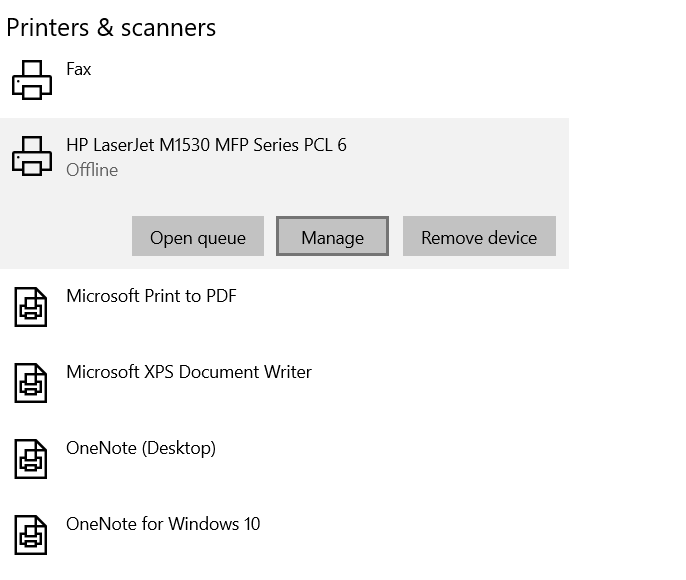
- Choose Printers and Scanners

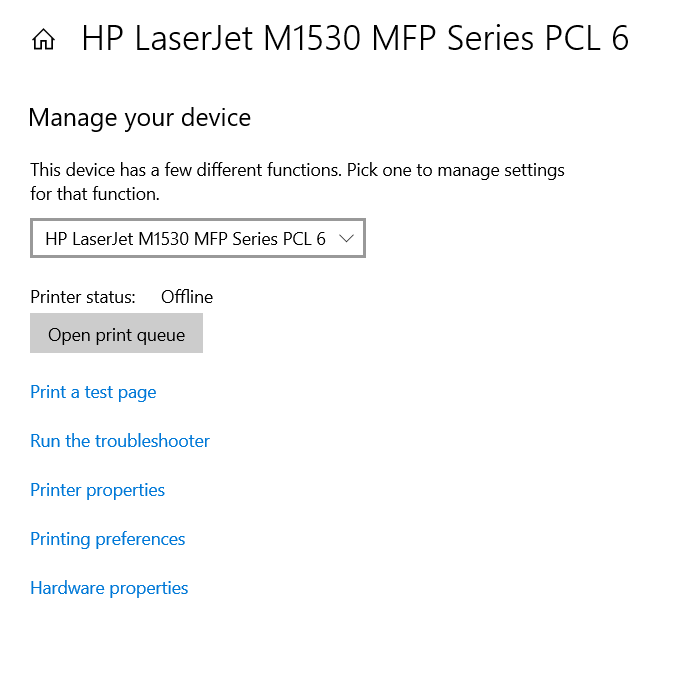
- Click Manage after selecting the printer you would like to connect
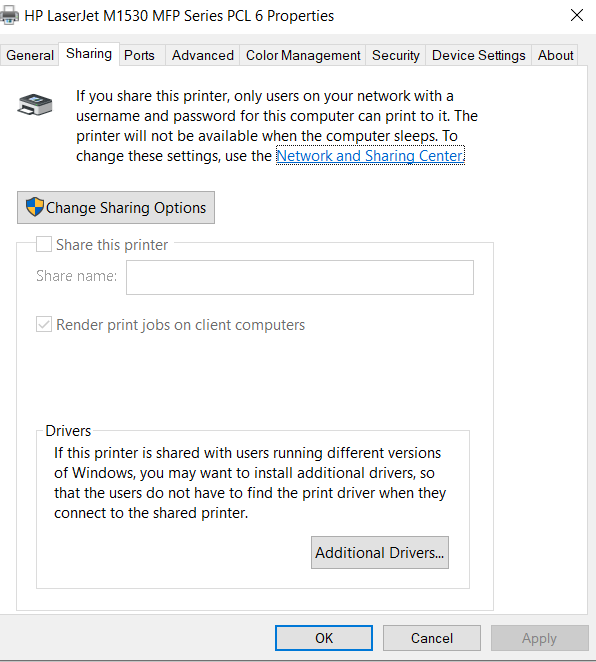
- The Sharing tab will appear after you click Printer Properties
- After pressing the Start icon, go to Settings
-
-
-
-
-
-
-
-
-
-
-
-
-
- Pick Share this printer from the Sharing section after clicking on the ‘Change Sharing Options’ button
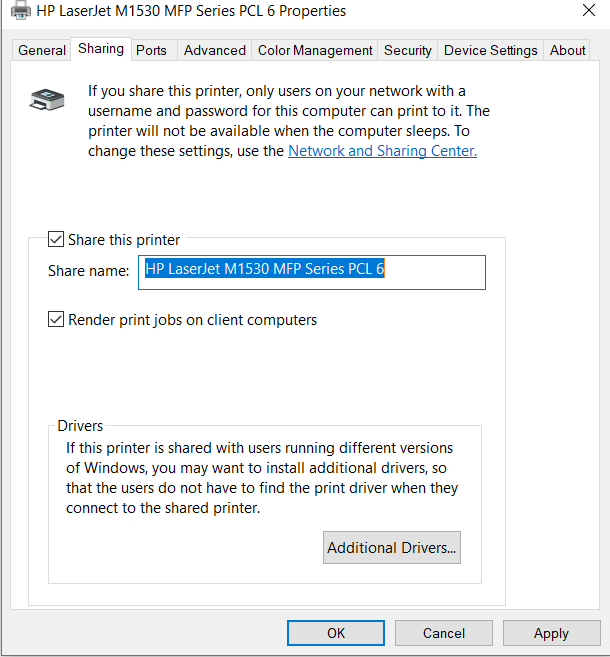
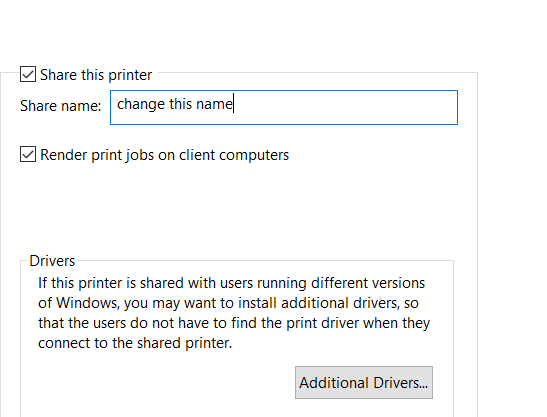
- You can change the printer’s shared title if you like. That’s the name you’ll utilize to link to the printer via a different computer
- Pick Share this printer from the Sharing section after clicking on the ‘Change Sharing Options’ button
-
-
-
-
-
-
-
-
-
-
-
-
-
- Via Control Panel, you can share your printer:
- Enter ‘control panel’ into the taskbar’s query engine, then pick Control Panel
- Enter ‘control panel’ into the taskbar’s query engine, then pick Control Panel
- Via Control Panel, you can share your printer:
-
-
-
-
-
-
-
-
-
-
-
-
-
- Choose the Hardware and Sound menu
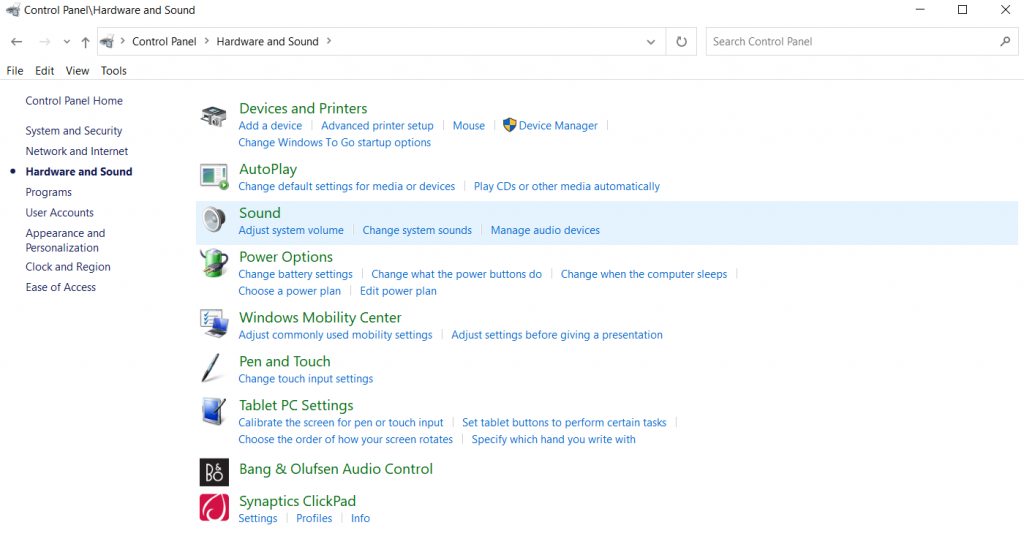
- Choose the Hardware and Sound menu
-
-
-
-
-
-
-
-
-
-
-
-
-
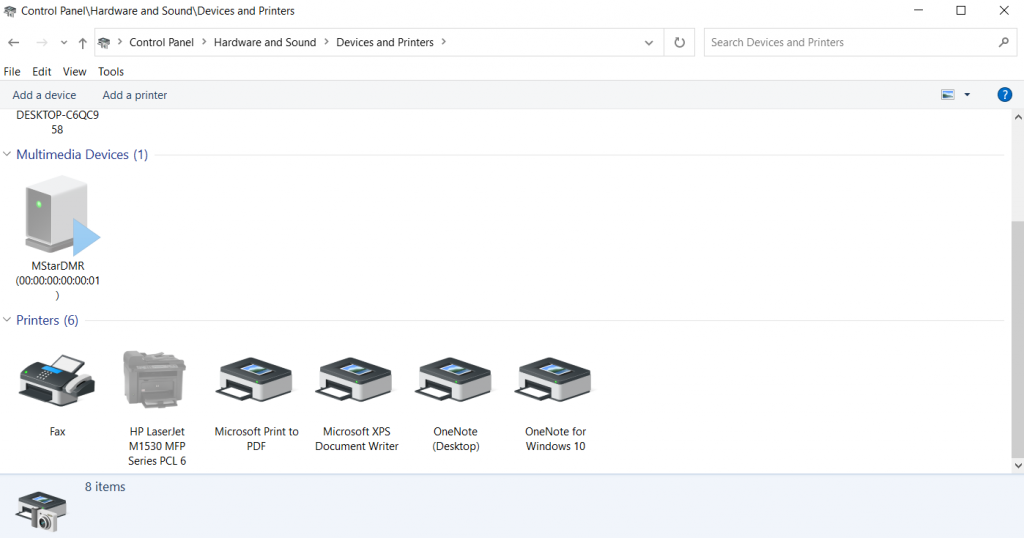
- Choose View devices and printers from the display menu
- Choose and continue pressing or use the right click on the printer device you would like to share. Then choose printer properties
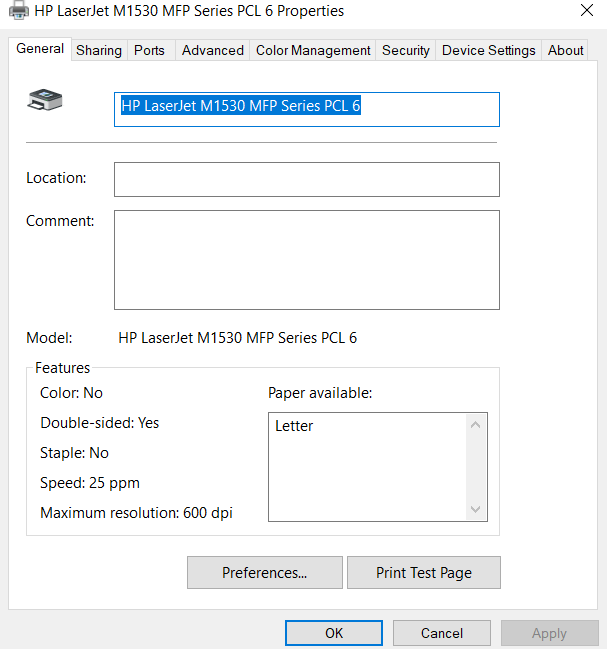
- Open the ‘Sharing’ tab from the displayed menu bar on top and then click on the ‘Change Sharing Options’ button

- Choose Share this printer from the Sharing section
- Choose View devices and printers from the display menu
-
-
-
-
-
-
-
-
-
-
-
-
-
- You can change the printer’s shared identifier if you like. This is the name you’ll have to use to login into the printer using a different computer
-
-
-
-
-
-
Link the connected printer to a different computer
- After pressing the Start button, go to Settings, then Devices, then Printers and Scanners
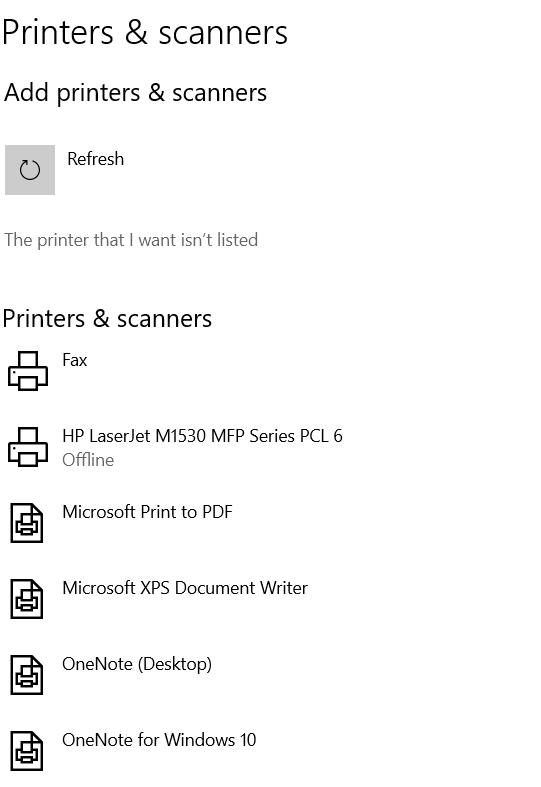
- Choose Add a printer or scanner underneath Add printers & scanners. Pick the printer you wish to use, then Add Device.
- If the printer you require isn’t available, choose ‘The printer I want isn’t listed’
- Choose Select a shared printer by name in the Add printer dialogue box, and then type the main PC’s name and the printer’s shared identifier in the following formats suggested below
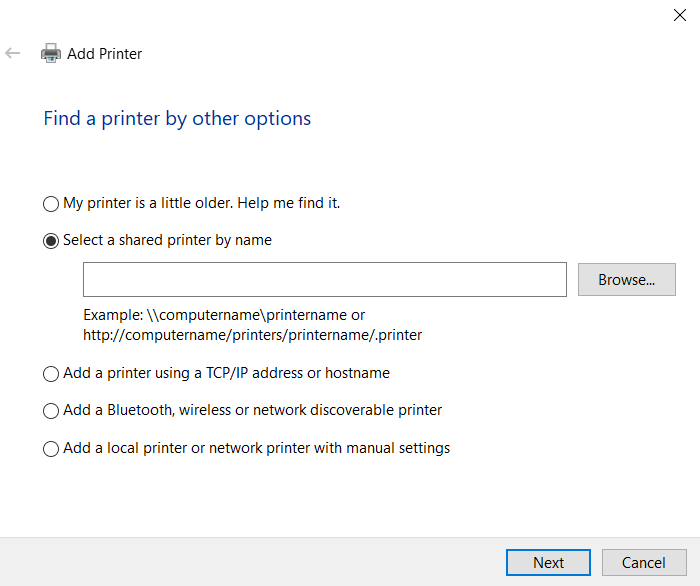
- To finish the setup, click Next when requested to download the printer software
