Here is how you can change the Download location for movies/shows for Netflix on Windows
In 2020, streaming apps are all the rage around us. Netflix, the original streaming giant, is still one of the most used streaming services around the world with millions of users, thanks to their international presence and giant catalog of content, from all around the world.
Netflix is also ahead of its competitors in another area – its presence on almost every platform imaginable. From tv boxes to gaming consoles like Xbox and PS4, to smartphone operating systems and, obviously, PC operating systems like Mac and Windows, Netflix is present everywhere.
Where it’s not, like the Linux operating system, you can easily watch it on a web browser. However, one functionality is missing from the web-based Netflix application – it doesn’t allow you to download your favorite movies and shows to your local machine – meaning you can’t watch it without a working internet collection.
The Netflix Windows application also supports offline streaming for compatible movies and shows, allowing you to watch these later even without an internet connection. We recently covered a guide, going over the process of how you can download movies/shows on Netflix.
One issue we have seen several people face is that, by default, Netflix downloads everything in the C: drive. C: is usually the primary drive used by Windows for all system tasks and it can be an issue if it starts to run out of space, especially with Netflix movies and shows eating up GBs of data when you start to download them. Fortunately, there is a way to change the primary download location for Netflix on Windows.
Here, we will show you how you can change the drive for Netflix on Windows,
Change Netflix Download Location
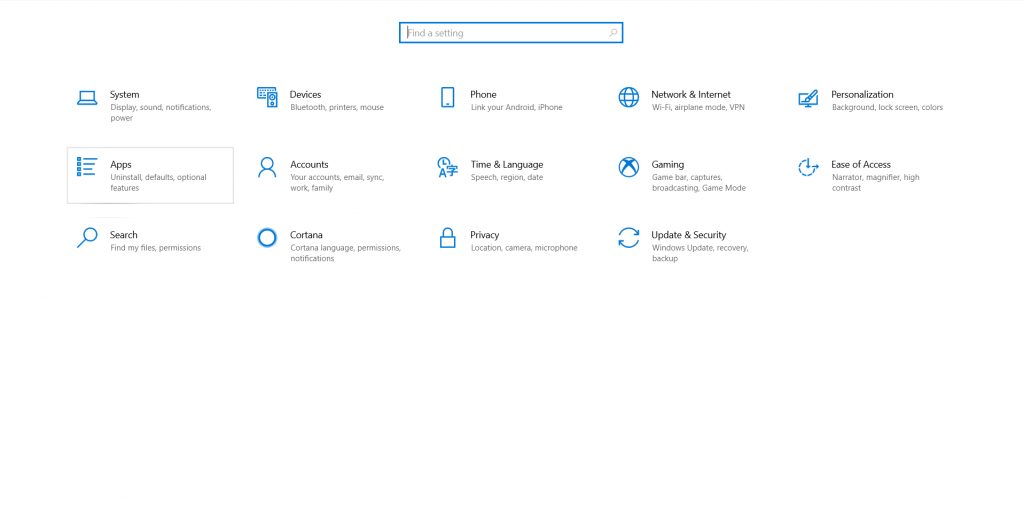
- Open the Settings app on Windows by searching for Settings from the Start menu or pressing Start + I.
- Click on Apps.
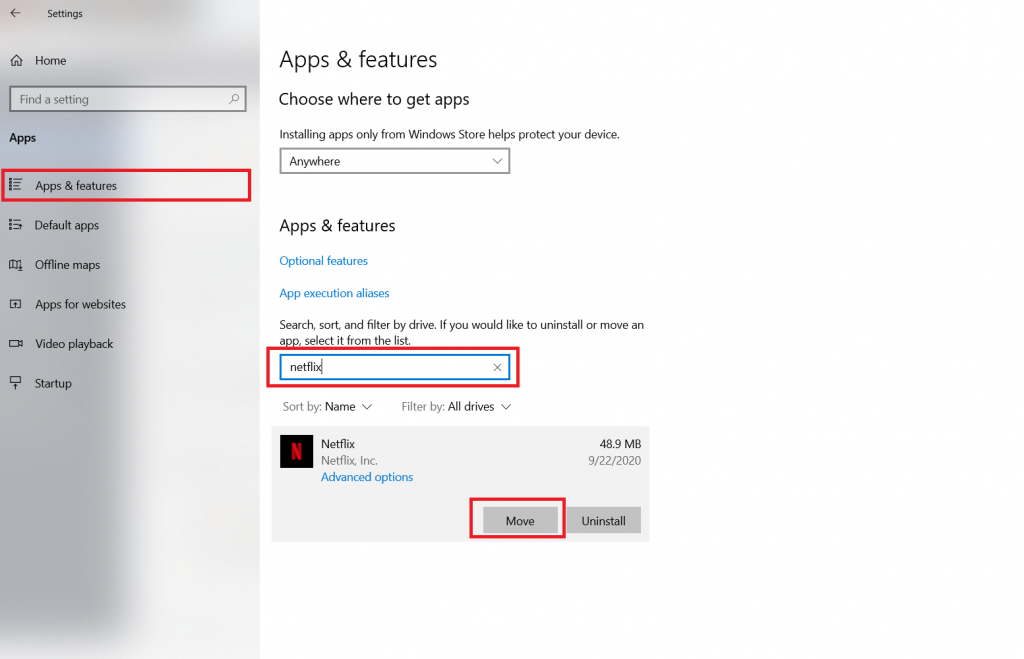
- Click on Apps & features from the left pane.
- In the right pane, under the Apps and features section, search for Netflix or scroll down to find it in the list of apps.
- Click on Move.
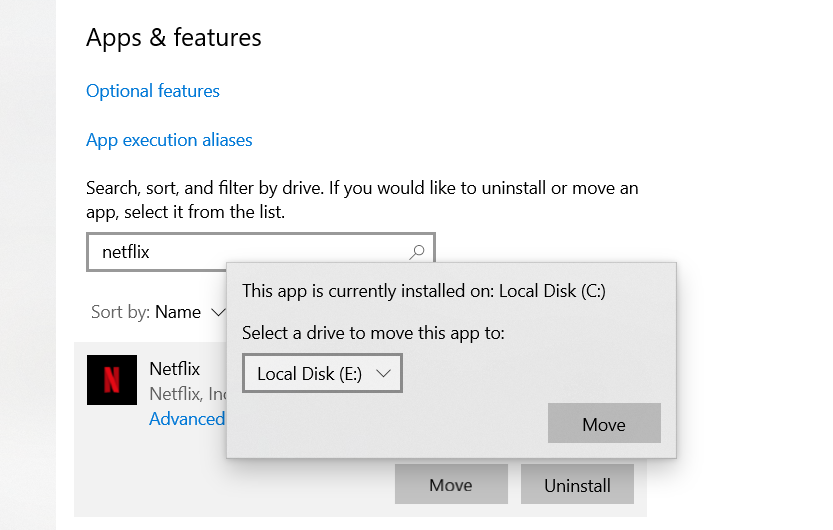
- Under the dropdown box for select a drive to move this app to, click on the drive you want to move Netflix to.
- Click on Move.
That’s it. Windows should automatically take care of everything, including your saved data and downloads, and move it to the newly assigned drive.
