
Here is how to get back the “Open command window here” option back in Windows
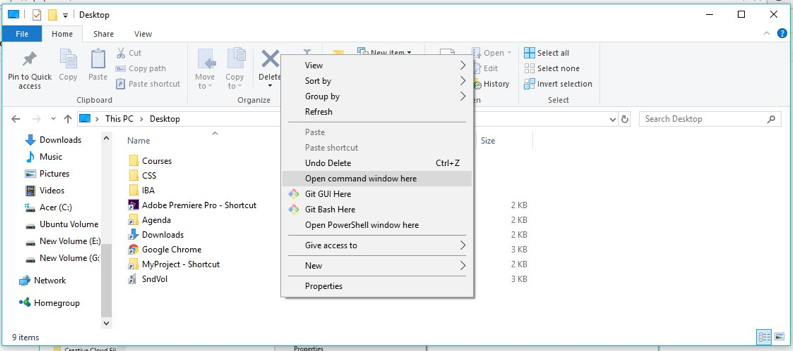
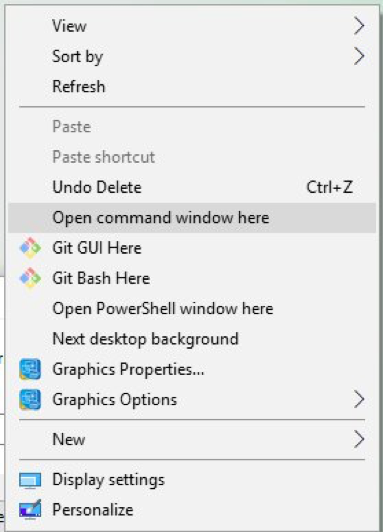 One of the easiest ways to open Command Prompt inside a folder is to simply right-click inside the folder with the Shift key pressed, and you could see “Open Command Prompt Here” option inside the right-click menu. If you can’t see the option there, here is what you need to do to get it back.
The Command Prompt
Command Prompt, or cmd.exe, is a command-line interpreter that allows power users to work with only text-based commands. Implemented through the Win32 console, cmd.exe is the counterpart to command.com, which was the command-line interpreter for DOS and Windows 9x systems.
Microsoft’s Windows operating system may have an incredible GUI (Graphical User Interface) with lots of configuration settings and tools at the user’s disposal, but when it comes to really getting work done, there is no other option than the old-school, black-screen of the Command Prompt.
Since the introduction of PowerShell in 2006, a task automation and configuration management framework with a more powerful command-line interface, Microsoft has been slowly phasing out the old Command Prompt. With the release of the Windows 10 Creators Update this year, even the SHIFT+Right Click menu shows the “Open PowerShell window here” option instead of the Command Prompt option. Luckily, there is still a way to get it back.
How-To Fix It
To get the things back like they used to be and return Command Prompt to all your context Windows, you need to make a change to a value setting stored inside the Windows Registry, a Windows tool that stores low-level configuration settings for most programs and drivers on your computer. Moreover, the change is completely reversible so if you don’t like the new configuration, you can go back in no time at all.
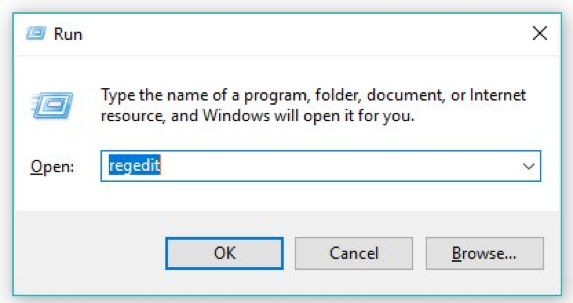
1. Press CTRL + R. Type “regedit” in the little Window that pops open and hit Enter. Windows will ask you if you want to allow this app to make changes to your computer, click on “Yes”.
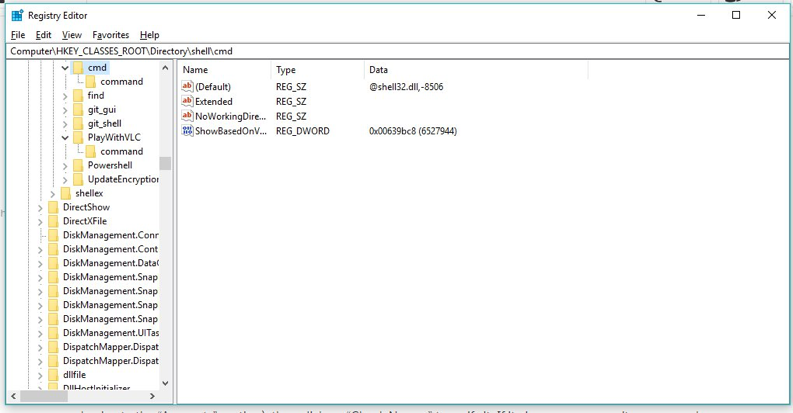
2. At the top of the Registry Editor, you will see an address bar. Simply paste the following address inside it (or navigate to it),
HKEY_CLASSES_ROOT\Directory\shell\cmd
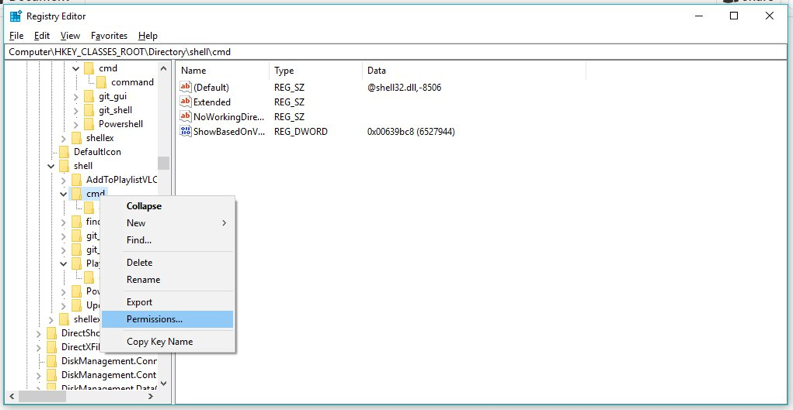
3. On the left side of the Registry Editor window, right click on “cmd”, click on “Permissions”.
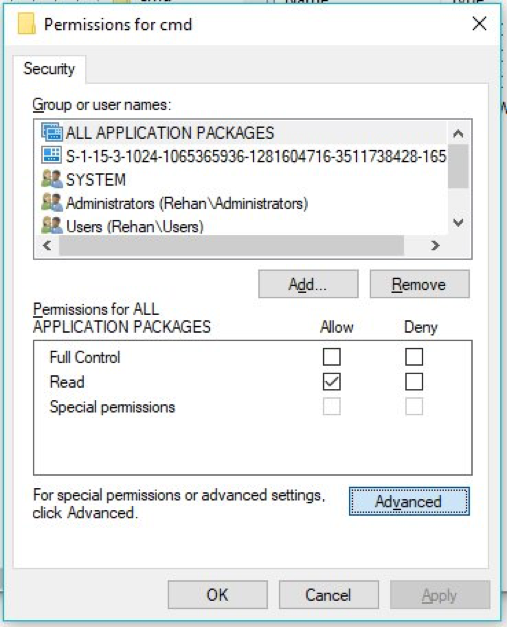
4. Click on “Advanced”.
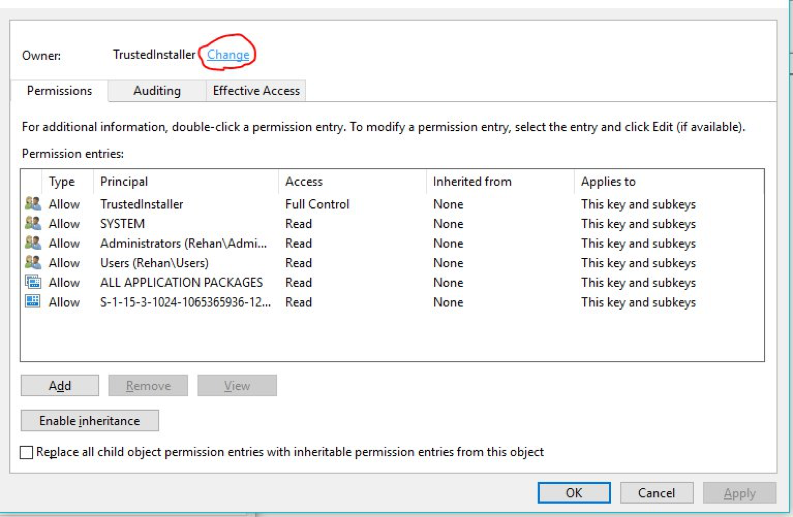
5. Click on the blue-colored “Change” text beside the “Trusted Installer” in the Owner’s section at the very top of the window.
6. Enter the user name or email registered with your PC in the text box that appears (you can check it by going to Settings and going to the “Accounts” section), then click on Check Names to verify it. If it gives you an error, it means you have entered the wrong name.
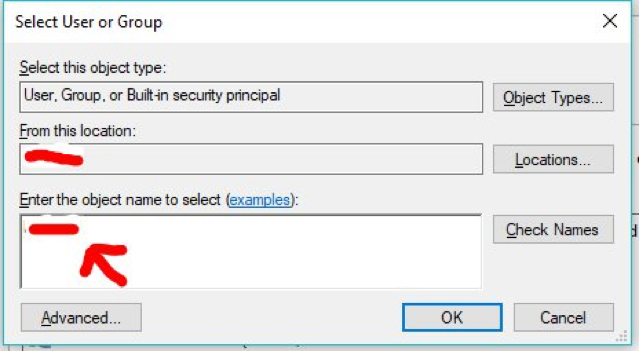
7. Click on OK.
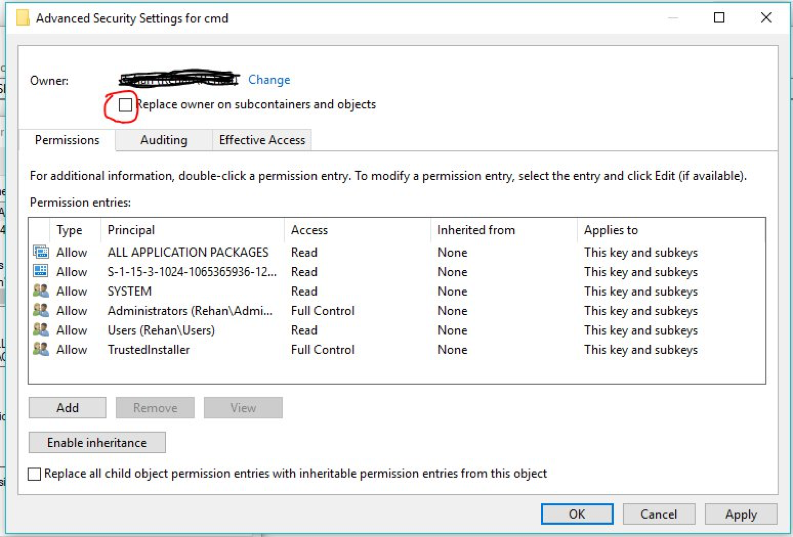
8. Tick the checkbox below the owner’s info (which should now be changed to your account name as shown below) and then hit OK.
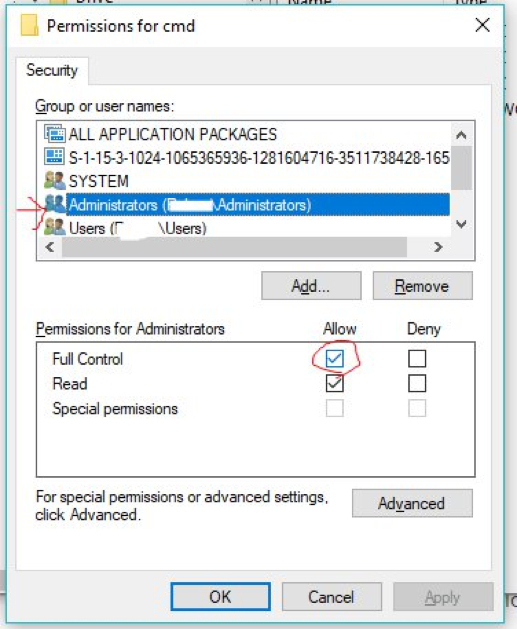
9. In the “Group or user names” section, select the account you just added and then tick the checkbox with “Full Control” next to it, then click OK.
10. Right click on “HideBasedOnVelocityId” in the right side of the video, select Rename.
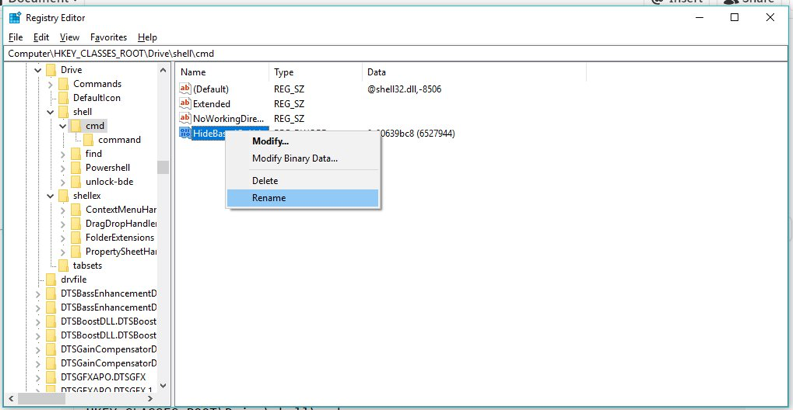
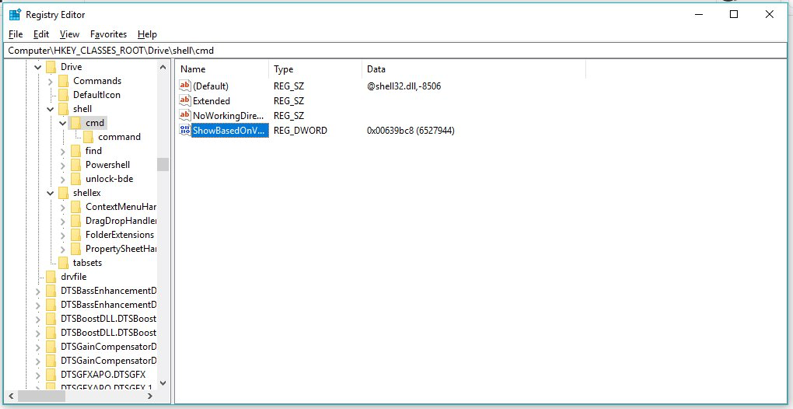
11. Set the new name as “ShowBasedOnVelocityId”.
That’s it. Your command window should be back where it belongs now, in all your context menus around Windows.
Note: If you still can’t see it, you should make the exact same changes to the “HideBasedOnVelocityId” file on two other locations (you will need to repeat steps 3 to 11) for the following two paths,
HKEY_CLASSES_ROOT\Directory\Background\shell\cmd
HKEY_CLASSES_ROOT\Drive\shell\cmd
If, at any time, you feel the need to remove the option, all you need to do is repeat the steps to go back to the configuration settings inside the Windows Registry, and then rename the file by removing the “Show” and changing it to “Hide”.
