
Here are 5 ways you can boot into safe mode in Windows 10
With each version of Windows, Microsoft introduces hordes of new features and new ways of doing things. While some of these features are really helpful and are meant to enhance and improve the way your computer functions, a lot of them also require you to change the way you use your computer.
Some of the features even put in place new restrictions which may or may not annoy you depending on how you use your computer. The restrictions can be a requirement for the new features or can be just put there to stop you from tinkering with your computer more than the company wants you to.
Safe Mode is a special mode in a computer software (specifically system software like an operating system) that allows the program to work in a restricted mode, allowing only essential programs and services to function. A diagnostic mode, it allows a user to narrow down and figure out if a third-party program/service is causing an error or issue. Simply put, it starts Windows in the very basic settings, using a limited set of files and drivers in order to help you troubleshoot problems on your PC.
For older versions of Windows, from Windows 95 to Windows 7, accessing Safe Mode was pretty easy. All you needed to do was press F8 key as the operating system boots and it would take you straight the boot menu from where you could boot into Safe Mode. However, with Windows 8, Microsoft decided to change the way a user can access Safe Mode.
In Windows 10, there are a number of ways you can access the Safe Mode. Here is how you can do it,
Windows Settings App
If you have successfully booted into Windows then you can boot into Safe Mode easily from the Windows Settings app.
- Press START + I to open the Settings app.
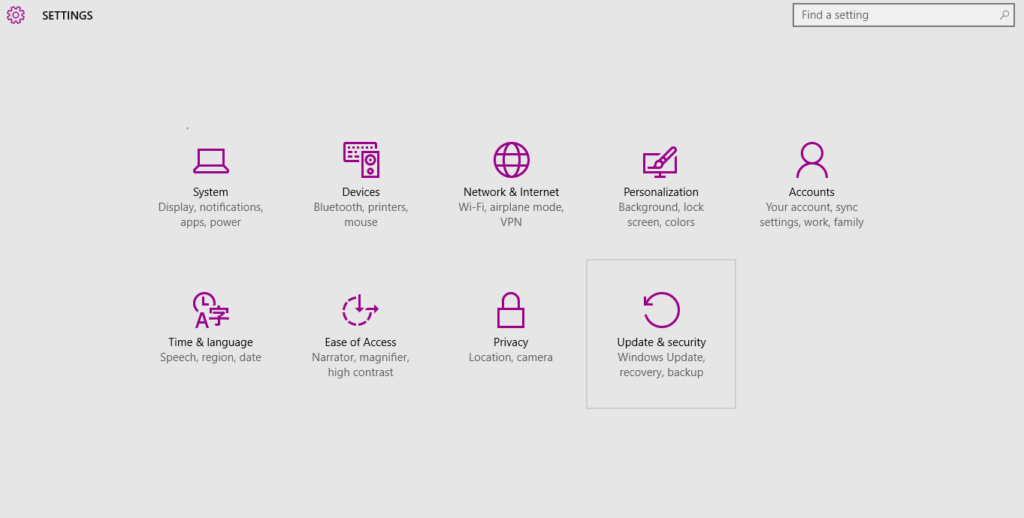
- Click on Update & security and then Recovery.
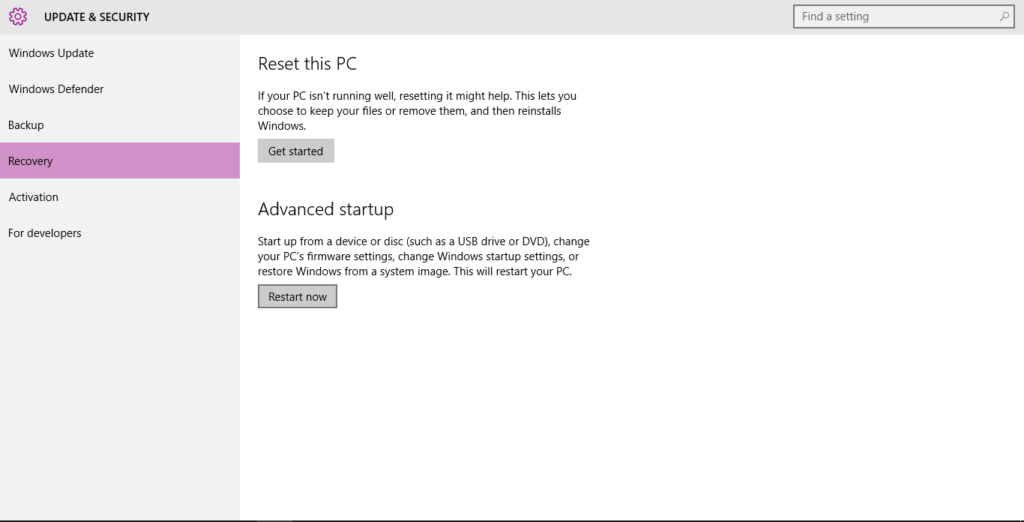
- Under Advanced startup, click on Restart now and then wait for your PC to restart.
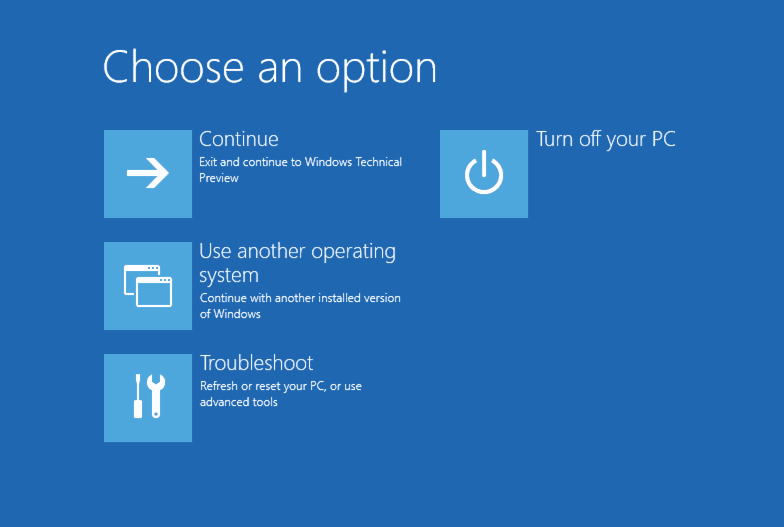
- When you see the Choose an option menu, select Troubleshoot, then Advanced options, then Startup Settings and finally click on Restart.
- Wait for your PC to restart and then when you see the Startup Settings menu, press 4 to boot into Safe Mode, 5 to boot into Safe Mode with Networking enabled, 6 to boot into Safe Mode with Command Prompt enabled.

Windows sign-in Screen
If you can’t sign in to access the Windows Settings app, you can try booting into safe mode directly from the Windows Sign-In screen.
- Click on the Power button.
- Hold down the Shift key and click on Restart.
- When you see the Choose an option menu, select Troubleshoot, then Advanced options, then Startup Settings and finally click on Restart.
- Wait for your PC to restart and then when you see the Startup Settings menu, press 4 to boot into Safe Mode, 5 to boot into Safe Mode with Networking enabled, 6 to boot into Safe Mode with Command Prompt enabled.
Using msconfig.exe
Once booted into Windows, there are multiple ways to boot into Safe Mode. One way is to use the built-in System Configuration tool called ‘msconfig.exe’. Here is how you can do it,
- Press START + R.
- Type in msconfig and press OK.

- In the options window that appears, go to the Boot tab.
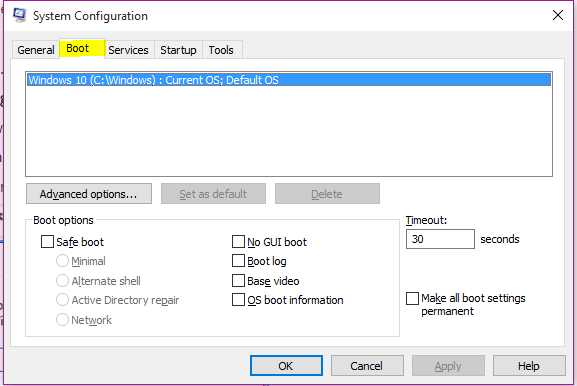
- Check the box next to Safe boot as shown below and select Minimal.
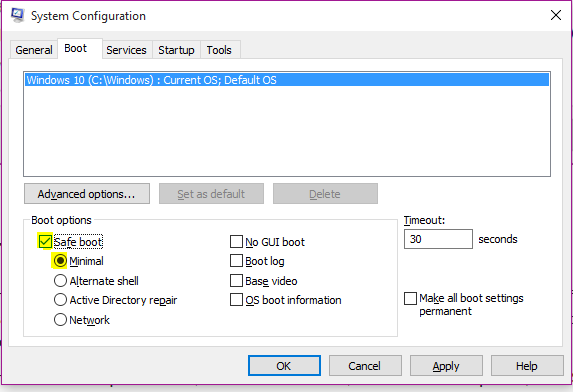
- Now restart your PC.
Interrupt the normal boot process in Windows
If your Windows PC isn’t booting up normally on the first try, just try booting up a couple more times. If Windows 10 fails to bootup three times in a row, it will automatically go to the Automatic Repair mode on the fourth try. From there, you can select Advanced options and then follow the usual sequence of steps to boot into Safe Mode,
- When you see the Choose an option menu, select Troubleshoot, then Advanced options, then Startup Settings and finally click on Restart.
- Wait for your PC to restart and then when you see the Startup Settings menu, press 4 to boot into Safe Mode, 5 to boot into Safe Mode with Networking enabled, 6 to boot into Safe Mode with Command Prompt enabled.
You can also try to interrupt the boot process by pressing F8 or SHIFT + F8 right after you press the power button and the Windows 10 booting process starts. The problem with this is that Microsoft has made certain improvements to Windows in order to make it boot up as fast as it does now. In fact, it boots up so fast that there is a very little time period (or if you have a fast SSD, almost no time) for you to interrupt the boot process and tell Windows to go into the Automatic Repair mode.
You can, however, turn off this fast startup feature. Do note that this will slightly slow down the Windows boot up process. Here is how you can turn off fast startup on a Windows 10 PC,
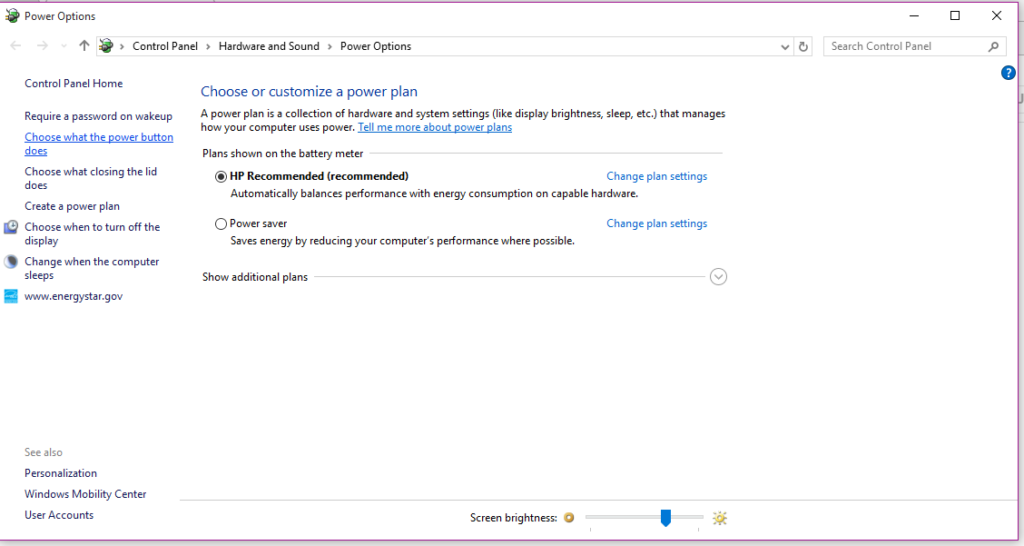
- Press START + X and select Power Options.

- In the left pane, select Choose what the power button does.
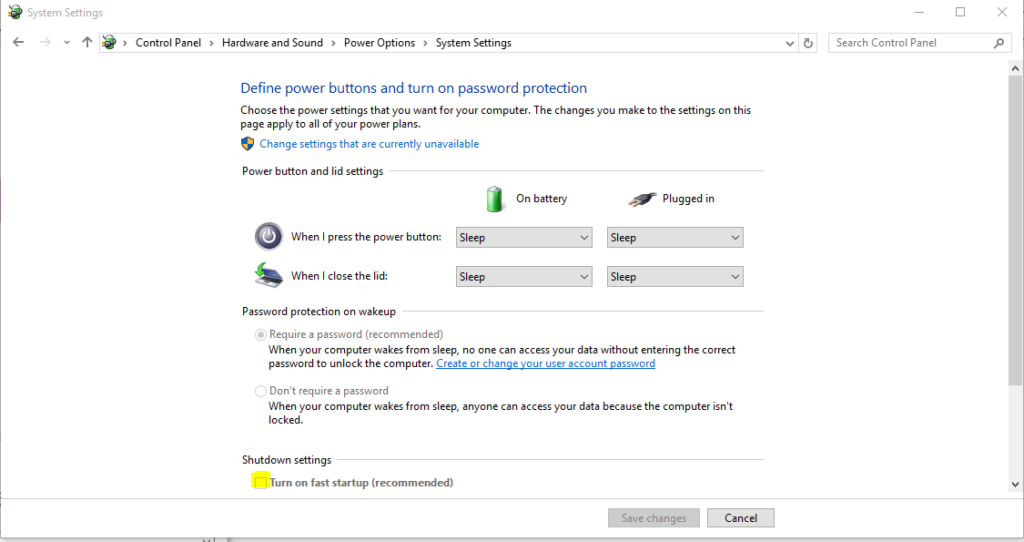
- Scroll down to the Shutdown settings section and check the box beside Turn on fast startup (recommended). If that option is grayed out, just proceed to the next step.
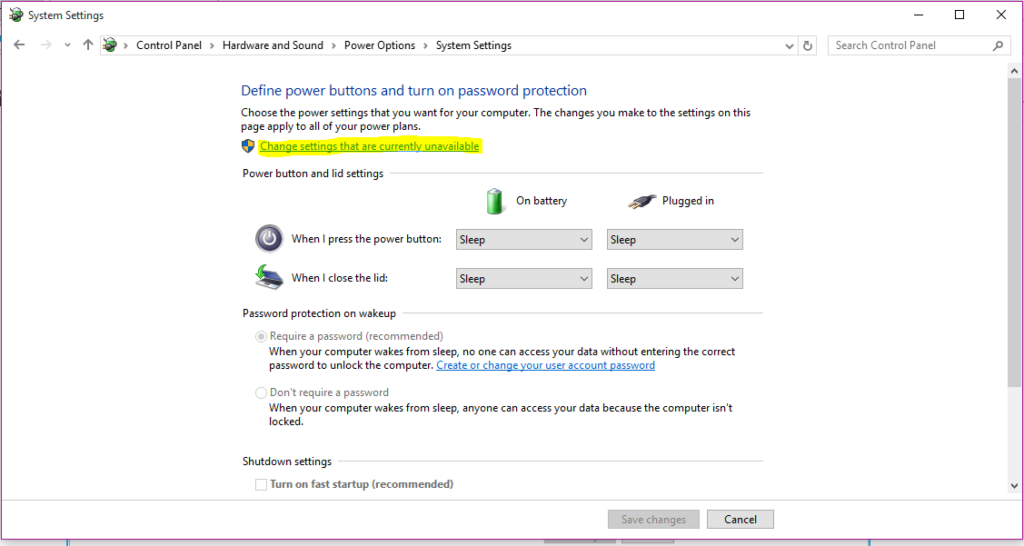
- Click on the blue text at the top that says ‘Change settings that are currently unavailable’. You should now be able to change the settings for fast startup
Now, when you boot up, you should have a couple of seconds during the bootup process where you can press a certain key (usually F8 or SHIFT+F8) to interrupt the boot process. The key varies from manufacturer to manufacturer and you can find out the Boot Menu settings for your PC by Googling it.
Using a Windows 10 Installation Drive
If your PC’s Windows 10 has been corrupted or is too broken to be able to boot into Safe Mode on its own, you can use an external Windows 10 installation drive. You can either use one if you have one lying around or even make a new one.
Once you have a Windows 10 installation drive, here is what you need to do,
- Plug it in your PC, start your PC and boot into the Windows 10 installation drive from the boot menu.
- Follow the setup steps, choose the keyboard and language, press Next.
- Click on Repair your computer.
- Select Troubleshoot, then select Command Prompt.
- In the Command Prompt, write the following text,
bcdedit /set {default} safeboot minimal
Once the command prompt tells you that the operation was completed successfully, just close it and press Continue.
