
Here is how you can Restrict Windows from Installing any particular Device Drivers
Windows is one of the most advanced PC operating systems out there. Not only does it come with comprehensive multi-user support, it also comes with tons of configuration tools to let you easily customize your PC as much as you want to make it work exactly how you want it to.
Some of these nifty little tools include the Group Policy Editor which allows you to govern the policies and configurations that are applied to each user group when they log-in to your PC. Similarly, there is a Windows Registry Editor, which is a powerful tool stores configuration settings for everything from the operating system to other software programs to user preferences, etc.
In this guide, we are going to take a look at the Group Policy Editor and how you can use it to restrict Windows from installing a particular Device Driver. In the past, we have used this feature to disable a faulty laptop keyboard, which is made possible by the feature in Group Policy Editor that allows you to prevent Windows from installing a Device Driver for any Device that is identified by a Device Hardware ID. Here is how you can use it to disable any Device on your PC,
Restrict Windows from Installing Device Drivers using Group Policy Editor
Find the Hardware ID of your Device
To tell the Group Policy Editor which device you want to stop it from installing the driver for, you will first need to find the Hardware ID. You can do it through the Device Manager. Below, we have given an example of how to disable driver installation for a mouse device.
- Press the Start button and search for Device Manager and click on it.
- Scroll down to the Mice and other pointing devices section (or the section for the device you want to disable, like Keyboard, Universal Serial Bus Controllers, etc.) and click on the arrow to reveal the drop-down list of drivers.
- Right-click on the mouse you want to disable for your PC and click on Properties.
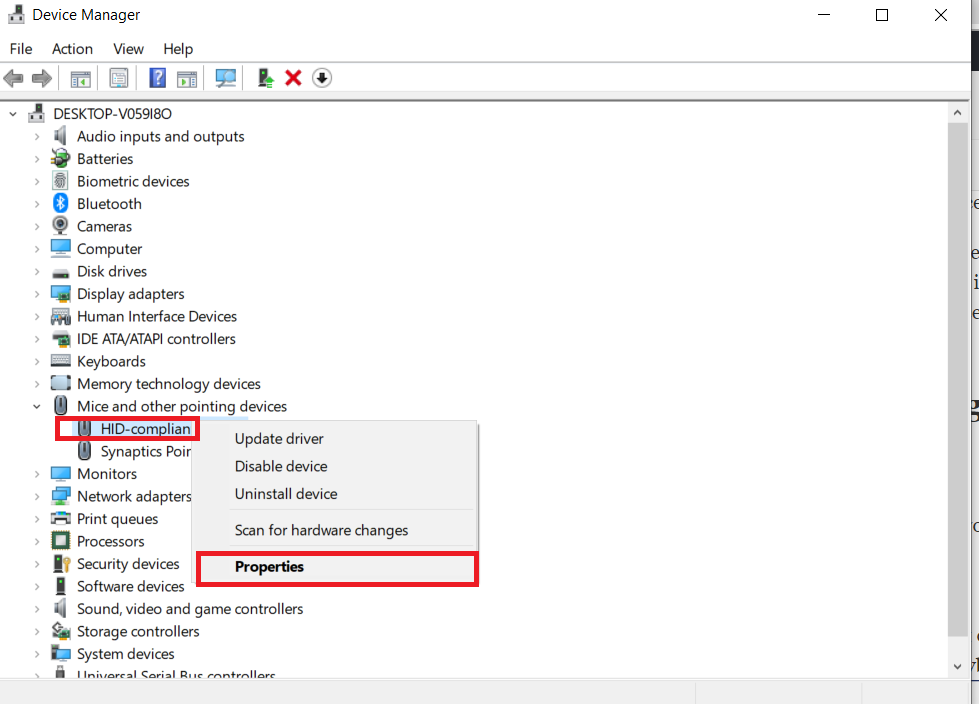
- Go to the Details tab as shown in the screenshot below.
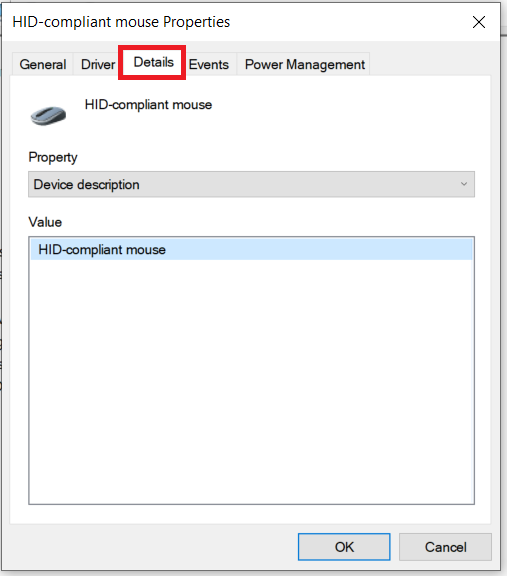
- In the Property box below, select Hardware ID.
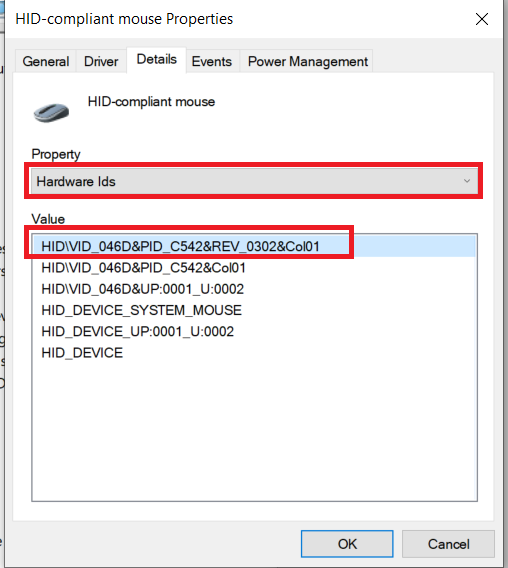
- You will see a list of values below. Copy the top-most value, which is the Hardware ID that refers to your device.
Prevent Windows from Installing Driver for this Device
Next, we will want to disable this device from the Group Policy Editor.
- Press the Start button and search for gpedit.msc and click on it to open the Group Policy Editor.
- In the left pane, go to the following path,
Computer Configuration > Administrative Templates > System > Device Installation > Device Installation Restrictions
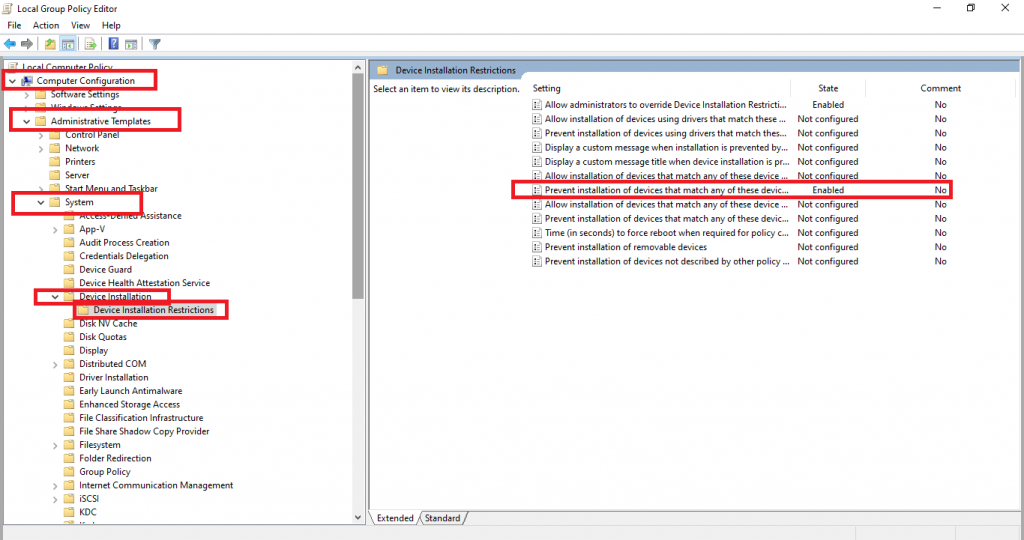
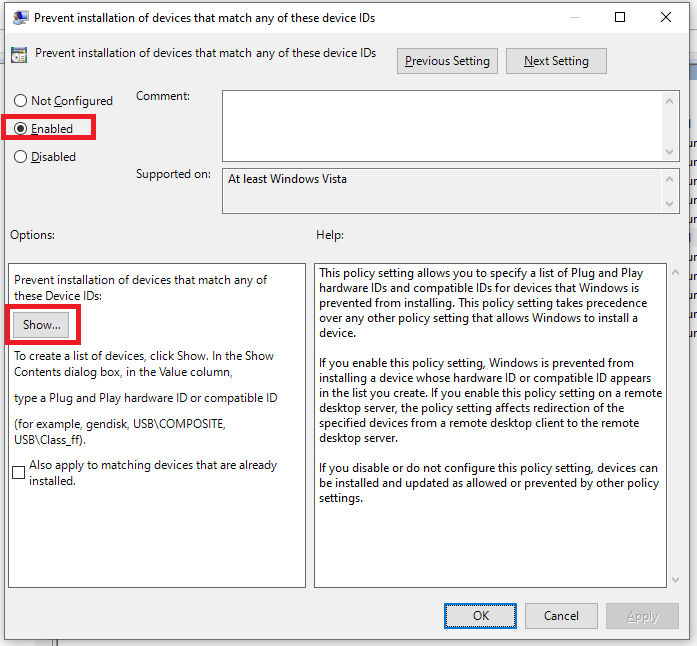
- In the right pane, you will see a list of settings. Find the setting titled “Prevent installation of devices that match any of these device IDs” and double-click on it to edit it.
- Select Enabled and in the Options box below, you will see a button called Show. Click on this.
- Here, enter the Hardware ID you found out earlier and click on OK.
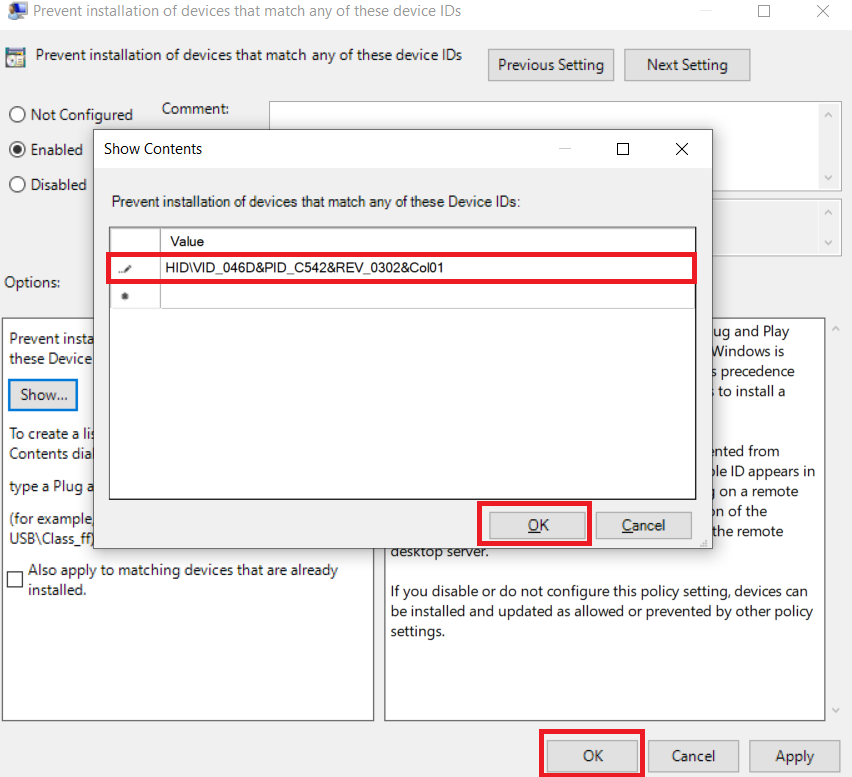
- Click on OK.
Uninstall Device Driver
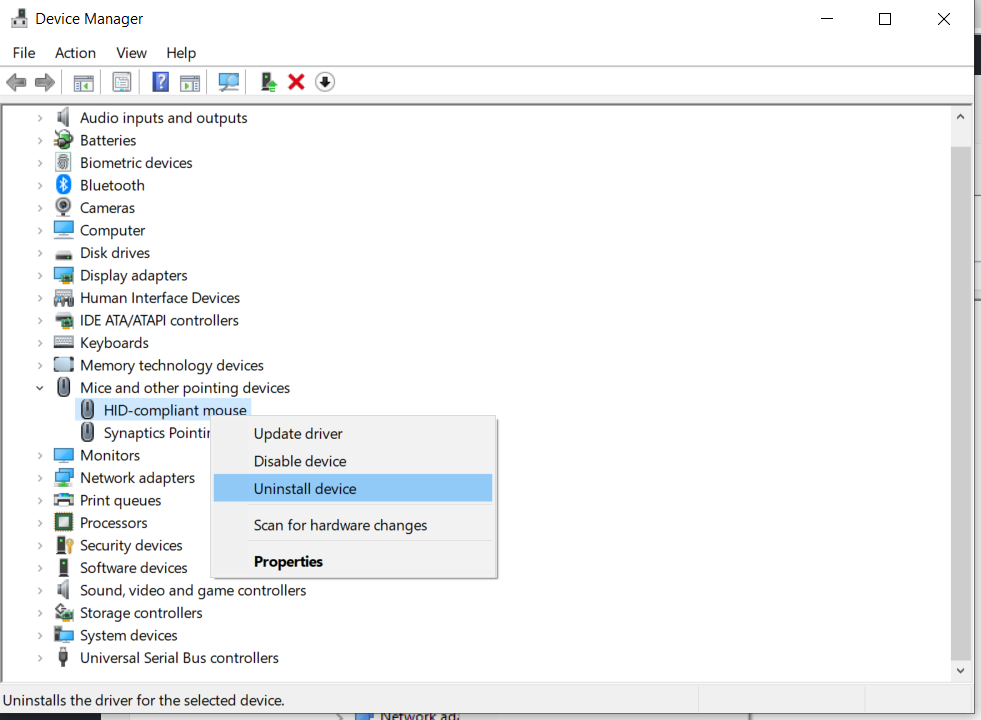
- Go back to the Device Manager (open Device Manager and then go to the Mice and pointing device driver as in the previous steps)
- Press the Start button and search for Device Manager and click on it.
- Scroll down to the Mouse section and click on the arrow to reveal the drop-down list of mouse drivers.
- Right-click on the driver you got the Hardware ID from and click on Uninstall device. For example, in our case, for a mouse driver, you follow this process.
- Click on Uninstall.
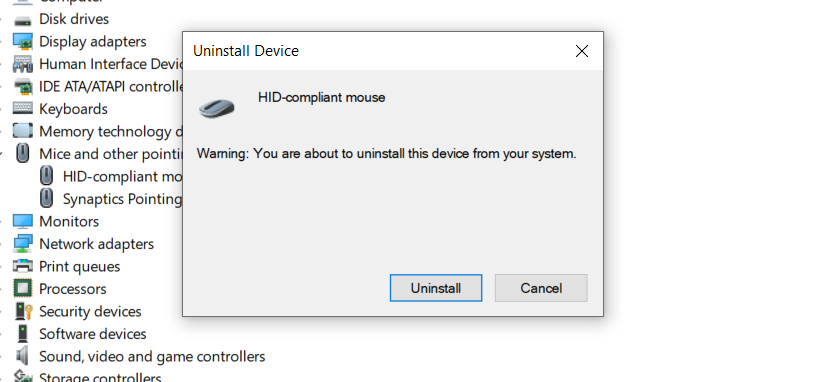
That’s it. Now it will ask you to restart your PC and Windows will make sure to not install the driver for this device as long as this setting is enabled.
If you ever want to revert this, you can open the Group Policy Editor again and remove this ID and/or simply Disable this setting.
