
How to access and use Power Pivot in Microsoft Excel
“Urgent hiring for Business analysts!!”
“Requirements: needs to have expertise on Power Pivot.”
These days, the demand for Business Analysts is increasing exponentially. And despite several alternatives that act as a tool for this profession, the most favored and widely used BA tool is Power Pivot. And this is not primarily because of the optimality or the efficiency of the software that gains such fame. It is because of how easy to use and generic it is, allowing many to enter this solid competitive field known as “Data Analysis.”
Power Pivot can be used by a user who already has Microsoft Excel installed and can simply use Power Pivot as an “add-in” to the software, not requiring rigorous downloading procedures or allocation of memory resources. Since Excel is the norm in most professional settings, Power Pivot has grown immensely.
So how to access Power Pivot?
Power Pivot is a data modeling and analysis feature in Microsoft Excel that allows you to analyze large amounts of data and create pivot tables and charts. So firstly, the user must have Microsoft Excel downloaded to their system. Now to add Power Pivot as an add-in in Excel, you can follow these steps:
- Open Microsoft Excel.
- Click on the “File” menu located in the top-left corner of the Excel window.
- Click on “Options”

- In the Excel Options dialog box, select “Add-Ins” from the left-hand menu.
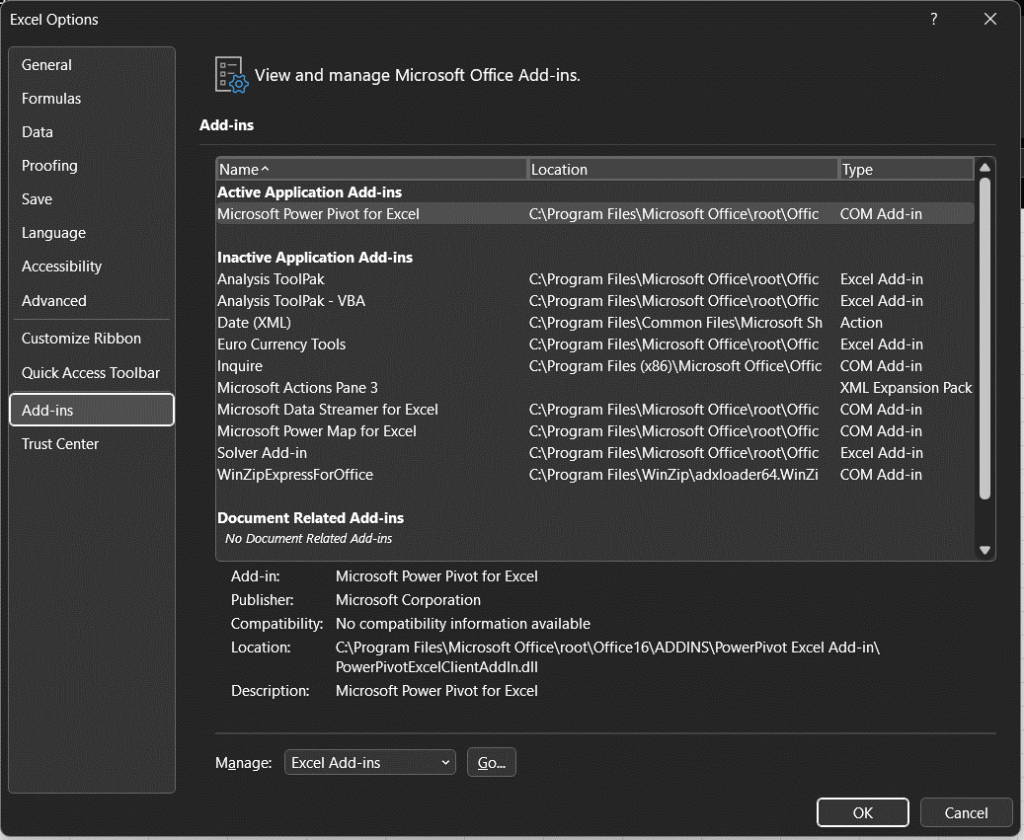
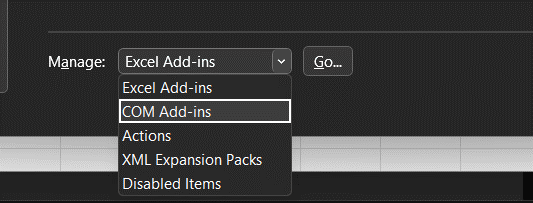
- In the “Manage” drop-down list, select “COM Add-ins” and click “Go”
- In the COM Add-ins dialog box, check the box next to “Microsoft Office Power Pivot for Excel”

- Click “OK”
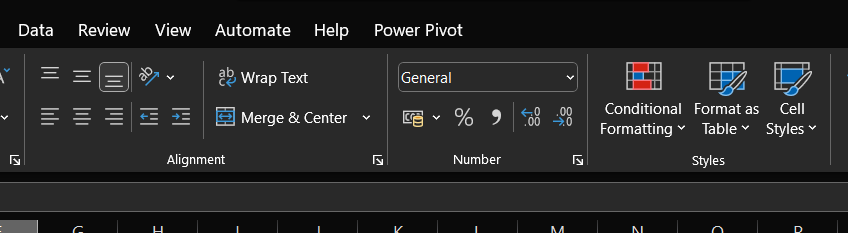
You may need to close and reopen Excel for the changes to take effect. Once you have done this, you will see the Power Pivot tab on the ribbon, allowing you to create and manage data models, tables, and charts.
In some cases, however, you might face the issue that there is no option labeled as “Microsoft Office Power Pivot for Excel” in the COM add-ins subsection.
This can be because Power Pivot is only available in some versions of Excel, only in Excel 2010 and later. Power Pivot is a standalone add-in for Excel 2010, 2013, and 2016. You may need to download and install it separately if it still needs to be installed.
How to check which Excel version you are using?
To check which version of Microsoft Excel you have, you can follow these steps:
- Open Microsoft Excel.
- Click on the “File” menu in the Excel window’s top-left corner.
- Click on “Account” or “Help” (depending on the version)
- Look for “About Excel” or “Office Account”
- A window will open displaying the version number of your installed Excel.
You can also check for updates or manage your account settings on this window.
Another way to check the version is:
- Click the “Start” button and type “Excel” in the search bar.
- Right-click on the Excel program and select “Properties” from the context menu.
- In the Properties window, you will find the version number of Excel under the “General” tab.
You can also check the version of Microsoft Office by following the above steps and looking at the version number of the Office application you have installed.
How to determine year through “version-number”:
To determine the year of a specific version of Microsoft Excel, you can check the version number and compare it to the release year of that version.
Here are some common version numbers and their corresponding release years:
Excel 2016: Version 16.0
Excel 2013: Version 15.0
Excel 2010: Version 14.0
Excel 2007: Version 12.0
Excel 2003: Version 11.0
You can check the version number and then match the version number to the release year.
Keep in mind that Microsoft releases updates and service packs for their software, which can change the version number. So, the version number you see doesn’t match the release year.
It’s also worth noting that the version numbers may vary depending on the platform, such as Windows or Mac, and also if you have Office 365 subscription or perpetual license.
If you are using Excel of 2010 and above and still face this same issue. You will need to download and install it separately if it still needs to be installed.
To download and install the Power Pivot add-in for Excel, you can follow these steps:
- Go to the Microsoft Download Center website.
- Search for “Power Pivot for Excel”
- Select the version that corresponds to your version of Excel and your operating system (Windows or Mac)
- Click on the “Download” button to download the installer file.
- Once the download is complete, double-click on the installer file to begin the installation process.
- Follow the prompts to complete the installation process.
Once the installation is complete, you must activate the Power Pivot add-in in Excel.
Now you can access Power Pivot through Excel hassle-free.
