How to share files over Ethernet/LAN
Nowadays wifi speed has increased drastically, and small pen drives with large storage are also available to us yet sometimes sharing files of excessively large size can become a hassle to share between multiple PCs, sometimes the connections get disconnected which disrupts the file sharing service or you would have to wipe the pen drive to avail its full space. To deal with this hassle we have the option to share the files over LAN or ethernet cable. The only dependency for this option is that the PCs between which the sharing is going to take place are connected to the same network via a LAN cable or we can simply connect both the PC to each other via LAN.
Below are the steps we would have to take to set up our transfer mechanism between the PCs via LAN or Ethernet.
Requirements:
You would require an ethernet cable.
Two PCs running windows.
Step 1:
Get a LAN cable or in other words a cat 5 cable and connect its one end to the first pc and the second end to the second pc.
Step 2:
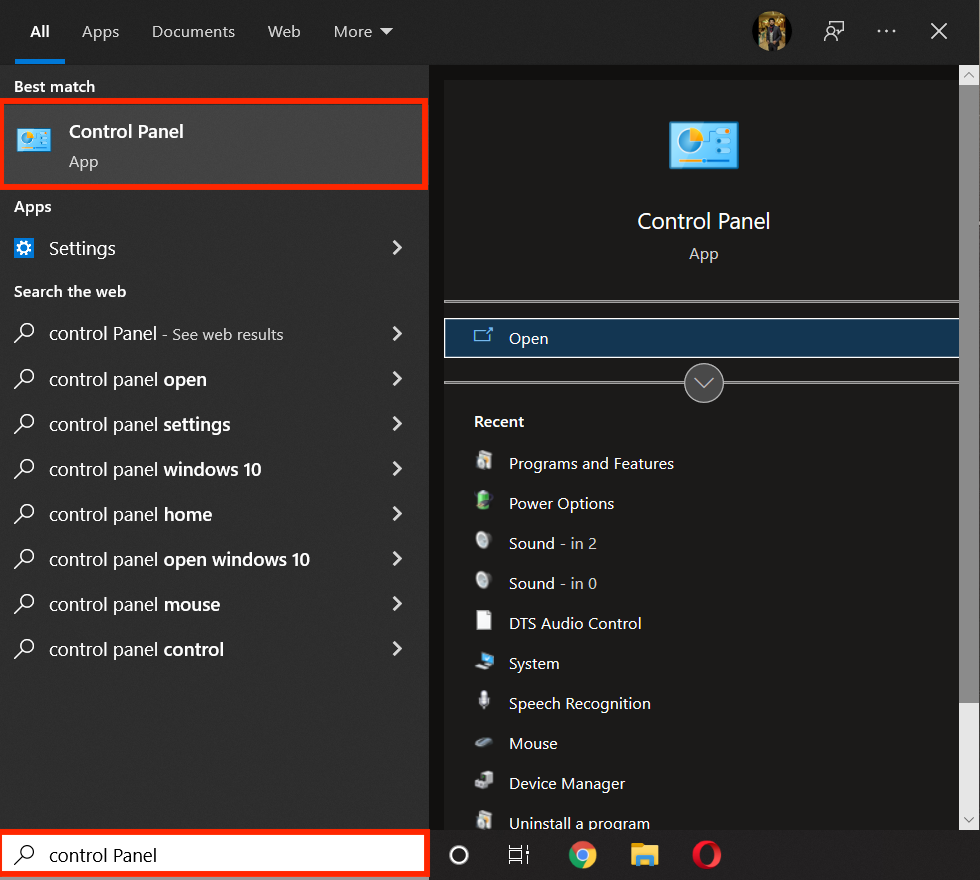
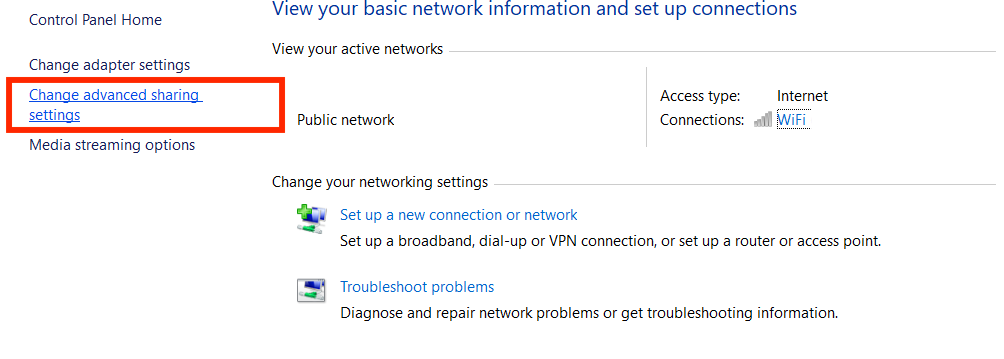
After connecting both pc, enable network sharing on both pc by opening the control panel from either start menu, or simply search control panel in the search bar.
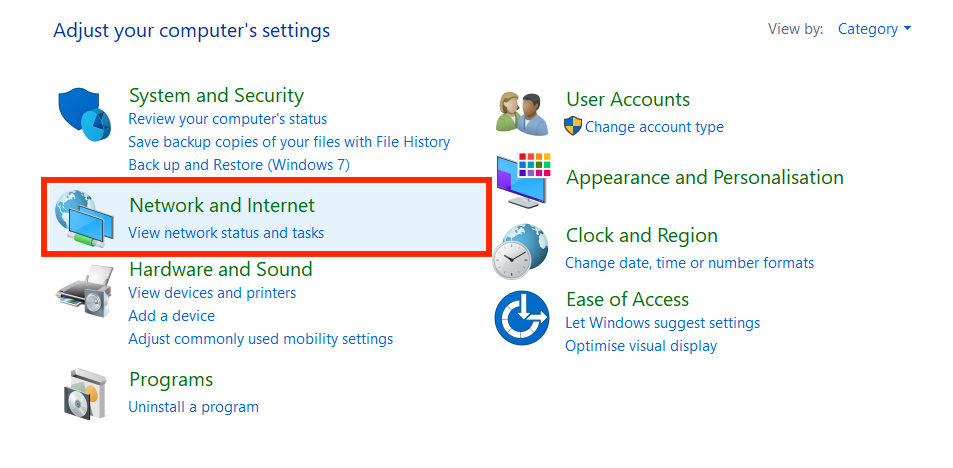
Then go to network and internet.
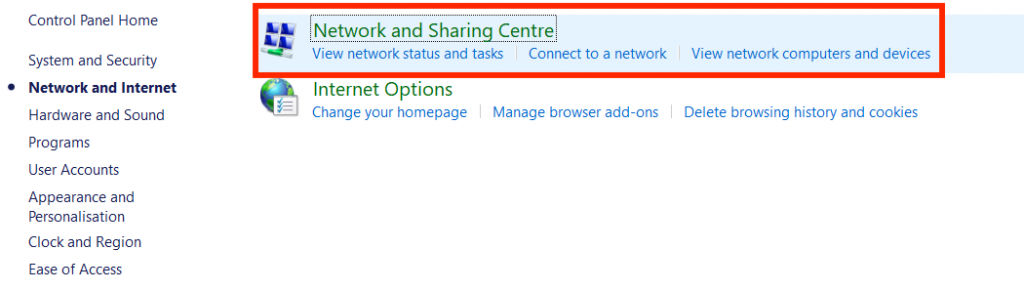
Now select Network and Sharing Center
On the left side you’ll see some options, select change advanced sharing setting
In this menu you will see three networks, expand the all network option.
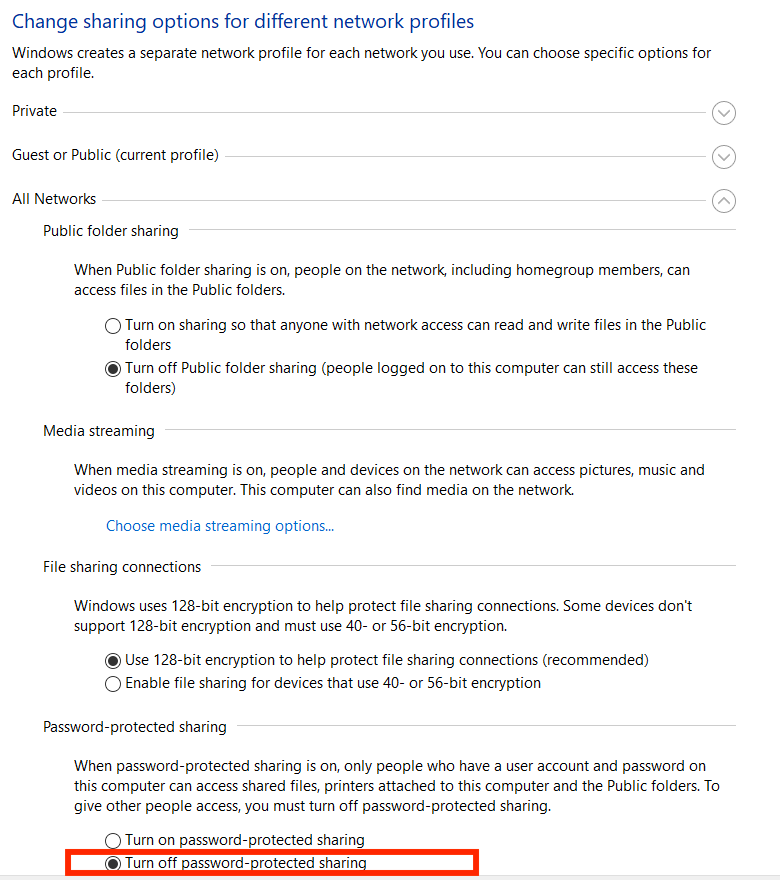 Here, we will be enabling public sharing so that files of both PCs are accessible to both PCs. keep the default options selected, just make sure Turn off password protected sharing is checked. This will enable you to access the file without having to provide credentials. Only check this option if you are sharing files with the people you trust otherwise check the option turn on password protected sharing which we will not be doing in our case.
Step 3:
Now we have to set up the static ip for both pc to bring them on the same network.
To set this up, go to the control panel and go to the Network and Sharing center by following the steps mentioned above.
In this window, on the right side you’ll see the connections as ethernet, as both PCs are connected to each other via the Ethernet cable. Click on it. It will open a new menu.
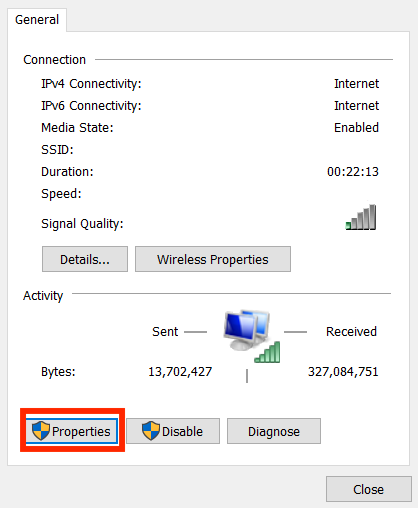 Click on properties.
A pop-up will appear, here select internet protocol version 4 (tcp/IPv4).
 Now click on properties. A new menu will appear.
In this menu we will be configuring the IPs of both PCs.
 For computer 1- type in the following values
— IP address: 192.168.1.1
— Subnet mask : 225.225.225.0
— Default gateway: 192.168.1.2
You can type any Class A or B ip but to keep it simple and easy, you can use the values mentioned here.
For computer-2
— IP Address : 192.168.1.2
— Subnet mask : 225.225.225.0
— Default gateway : 192.168.1.1
Simple type in the above values and leave the rest as is.
Now open the file explorer and on left side you’ll see network tab, double click on it.
If every step has been done properly and the setup is successful then we will see both the pcs appearing in this tab.
To make file sharing even easier, we can set up a shared folder on both PCs giving access to the other, and simply copy-paste the files we want to share in the folder. We can do this by going to the desktop Right click anywhere and select create a new folder Name the folder as you desire and then right click on the folder and select the give access to option, click on Specific people
A new menu will appear showing all the users, just select everyone.
Click on share, a new window will appear showing you the destination of the folder. Simply click done. And you are done.
Now simply share files by going to the file explorer and selecting the network option on the left side where both pc names are visible. Go into any pc by clicking on it and you will see the folder you have set up previously for sharing.
