
Here is how you can set Program Affinity in Windows to Start a Program with a Specific CPU core
Windows is an advanced operating system with tons of hidden features that the common user usually doesn’t even know about. However, if you are a power user who wants to know about the features that will allow you to use your PC to its fullest, then you need to know about program affinity in windows, what it is, and how you can use it.
Most PCs today come with multi-core processors, allowing them to process faster by running different processes on different cores. This significantly improves performance. Usually, Windows is pretty good at figuring out which cores to use and how to execute processes in the fastest and most effective way possible.
However, it has also built options to allow you to choose for yourself, which application to run on which CPU. This can be configured through an affinity configuration, which tells Windows exactly which CPU to run the application on. Here is how you can do it,
Set Program Affinity through Windows Task Manager
- Open the Windows Task Manager. Press Windows Key + X and choose Task Manager.
- Go to the Details tab.
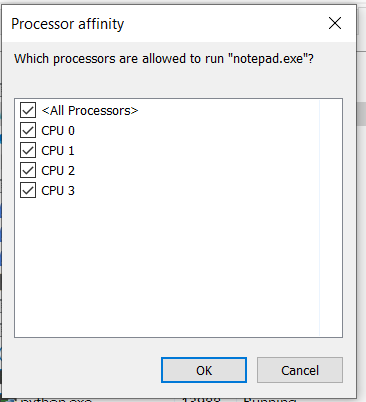
- Here, you will see a list of processes that are currently running on your PC. For example, we will be setting affinity for Notepad so we will search for it in this list. (Most modern applications do have multiple processes and each of those process can run on different CPUs).
- Right-click on it and click on Set affinity.

- It will show you a list of CPUs available on your machine. You can just select the CPUs you want to allow your application to run on and press OK.
That’s it. This feature is especially handy in case you are doing some long-term, performance-intensive work and you want to restrict your machine to only one/two CPUs so you can continue your work on the side without your PC overheating.
