
Here is how you can secure your Windows 10 PC in 2020
Microsoft Windows is an operating system that has been in our lives since a very long time. We all remember using Windows XP, Windows Vista, Windows 7, Windows 8 and Windows 8.1. Although all of these operating systems for your personal computers, laptops, and tablets were amazing in their sense, we can not deny that all of them had some serious security threats. A non-technical individual might be thinking to themselves that Windows 10 is safe and secure but this could not be farther than the truth.
Since it’s release on July 29th’ 2015, Windows 10 has been exposed to a lot of serious threats. Just recently, A U.S. Government official took to his twitter account and posted a statement that warned approximately 900 Million users across the globe. Another scandal was when the notorious hacker group ‘Platinum’ had developed a malware that could hide in plain sight in Windows 10.
You get the idea now, you should not trust Windows 10 with all of your important data. With that being said, we will try our best to present to you some ideas through which you can secure your data on your computers and other devices.
Do not blindly trust the defaults
You heard that right, Do not trust the default settings in Windows 10. In fact, change those settings as soon as you can.
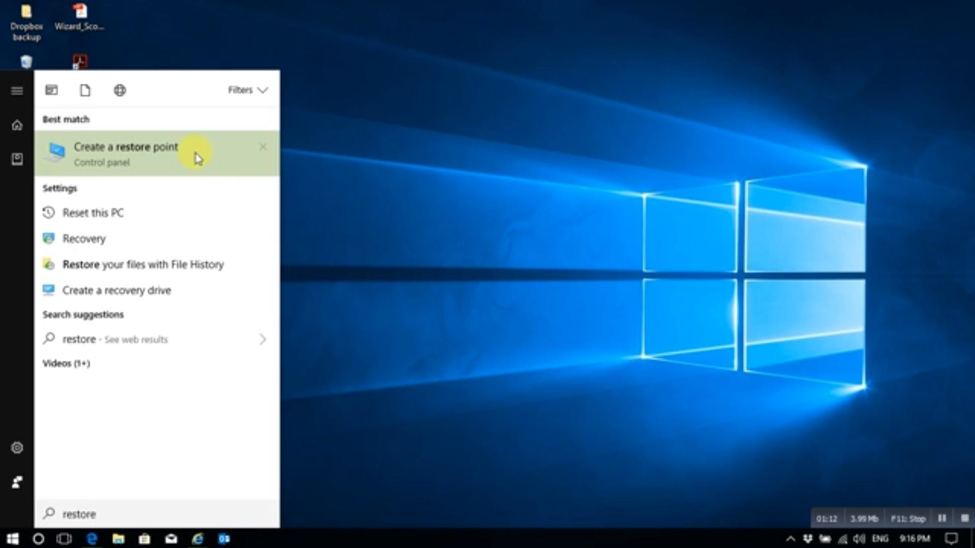
Start by creating a Save Point:
A Save Point needs to be enabled manually and is the perfect way to go if your device ever starts to act a bit weird for your liking. You can simply create a Save Point using the instructions below and if you think that your device is acting weird, you can simply restore your Windows to the time of the Save Point.
- Tap on the Windows logo present at the bottom left of the Taskbar. Type Restore in the search bar and you will see will see an option ‘Create a Restore point’. Click on it
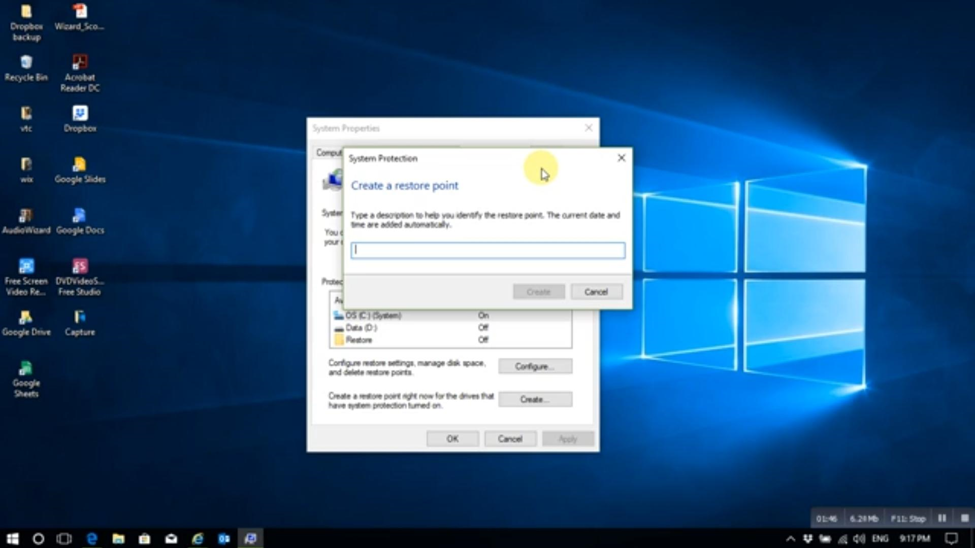
 2. Afterwards, click on the option ‘Create’. Then name your customized Save Point. *Naming it by the date can be helpful*
Kill the Bloatware:
Whether you have freshly installed Windows 10 or you have updated from Windows 7 or Windows 8, you are bound to get Bloatware. Those unwanted applications that take up too much space but in essence are of absolutely no use to you are called ‘Bloatware’. Deleting these unwanted applications is not as easy as you think. Thankfully other methods are available to completely erase these applications from your device.
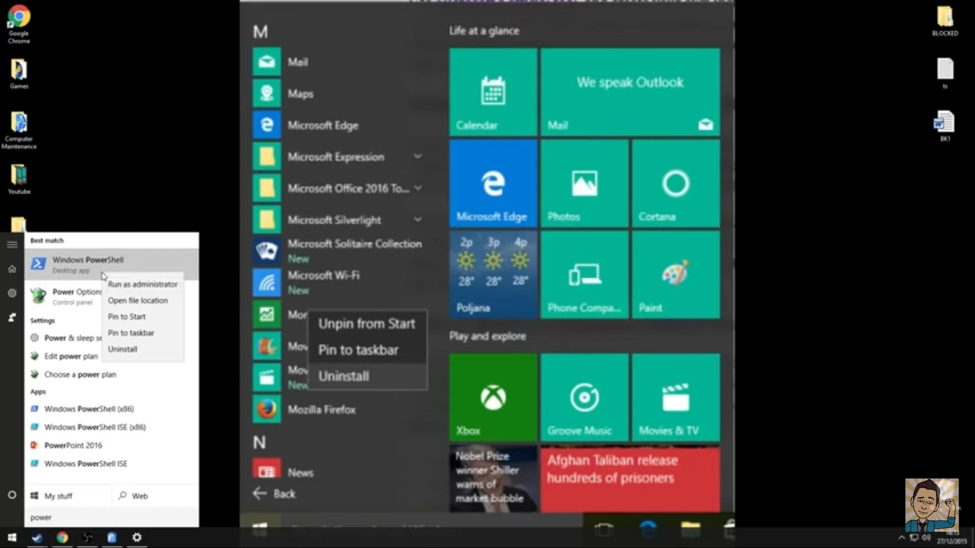
- Search for ‘PowerShell’ on your search bar. Left-click and choose the option ‘Run as Administrator’
- Use the link https://pastebin.com/2L6VNUyT to get all the required commands to remove Bloatware from your device
- Copy and Paste the commands as per your wish in the Administrator box
- It will probably take a few seconds, possibly minutes for this command to be successfully carried out.
Enable Locals only
Signing in to Windows 10 means you will be automatically signed in from a Microsoft Account instead of a Local Account. By default, it means that all the devices you are using are going to be conveniently synced. This can be a huge problem. Let’s assume that one of your devices was corrupted or compromised then it means putting all of your personal information and useful data under risk.
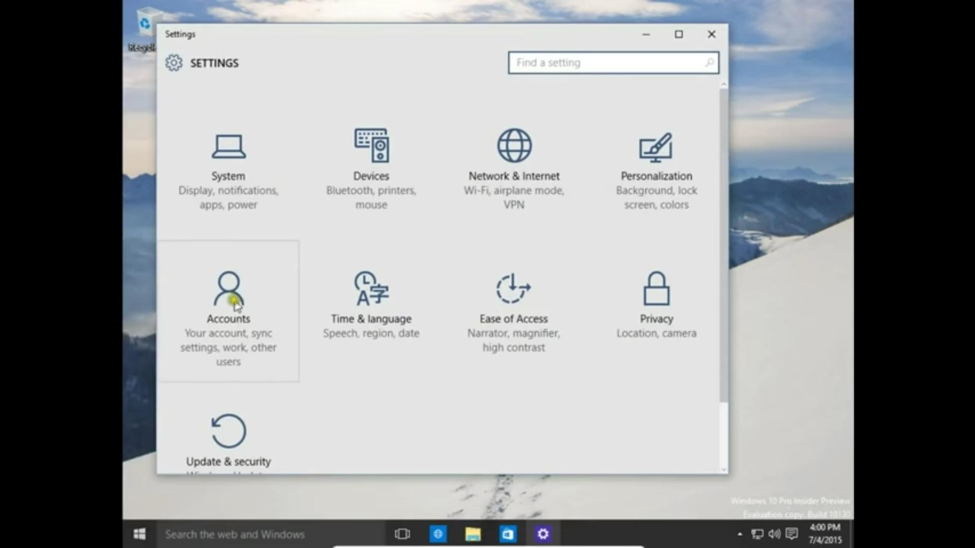
- Click on the ‘Windows’ icon present at the bottom left corner of the task bar
- Then look for the ‘Settings’ option
- After opening Settings you will see an option of ‘Accounts’
- After pressing on Accounts, you will be able to see your default Microsoft Account. Press the option below it to continue

- Enter your password to continue and enable the local account.
Download a Reliable Antivirus
You might be thinking that the Windows Defender can be a really good option to choose as an Antivirus but that is not always the case. There are hundreds and thousands of reliable Antiviruses available throughout the internet.
You can choose from options such as Bitdefender Antivirus Free Edition or if you are up for subscribing Norton Security 360 Deluxe can be a valuable option.
To install Bitdefender 2019, your system requires at least,
- 2 GB RAM
- 2 GB Free Space
How to Install Bitdefender Antivirus?
- Access your central account by typing Centralbitdefender.com on the web
- Press Sign-in if you have an account or create a new account for free
- After your account has been created, enter your email credentials and your password
- Select My Devices
- Then click on Install Protection
- Choose the option Install Protect on this device, A file will start downloading
- Run the file
