
How to Optimize your Windows 10 PC for Gaming
The good thing about owning a PC is that it is more than just a workstation or a media consumption device. If you know what you’re doing, you can use it to curb your thirst for a number of things – be it developing complex software, editing or processing music or movies, mining cryptocurrency or even use it as your primary gaming machine.
While a lot of people prefer dedicated gaming consoles like Microsoft’s Xbox or Sony’s PlayStation for their gaming needs, a big fraction of gaming fans around the world that still consider Windows PCs as the holy grail of gaming.
Having your own PC for gaming gives you a number of advantages – it gives you the ability to customize its specifications as you see fit, a luxury that is absent from the two most popular gaming consoles present in the market today. This means you can play some games on the most advanced settings and get the best graphics quality. Not only that, it also allows you to tweak games by playing around with their settings using different mods, one of the biggest allures of the GTA franchise.
However, since Windows is a general purpose Operating System, its default settings are tuned to be used best by an ordinary user. Gaming on a PC means extracting every ounce of performance the PC can offer and if your operating system isn’t tweaked to be used accordingly, it might not give you the best performance it can give, and you might face several issues — from laggy performance and dropped frames to being unable to play high-quality games at your preferred frame rate and level of graphics detail.
Here is how you can tweak settings in Windows to optimize its performance according to your gaming needs and make it the perfect gaming machine,
1. Clearing Temporary Files
A lot of programs on your computer tend to create temporary files for various processes and tasks. However, not all of them remember (or get the chance) to clear out the trash. With time, these temporary (and mostly useless) files tend to gather up and hog your system’s resources. It is better to keep clearing them from time to time to make sure your storage isn’t being taken up by useless files.
Here is how you can do it,
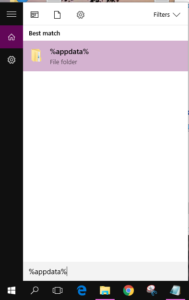
- Press START + Q to access the Windows search bar and type,
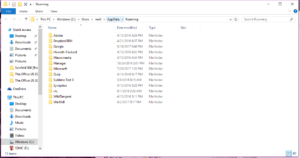
%appdata% - Click on the search result and then click on AppData in the address bar at the top.
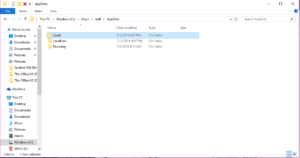
- Click on the folder called Local and then click on the Temp folder.

- Now select all the files using CTRL + A and press the Delete button on your Keyboard (or right-click anywhere and select Delete). It might ask you for permission. If yes, click Continue.


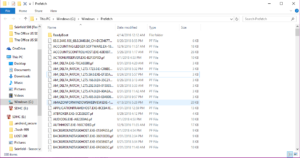
- Press START + R and then type prefetch, then press OK.

- Select all by pressing CTRL + A and press the Delete button on your Keyboard (or right-click anywhere and select Delete). It might ask you for permission. If yes, click Continue.
This only clears out the data that apps have saved in the App Data folder. There are still a lot of temporary and useless files on your disk that you need to remove.
- Open up This PC (or what previously used to be My Computer).
- Now right-click on any disk on your drive and click on Properties.

- Click on the Disk Cleanup option.
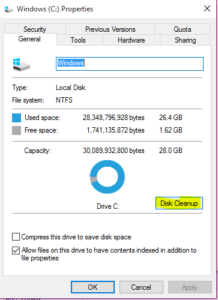
- Select all the checkboxes under Files to delete and then press OK.
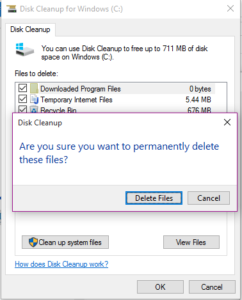
- Click on Delete Files.
Repeat this process for every partition on your disk drive.
2. Removing Drive System Errors
If you have an HDD, you can also run a system tool to check if there are any system errors on your drive.
- Open up This PC (or what previously used to be My Computer).
- Now right-click on any disk on your drive and click on Properties.
- Click on the Tools tab and then click on Check.
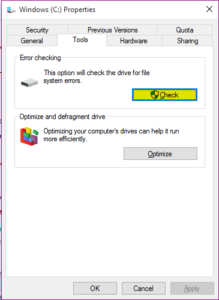
- If there are already known errors, Windows will notify you. Otherwise, click on Scan Drive to run a scan.
- If there are any system errors, it will show you and ask you if you want to fix them.
Repeat this process for every partition on your disk drive.
3. Optimizing System Startup
Windows has a specific startup routine, where it starts certain services and programs it thinks are essential to an average computer user. You need to change it and tell your operating system to stop starting services that aren’t relevant to you.
Here is how you can do it,
- Press START + R and then type msconfig in the box that appears, then press OK.

- It will open the ‘System Configuration’ menu. Select Selective startup and check both the boxes below it.
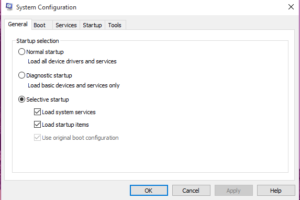
- Select No GUI boot and change the Timeout to 3 seconds.
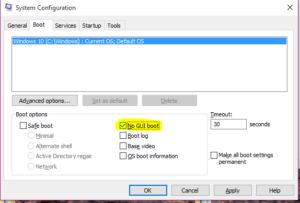
- Now go to the Boot tab and click on Advanced options.

- Check the box beside Number of processors and in the selection box below it, select the maximum number of processors your PC has. Mine has two, so I selected the 2 option.

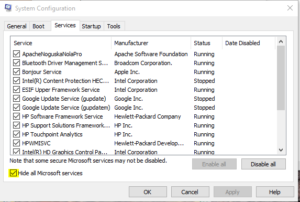
- Now go to the Services tab, click on Hide all Microsoft services and then you can see which third-party programs are running services on your PC. If you see any fishy services or any services that you think shouldn’t be running, just search them on the internet to make sure they aren’t useful to your PC and then turn them off after making sure. If you turn off a service and your PC isn’t working properly, just come back here, switch it on and then Restart your PC to apply the new settings.
Once you are done, press Apply and OK. It may ask you to Restart your PC.
4. Changing PC Power Plan
Windows also has several tricks up its sleeve to make your PC run effectively in order to preserve power. However, these power options aren’t as relevant to desktop users which are hooked to a regular power supply so you can change these settings to get the max from your computer.
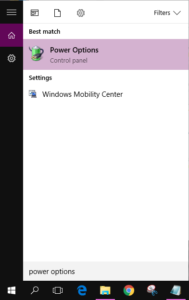
- Press START + Q to open the Windows Search bar and type power options and click on the first result.
- Click on Show additional plans and then select High performance. Click on Change plan settings.

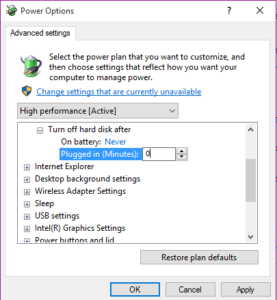
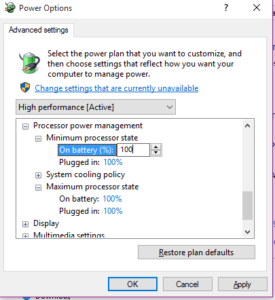
- Click on Change advanced power settings.

- Click on the little + icon next to Hard Disk, then on the + icon next to Turn off hard disk after.
- Click on On battery and write 0. Click on Plugged in (Minutes) and then write 0.
- Click on Processor power management and for both, minimum processor state and Maximum processor state, change the percentages to 100%.
5. Changing GPU Priority
Since Windows is a multi-tasking Operating System, allowing you to interact with multiple programs at the same time, it also needs to decide the priority of the tasks it needs to perform. To make sure that your gaming needs get the most priority, you need to change some system settings by editing the registry.
Here is how you can do it,
- Press START + R and then type regedit, then press OK.
- Go to Computer\HKEY_LOCAL_MACHINE\SOFTWARE\Microsoft\Windows NT\CurrentVersion\Multimedia\SystemProfile.

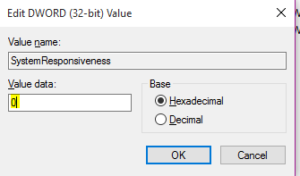
- Click on SystemResponsiveness and change the Value data value to 0 and press OK.
- Under the SystemProfile folder, click on Games.
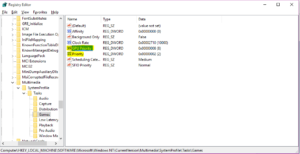
- Click on GPU Priority and change the value to 8.
- Click on Priority and change the value to 6.
6. Disable unused Windows Services
There are a lot of Windows services responsible for making various Windows features work that, although useful, can take up too much of your PC’s resources. If you want to primarily use your PC for gaming, you should turn these off,
Here is how you can do it,
- Press START + R and then type services.msc, then press OK.

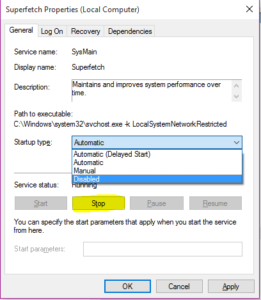
- Scroll down and find Superfetch in the list. Right-click on it and select Properties.
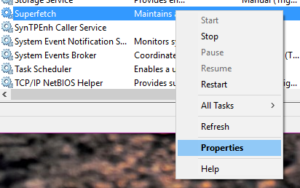
- In the options next to Startup type, select Disabled. Now, press the Stop button.
- Do the same for the following services,
- dmwappushvsc
- Fax
- Scroll to the end of list and do the same for all Xbox Live services.
7. Disable Windows Animations and Other Features
You can also turn off various Windows features like animations and other visual enhancements that exist solely to make Windows look better visually for a more snappier performance. Don’t worry, you can choose what features to turn off and what to keep.
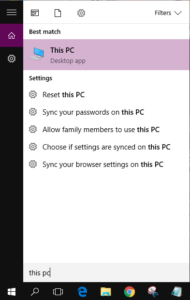
- Press START + Q to open Windows Search and write This PC. Right-click on This PC and select Properties.
- Click on Advanced system settings.

- Click on Settings in the Performance section.

- Select Custom and then uncheck all the boxes except two (this is just my preferred settings and you can choose which features to keep and which to turn off).
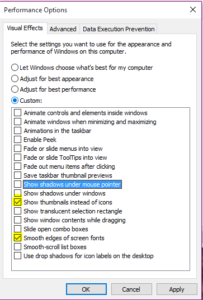
- Press OK.
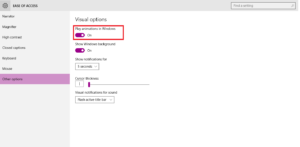
- Open the Settings app by pressing START + I. Press on Ease Of Access.
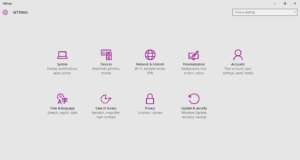
- Go to Other options and under Play animations in Windows, switch it to off.
If you don’t use Windows apps much, you can also turn off Notifications and animations by opening the Settings app (START + I), clicking on Notifications & actions and then turning all the options to Off.

For an even smoother experience, you can also try turning off Windows 10 automatic updates. For better hard disk performance, you can follow our guide over here.
