
Faulty Key? Here is how you can remap a keyboard key in Windows
There are pros as well as cons to owning a laptop. While a laptop offers increased portability, allowing you to do your work on the go, it also cuts down on the modularity aspect of owning a computer. For most people (average users), this works fine as they don’t like to tinker with the computer and like it as it is. Only a certain kind of pro user (and most gamers) want complete control of each aspect of the hardware.
However, the problem arises when a part of the laptop becomes faulty, especially the keyboard. Instead of just buying a new keyboard, as is the case if you own a PC, you have to send it in for repair as it is quite hard to pry open a laptop to fix it. Moreover, if the keyboard can’t be fixed, you have to get the keyboard for the exact same model of the laptop instead of getting any keyboard you like from the market.
There is no way you can fix a hardware problem like this with a software solution but you can use a workaround for a temporary basis to get around the problem. It might take some getting used to but it will also save you a considerable amount of money.
If a certain key on your keyboard becomes faulty, you can use a key remapping software to use some other key to function as the key (usually a key that you don’t normally use or a function like CTRL/ALT which have two keys on the keyboard).
Here’s how you can do it,
Note: We are going to use SharpKeys, a freely available tool that uses a Registry hack to make certain keys on a keyboard act like other keys.
Downloads
- Download SharpKeys 3.5: MSI | ZIP | requires .NET Framework 4.0
- Download SharpKeys 3.0: MSI | ZIP | requires .NET Framework 2.0
You can check your .NET framework by following the guide over here or by following the steps given below,
-
Press START+R to open the Run Menu.
- In the Open box, enter regedit.exe.
- In the Registry Editor, open the following subkey:
HKEY_LOCAL_MACHINE\SOFTWARE\Microsoft\NET Framework Setup\NDP
The good thing about SharpKeys is that you don’t even need to install the application. Here is how you can use SharpKeys to remap a key on your keyboard,
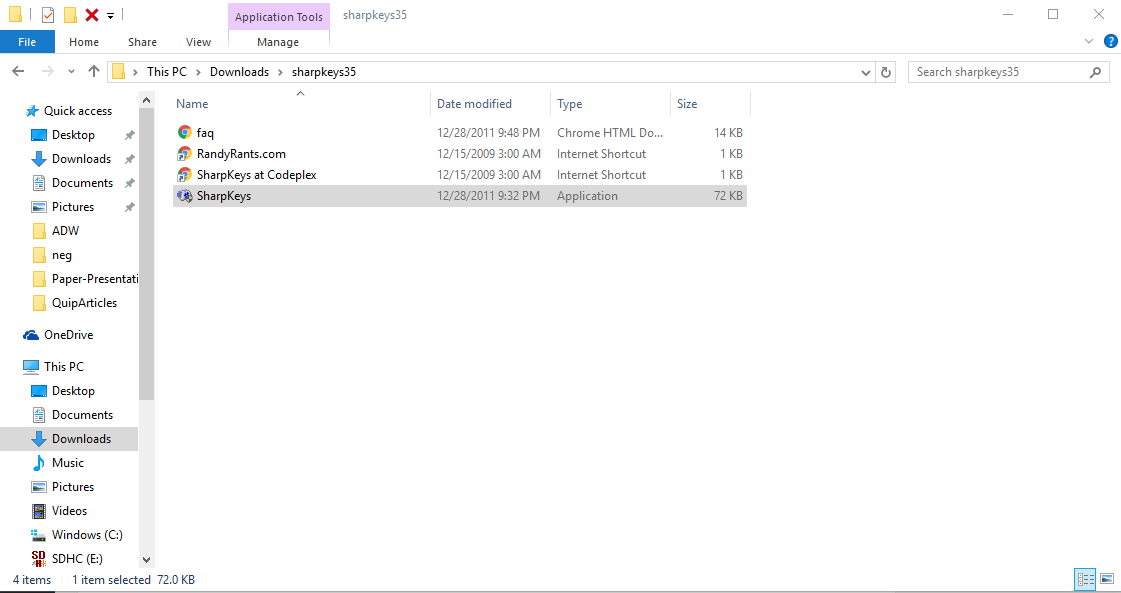
- Just download the ZIP version and open the .EXE file by double-clicking on it, as shown in the image below.
- Launch the application and it will show you all the key remap changes you have made (right now, it will be blank). You need to click on the Add button to make a change.

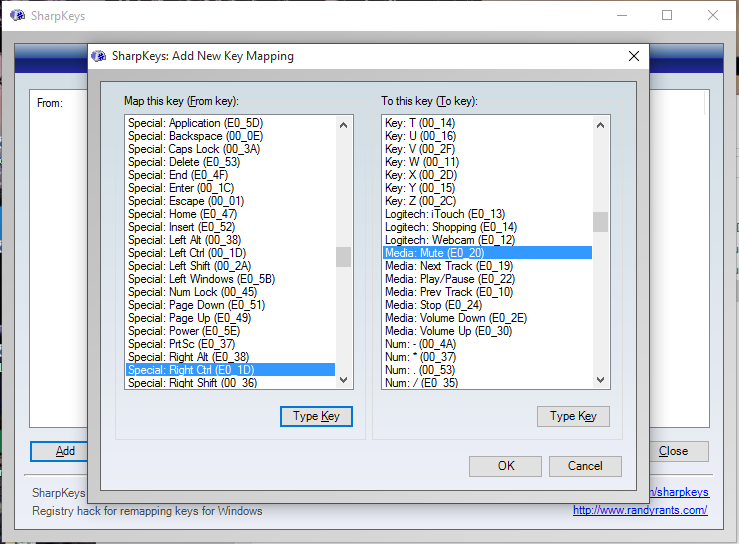
- It will show you two columns, listing down all the keys that you can remap. In the left column, you need to choose the key that you want to map and in the right column, you need to choose the key you want it mapped to.For example, if you want your CTRL key to act act a space bar (enter a space every time you press CTRL), you need to select CTRL in the left column and space bar in the right column.
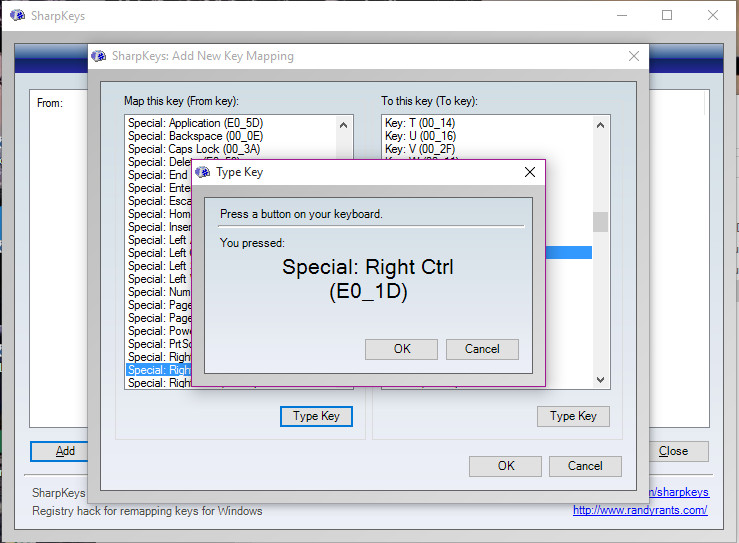
There are two ways you can select a key. Either press on Type Key and press the key (which won’t be possible in case of a faulty key) or scroll through the list to select a key.
In the images below, I have mapped the Right-CTRL key to act like a Mute button (mutes/unmutes the voice every time I press it).
- Once you have made the desired changes, press OK.
- Now, click on Write Registry to apply the desired changes. You will have to logout/reboot for the changes to go into effect.
That’s it. It is as simple as that. If at any point, you want to undo the changes you made, you can simply open SharpKeys again and Edit/Delete the change you made and then click on Write Registry to apply it.
