Here is how you can Connect a Printer to your Windows Machine
Windows is a general-purpose operating system and has a ton of built-in utilities and tools to allow you to perform almost any task you want to perform from a personal computer. Most hardware devices like mouse, keyboards, printers, etc. are designed to work with Windows without any installation required. To make this possible, Microsoft includes several drivers that should be able to work with these machines.
However, due to hundreds of different manufacturers and many different Windows versions that they have to support, there can be some issues when you want to pair a printer with your Windows machine.
In this guide, we will cover the basic steps you need to perform to pair your printer with your Windows machine and also cover some basic troubleshooting steps.
Connect a Printer to Windows
Wired Printer using USB
- Connect the printer using the USB cable to your Windows machine.
- Open the Settings app (Start + I).
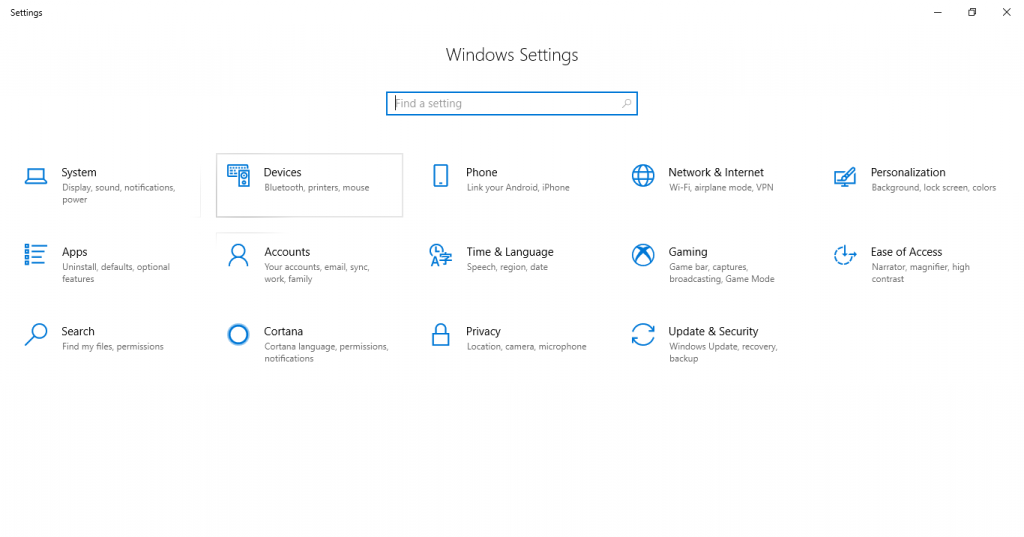
- Click on Devices.
- Click on Printers & Scanners from the left pane.

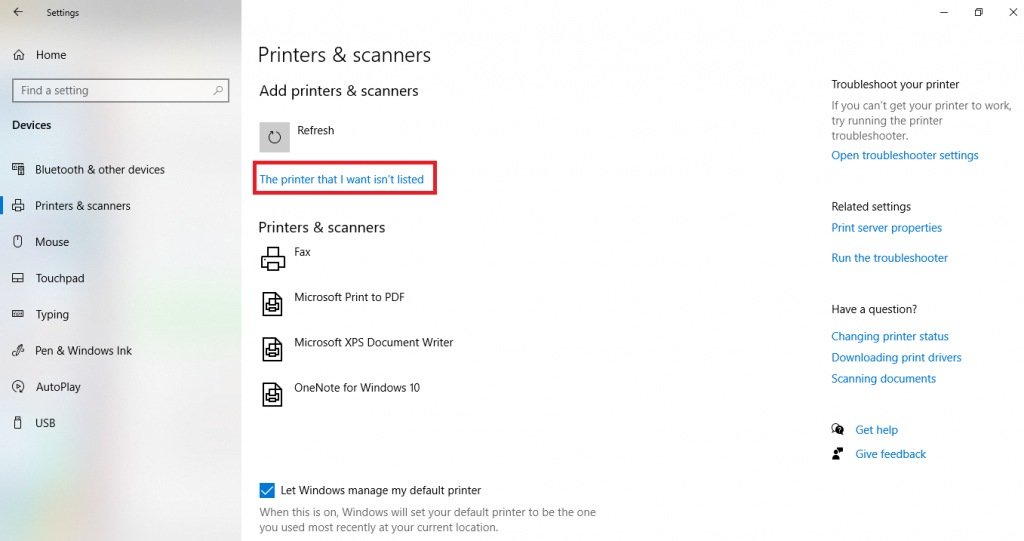
- Click on Add a printer or scanner from the right pane, as shown in the screenshot.

- Windows will search for a printer. If a printer is connected, it should automatically be detected. If it isn’t, you can click on Refresh to try once more. If it still isn’t detected, you can just click on The printer that I want isn’t listed to troubleshoot the issue, as shown below,
You can select from a host of different options to try an alternative way to connect to your printer.

Hopefully, your printer should have been connected by now and you can select the Print option from any program to send any document to your printer. If you have exhausted all the options and your printer still isn’t working, do take a look at our guide on updating your Printer drivers. Once you have done that, try again from the first step.
