
Here is how you can make a full System Image Backup of your Hard Drive on Windows
A computer’s value to the user is in the data that it stores. Without data, two computers of the same kind would be identical and it’s only in the streams of ones and zeroes stored on a computer that actually distinguish it from any other computer.
All that data is stored on the computer’s HDD (Hard Disk Drive) or, in the case of modern computers, an SSD (Solid State Drive). An SSD is way faster than an HDD but an HDD has a longer life cycle. However, both have a certain life and one day you might wake up to find out that your disk has crashed and all the data that you stored on it is now lost. It is not a question of whether it will crash or not but when it will crash, because, like any other consumer product, it is not made to last forever.
The only way you can ensure that you don’t lose all your data just because your primary form of storage crashed is to have a secondary form of storage, be it in on a secondary hard drive or a memory card or even a USB. It is important to have a backup that you can use in such a scenario.
In this guide, we will teach you to create a complete backup of your hard disk and also show you as to how you can use the backup to restore your system in case it crashes.
Note: Since the process for backing up an SSD or an HDD is exactly same, you can use this guide regardless of which type of disk storage we have. However, for the purpose of this guide, we will call it a ‘hard disk’.
Want to create a full-disk backup for your hard disk on Windows? There are several ways to do it using the built-in tools inside Windows.
One of the ways is to make a complete System Image. A System Image is a complete backup of all the files and everything on your PC, including all the settings and preferences, the complete Windows installation, etc.
You can use the System Image to completely restore your computer from the point you made the System Image backup.
How-to make a System Image of your Hard Disk on Windows
To be able to make a complete System Image, you need to have an external storage device, like a secondary hard drive or any other external storage with enough space.
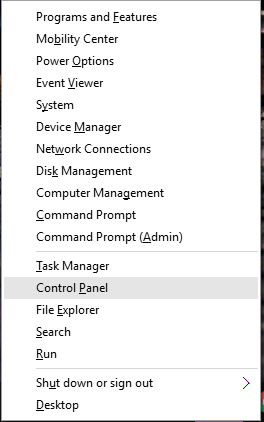
- Press Start + X and click on Control Panel.
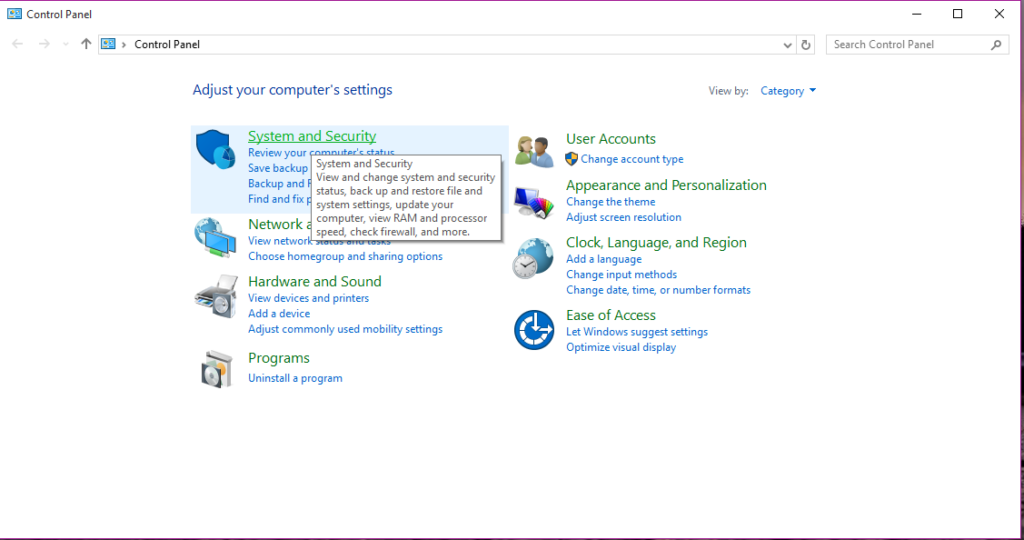
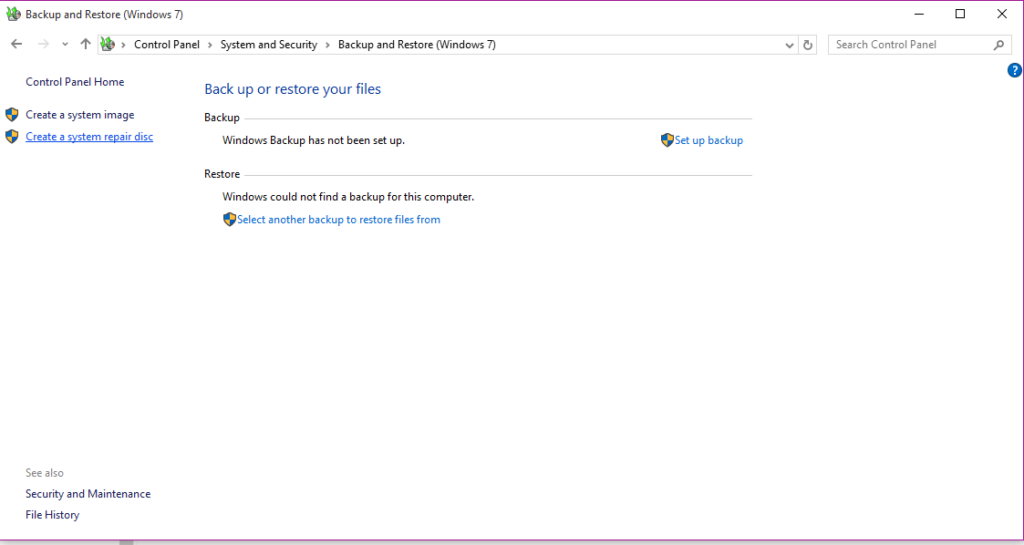
- Now click on System and Security, and then select Backup and Restore (Windows 7).
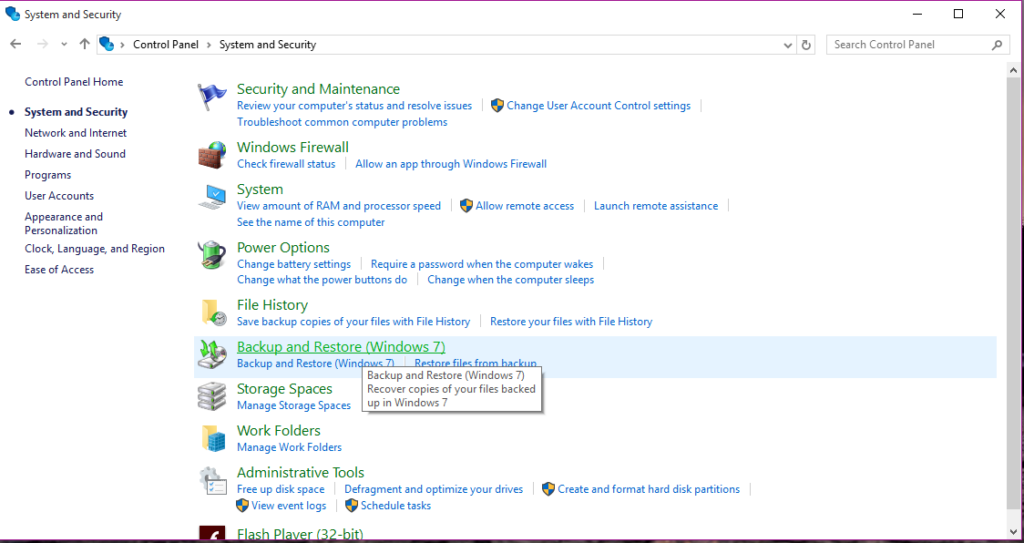
- On the left pane, find the option to Create a system image.
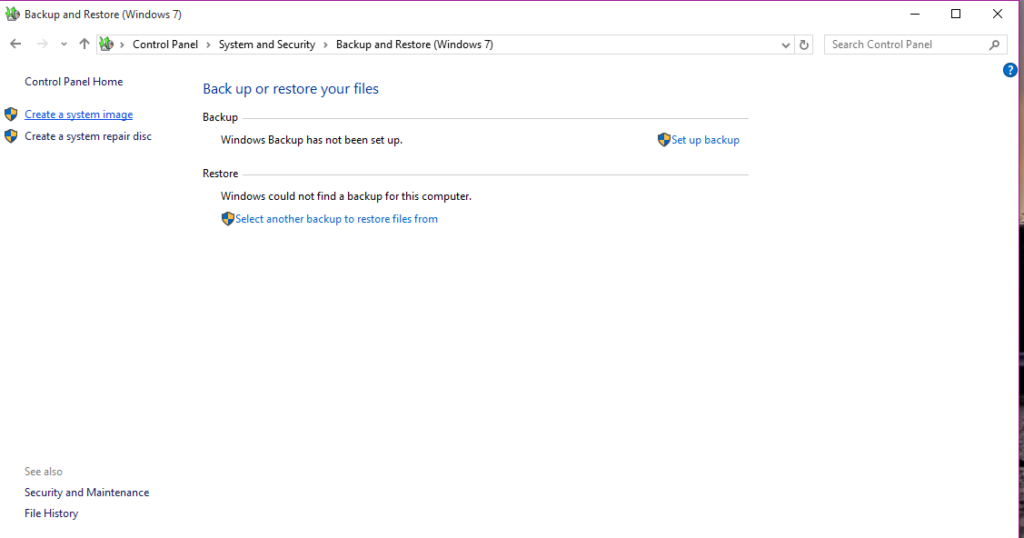
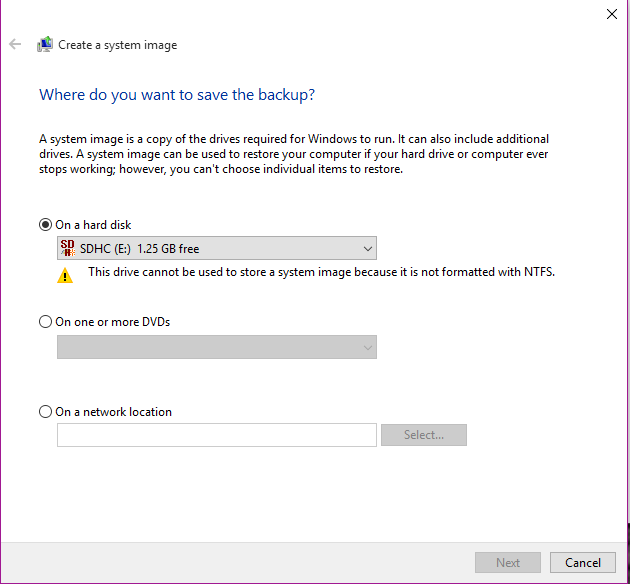
- Windows will ask you to select the place to save the backup you are about to create. You can select your preferred external storage. Then click on Select to proceed to the next step.
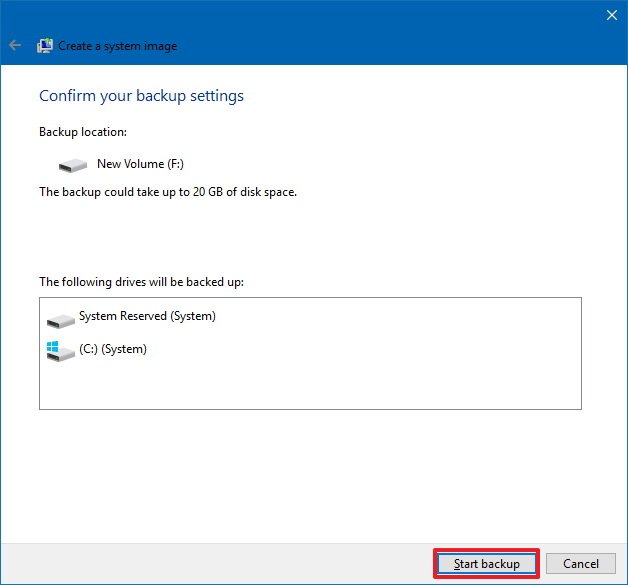
- Windows will notify you of what it will backup, and how much storage it will take. Do make sure that the recommended storage for backup is available on your drive. Click on Start backup to start the process.
Now, let Windows do its magic. it will create a full-backup of your hard disk, including the files you are currently working on, without disturbing you. As it does its job, you can use your PC. It will automatically notify you once the job is done.
Once the system image is created, you can disconnect your secondary storage drive and keep it in a safe place. If your computer ever crashes or you feel the need to restore the backup, here is what you need to do.
Note: In order to restore your PC with the System Image, you will need to have a bootable Windows USB for this process to work. You can create one by reading the guide over here. Or, you can create a System Repair Disc.
How-To Create a System Repair Disc
- Press Start + X and click on Control Panel.
- Now click on System and Security, and then select Backup and Restore (Windows 7).
- On the left pane, find the option for Create a system repair disc.
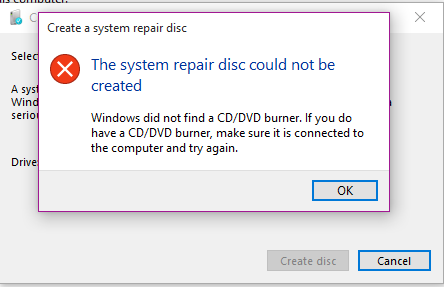
- Select a CD/DVD and insert a blank disc into the drive.
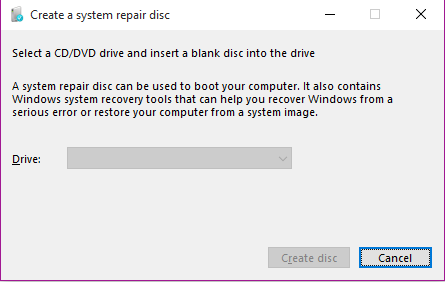
You need to a CD/DVD burner for this to work. Otherwise, you need to have a bootable Windows USB to be able to restore the backup.
How-To restore the System Image
- Connect the external drive that contains the system image backup to your device.
- Connect the system repair disc or the bootable USB to your system.
- Now turn on your PC and go to the boot menu to boot from the USB /repair disc.
- It should show you the Windows Setup Wizard. Select your preferred language and select Next.

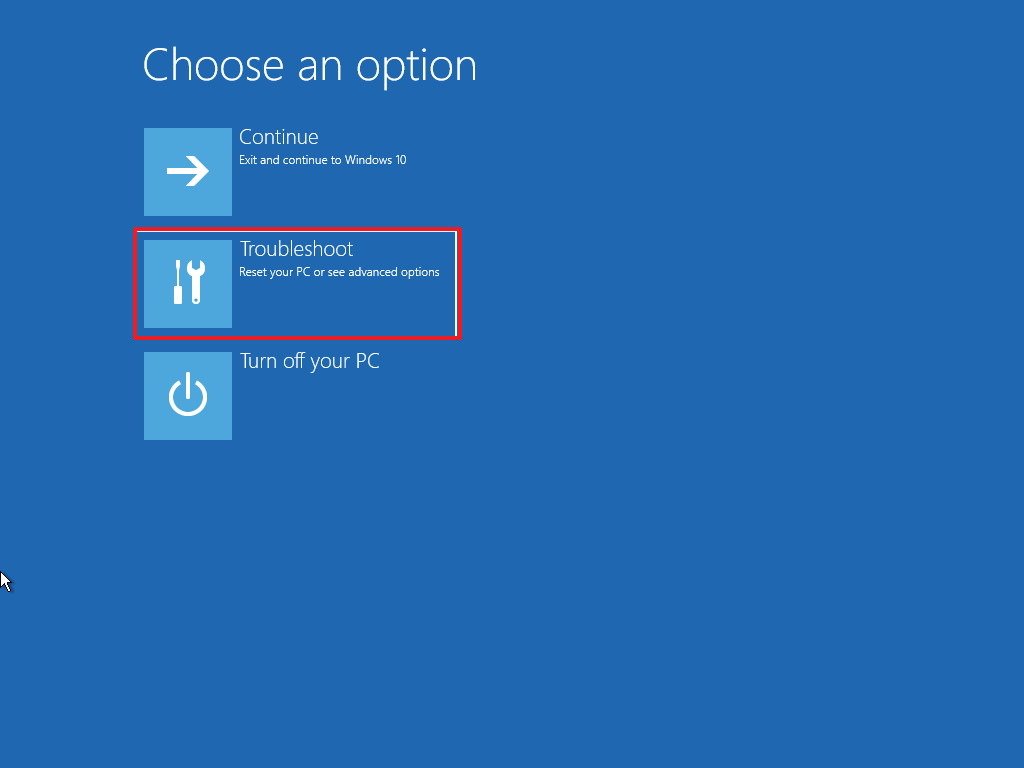
- On the next screen, click on Repair your computer.

- Now click on Troubleshoot and select System Image Recovery.

- Select your target Operating System (Windows 10 in this case).

- In the next menu screen titled ‘Re-image your computer’, click on Use the latest available system image and then click on Next.

- On the next screen, it will ask you if you want to restore a full backup i.e. erase any existing partitions and disks. Check the box if yes and then click on Next.

- Click on Finish and then click on yes.

That’s it. You don’t have to do anything more. Let Windows restore your backup from the system image and it should bring your computer back to exactly as it was before.
