
Here is how you can enable Hardware Accelerated GPU in Windows 10
Windows has come a long way since its introduction. In today’s world, it is used for everything from light usage tasks like daily office work, managing documents, light browsing and watching videos to graphics-intensive tasks like rendering incredibly GPU-intensive videos or gaming.
Over time, Windows has gotten better and better at handling GPU tasks. In the Windows 10 May 2020 update (version 2004), Microsoft has introduced a new feature called Hardware Accelerated GPU Scheduling, a long-anticipated GPU feature. It allows Windows to offload high frequency tasks to the GPU scheduling processor while Windows controls to handle the prioritization among different applications. This is a significant change to the Windows driver model and should allow much smoother performance.
Currently, it is introduced as an opt-in feature for now and is off by default. However, if your PC meets the right specification criteria, you should see the option to enable it. It requires a fairly recent GPU and the latest drivers.
Here’s what you need to confirm before proceeding with this guide,
- Have the latest graphics drivers that support the feature. For example, Nvidia users will need the GeForce driver 451.48 or newer for instance as the company introduced support for Hardware Accelerated GPU Scheduling in that version.
- Have the Windows 10 May 2020 Update (version 2004) or later installed on your PC. You can check the Windows version using our guide over here.
Once you have verified this, you can proceed to the next step to enable this feature.
Enable Hardware Accelerated GPU from Settings
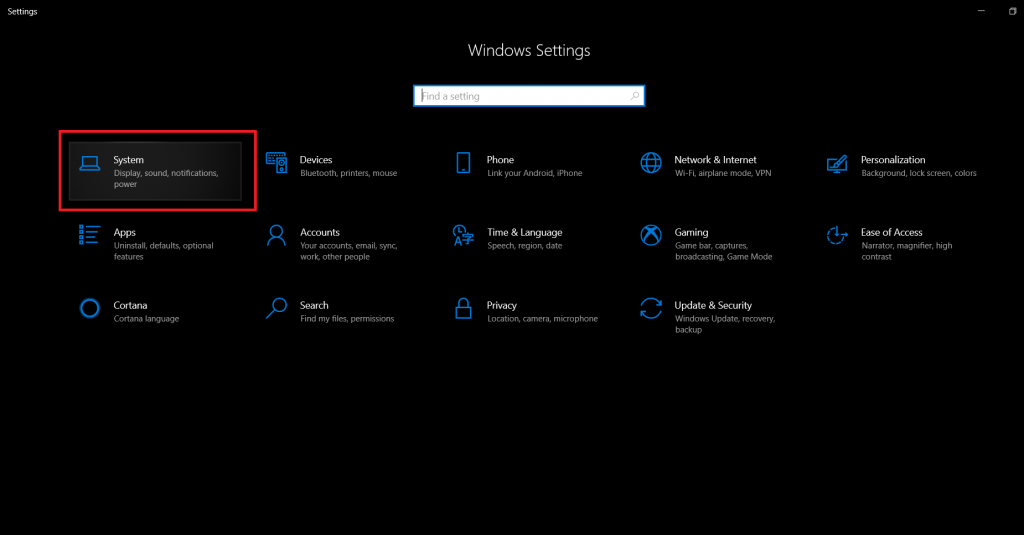
- Open the Settings app.
- Click on System.
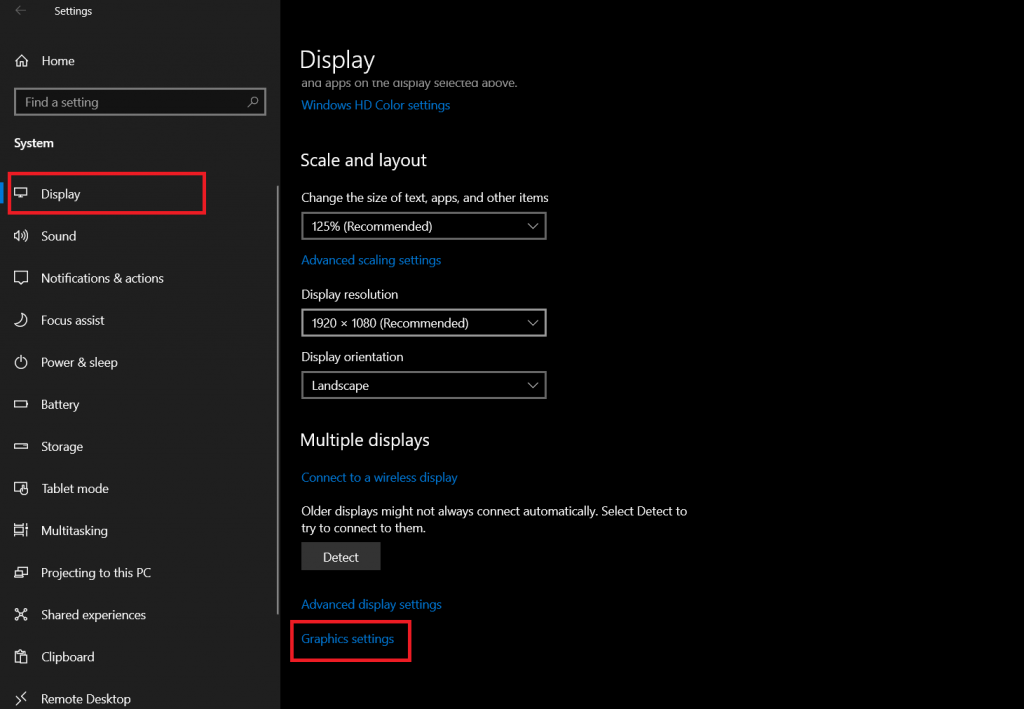
- Click on Display on the left pane. Scroll down and click on Graphics settings on the right pane, as shown in the screenshot below.
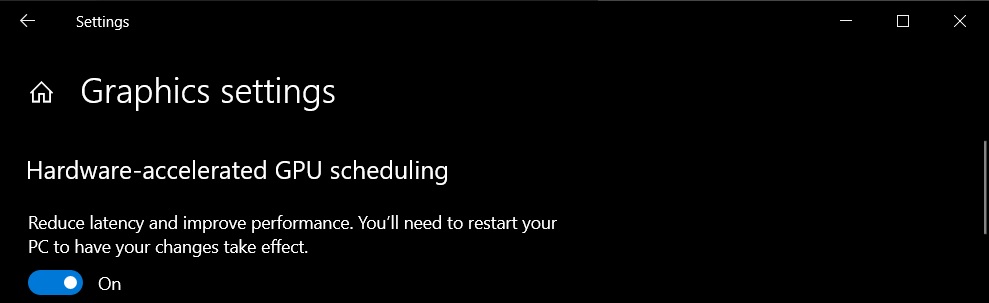
- If you have the right version of Windows and drivers, you should see the following option below,
Enable Hardware Accelerated GPU from Registry Editor
Another way you can enable the new Hardware Accelerated GPU feature by forcing it through the Windows Registry Editor. Windows comes with this tool that allows you to make changes but the problem with this is that, if you don’t know what you are doing, you can easily end up messing with some critical system settings and cause other programs (or even the operating system) to go haywire.
The best thing to do before you make any changes is to make a backup, so if you make any undesired changes, you can quickly revert back without causing any permanent harm. You can use our guide over here to safely modify Registry.
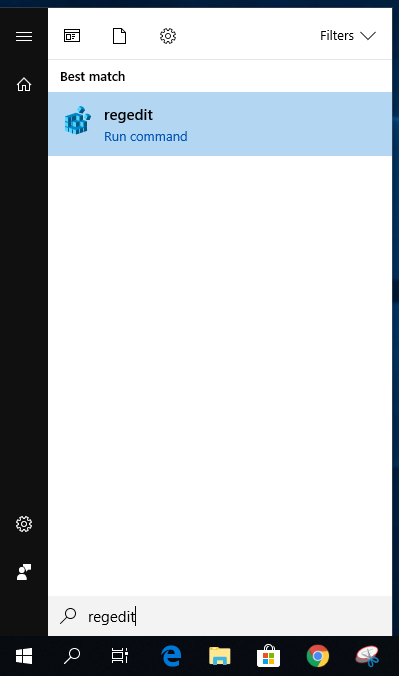
- Open the Windows Registry Editor by searching for regedit from the Start menu.
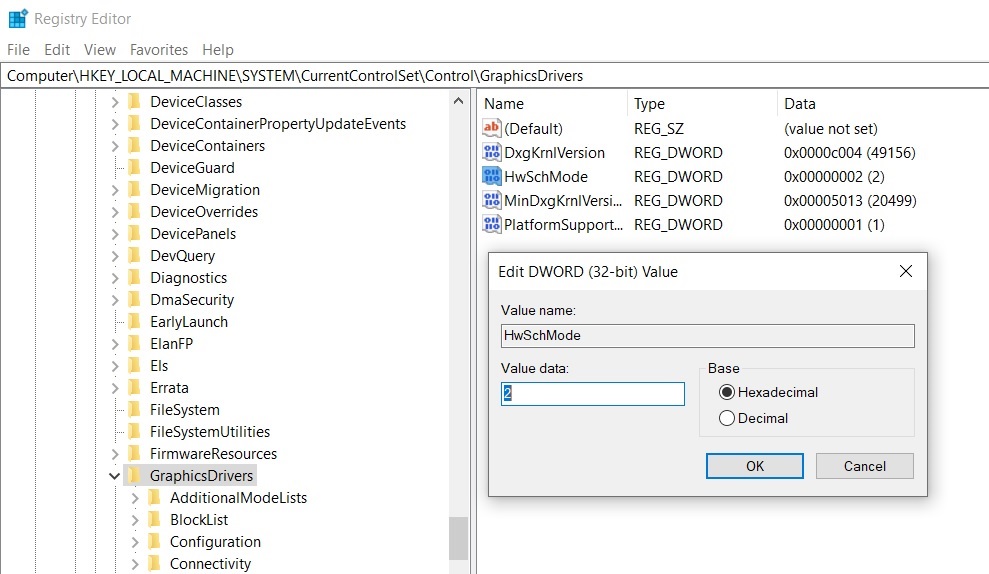
- Go to the key shown below,
HKEY_LOCAL_MACHINE\SYSTEM\CurrentControlSet\Control\GraphicsDrivers
- In the right pane, you should see the Values stored against this key. Click on the HwSchMode key to open it.
- In the Value text box, you should see the current value as 1. 1 means Off and 2 means On. Replace it with On and press OK to save it.
That’s it.
