
How-To automate tasks on Windows using Batch Files
The Windows interface is a Graphical User Interface, allowing the user to navigate through different options and menus by using a mouse and a keyboard, allowing the user to interact with the environment rather than type every command out.
This way of interaction may be easier to learn and use for the average user but it leaves a lot of room for the power users, or anyone who wants to speed up tasks using automation. With a graphical interface, it is difficult to tell the computer exactly what to do since what it shows you on the screen isn’t exactly how the operating system runs things in the background. What the user sees is basically a graphical representation of it.
However, when using a text-based console, the commands a user writes can easily be mimicked by the computer since it makes no difference who types it. Most basic tasks in Windows like maintenance tasks involve repetitive steps and can be easily automated. In Windows, Microsoft has added support for batch files – which are basically scripting files written in a language that pretty easy to understand for the user. There are tons of commands you can use for writing a batch file.
For more detail on how you can write a batch file, you can read our guide over here, which discusses in detail the process of creating a batch file to perform some basic tasks, like launching a program or deleting all files older than a certain number of days.
For the purpose of this guide, we will take a look at how you can automate the execution of a batch file, so Windows will automatically know when and how to run a certain batch file. Thankfully, Windows also comes with its very own Task Scheduler program which can easily be assigned to run a batch file at a certain time or after a certain time interval.
Schedule a Batch File using Task Scheduler
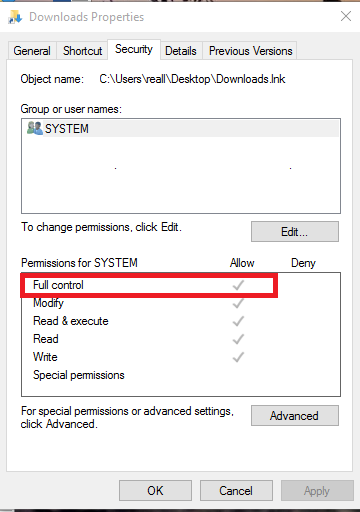
- Create a batch file (use our guide over here for more information) and save it in a folder where you have sufficient permissions, for example, in your C Drive. Task Scheduler needs Full Control permissions over the folder that stores the script, as well as the folders which contain any other files the script uses. To see the permissions your account has over a folder, right-click on the folder that contains the file and click on Properties. Then, go to the Security tab and scroll down to the section that shows the permissions for your account – it should show a check against ‘Full control’.
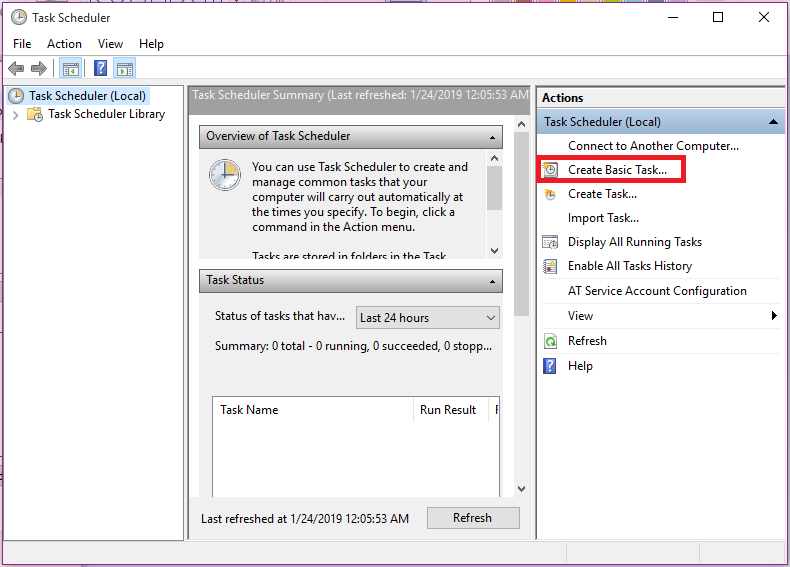
- Next, you should launch Task Scheduler. Open Windows search (START + S), type Task Scheduler in the search box and click on the result that appears.
- In the left pane of the Task Scheduler window, click on Create Basic Task.
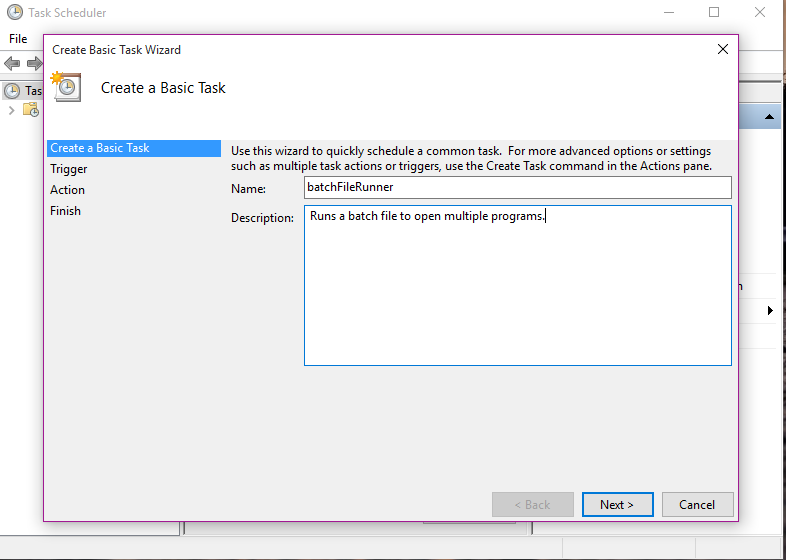
- Enter a Name and Description (optional) for the task and click on Next.
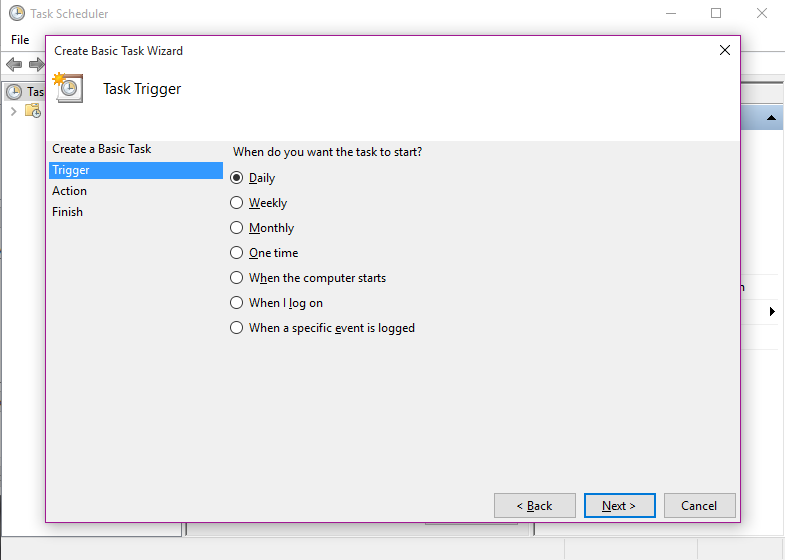
- Choose when do you want to run the task – is it on a timely basis or whenever you log on or whenever the computer starts. You can also set the task to be triggered when a specific event occurs. Make a choice and click on Next.
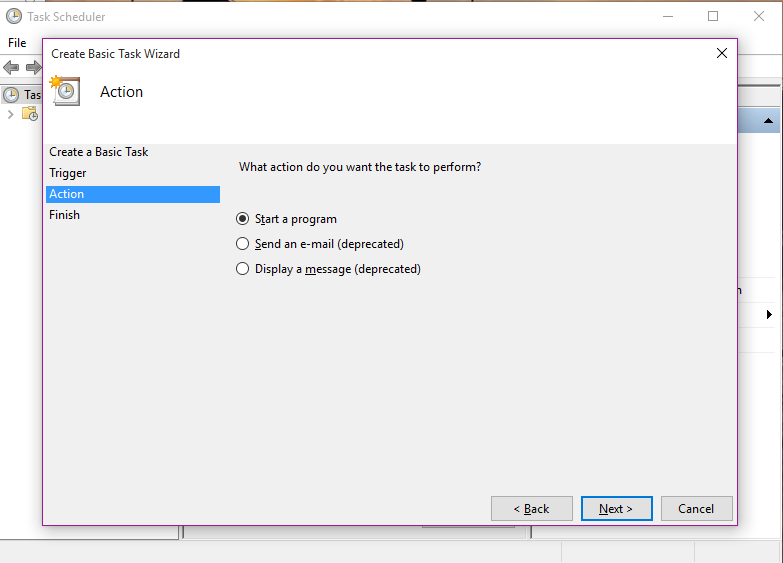
- Choose ‘Start a program‘ from the given choices and click on Next.
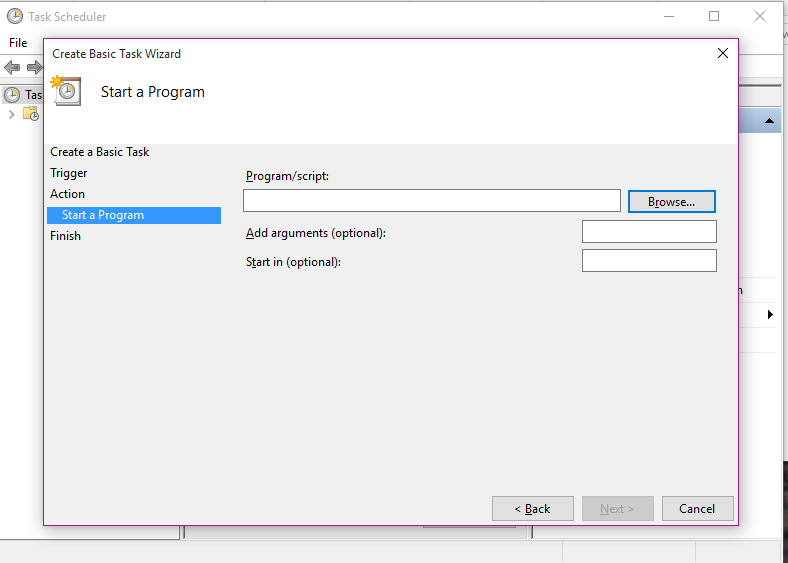
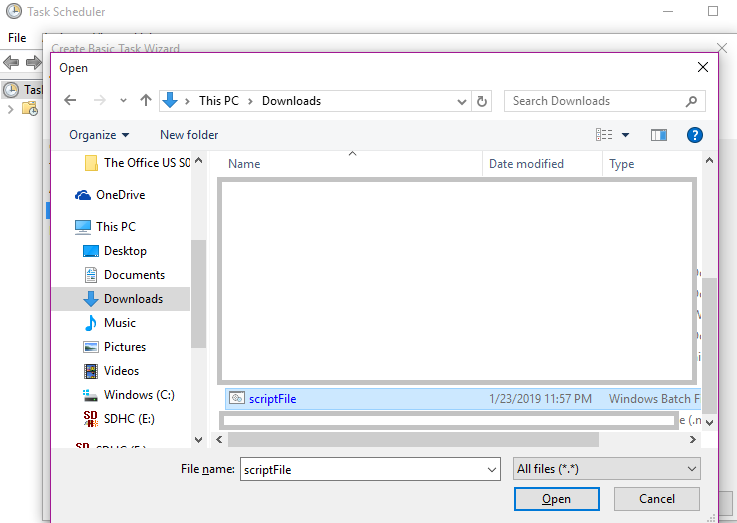
- Click on Browse and navigate to the batch file you created earlier and select it. Then click on Next.
- Click on Finish to create the task.
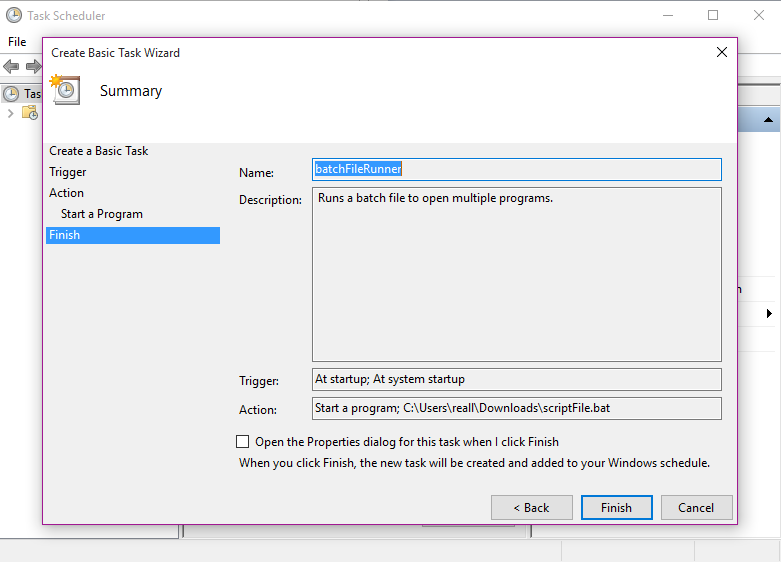
That’s it. Your computer should now automatically run the batch file whenever the Trigger event occurs.
