
Here is how you can Auto-Empty Recycle Bin in Windows
Are you short on storage? Do you try to free up space by periodically deleting stuff from your PC? Are you tired of having to do this in two steps? First, deleting stuff from your storage and then deleting it again from Recycle Bin? Well, we might have the perfect solution for you; how to auto-empty recycle bin in Windows so you don’t have to worry about deleting stuff twice.
The two-step deletion process is nice to have, as it prevents you from making accidental deletions. Even if you do delete something accidentally, you have the chance of going to the recycle bin and restoring it from there. But this gives rise to another problem, remembering to delete it from there too.
One solution to this is that your recycle bin periodically empties itself after a certain time. For example, if you deleted a file today, recycle bin remembers to delete it permanently after 30 days, so you have enough time to decide to restore it. And even if you don’t, it doesn’t stay there in the bin for an indefinite period of time, taking up useful storage space.
Here is how you can set this up, using Windows’ Storage Sense feature,
Set Up Storage Sense to Auto-Empty Recycle Bin
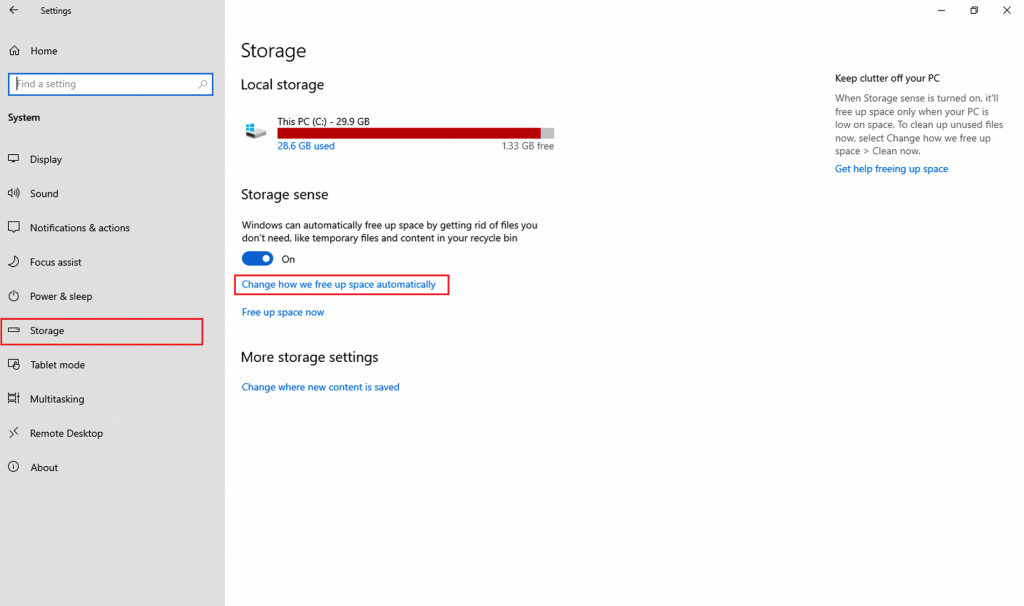
- Open the Settings app.
- Click on System and then, from the left pane, click on Storage.
- In the right pane, under the settings for Storage Sense, click on Change how we free up space automatically, as shown in the screenshot below.
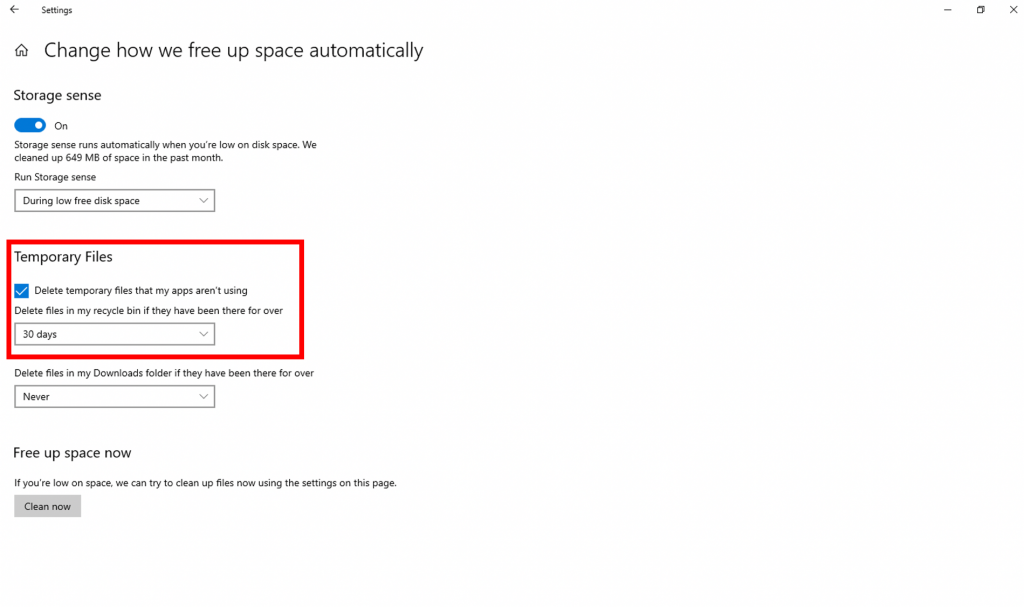
- Here, you have to check the box for Delete temporary files that my apps aren’t using and then you can select the duration for recycle bin, either 1 day, 14 days, 30 days, or 60 days.
That’s it. Now your recycle bin will auto-delete files that have been in the bin for as long as the duration you have set.
